Posts tagged #How To

Roasted Chicken Breast

Roasted Chicken Breast | My Engineered Nutrition

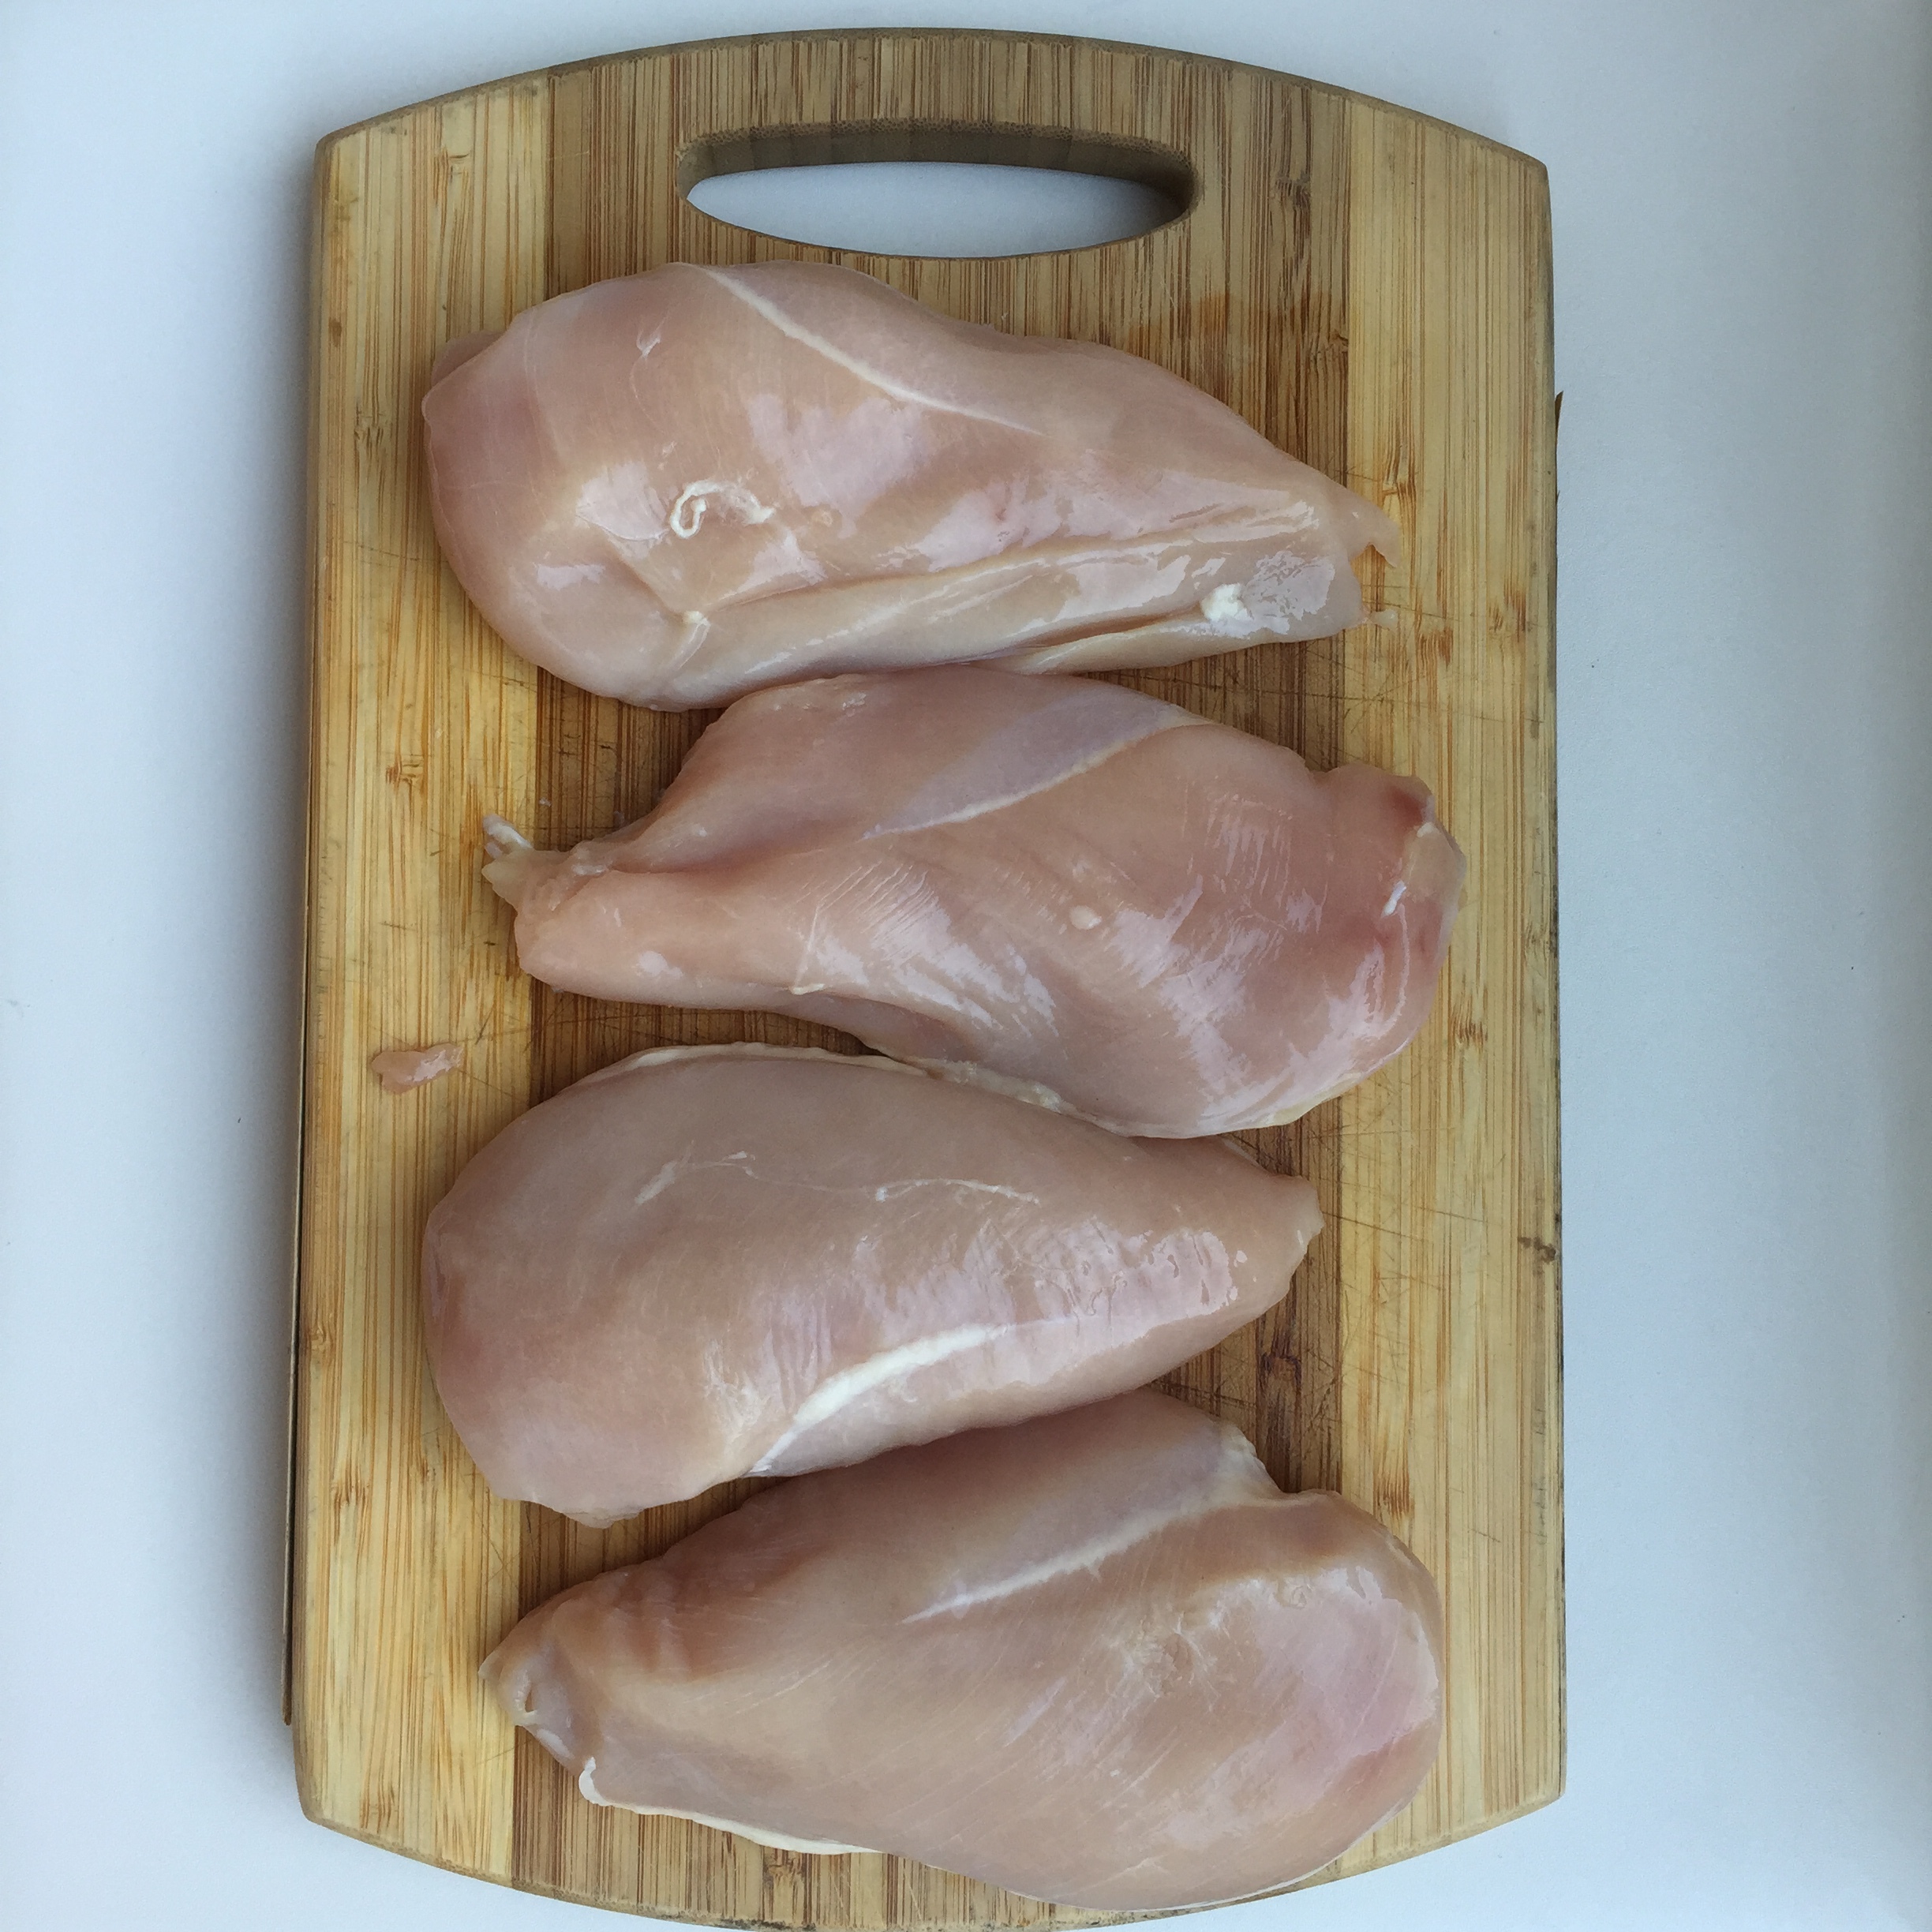
Roasting chicken can be a very simple but also very tricky. Cook just right and it can be juicy and tender. Cook too long and you have a dry and hard piece of protein that is almost unbearable. Once I mastered how to perfectly roast chicken breast my life got SO much easier (and more tasty) when it came to prepping meals in advance. 

Roasted Chicken Breast | My Engineered Nutrition

If you've known me in the past 2 years, then you've known me during a time when I took meal prepping very seriously. This was during my time when I was actively competing in figure competitions. Bring on the veggies and chicken breast for 80% of my meals (also before I learned of the beauty of flexible dieting, but I digress). Coincidentally enough, I could never cook chicken perfectly during this time. 

Roasted Chicken Breast | My Engineered Nutrition

I actually got to a point where I couldn't stand to look at baked chicken because I anticipated a dry and hard piece of meat. Please ANYTHING other than that!! Fast forward a year and a half since my last show and I have one very small but very impactful addition to my kitchen tool arsenal: an instant read food thermometer.  

Instant Read Food Thermometer | My Engineered Nutrition

I can't stress how big of a difference this simple tool can make! No more guessing if and when your meats are cooked to the appropriate temperature and NO MORE OVERCOOKING! Rejoice! 

Roasted Chicken Breast | My Engineered Nutrition

Ok...so a bit dramatic.

But seriously, if you haven't made the investment in this tool it will make your time in the kitchen so much easier. This simple 'How To' on roasted chicken is a staple for everyone's meal rotation. I make chicken on a weekly basis and either eat it as is with salads, sandwiches, etc. or transform it and use this as a base for other recipes. This is such a simple technique and everyone should know how they too, can cook perfectly juicy chicken! 

The key to perfectly cooked chicken is to pull it from cooking BEFORE it reaches the proper internal temperature. A safe minimum internal temperature for chicken is 165°F. I pull my chicken from the oven once it reaches 155°F, as it will continue to cook about another 10°F after it is taken out of the oven. 

Roasted Chicken Breast | My Engineered Nutrition

Perfectly Roasted Chicken Breast

Ingredients:

  • 4 Chicken Breasts
  • 1 lemon, juiced
  • 1 tsp dried rosemary
  • 1 tsp dried oregano
  • 1/4 tsp salt
  • 1/4 tsp pepper

Directions:

  1. In a mixing bowl, combine chicken breasts, lemon juice and spices. Allow to marinate for 15 minutes. Meanwhile, preheat oven to 400°F.
  2. Line a baking sheet with parchment paper. Once the chicken has marinated, arrange chicken breasts on baking sheet, evenly spaced. Insert thermometer probe into the thickest part of one of the larger pieces of chicken.
  3. Roast at 400°F until the thermometer reads 155°F - this normally takes about 25 minutes for me. 
  4. Remove from the oven and let rest for at least 5 minutes before cutting - you don't want to lose all the juices! Now you can eat this as is or use in your favorite dish! 
Posted on September 29, 2015 and filed under Recipes, Chicken.

Cauliflower Crust

Cauliflower Crust | My Engineered Nutrition

I've shared my recipe for Cauliflower Crust previously in my post for BBQ Chicken Pizza. However, it is so versatile and so fantastic I felt it deserved a page all on its own. The process of making a cauliflower crust may sound imtimidating, and sure, it requires a bit more effort in making BUT, once you understand the steps it can be very easy!

The process of making the crust starts just like you would for making cauliflower rice, if you are familiar with that. Loosely chop 1 head of cauliflower and pulse it in a food processor until a "rice" consistency is reached.

Cauliflower Crust | My Engineered Nutrition

You take it a step further once you have the rice by steaming the cauliflower and the squeezing all of the liquid out. This is a critical step in making a crust that keeps shape once it has been baked. You can steam the cauliflower rice in the microwave (quickest method) or by baking it in the oven, spread out in a single layer on a baking sheet. 

Cauliflower Crust | My Engineered Nutrition

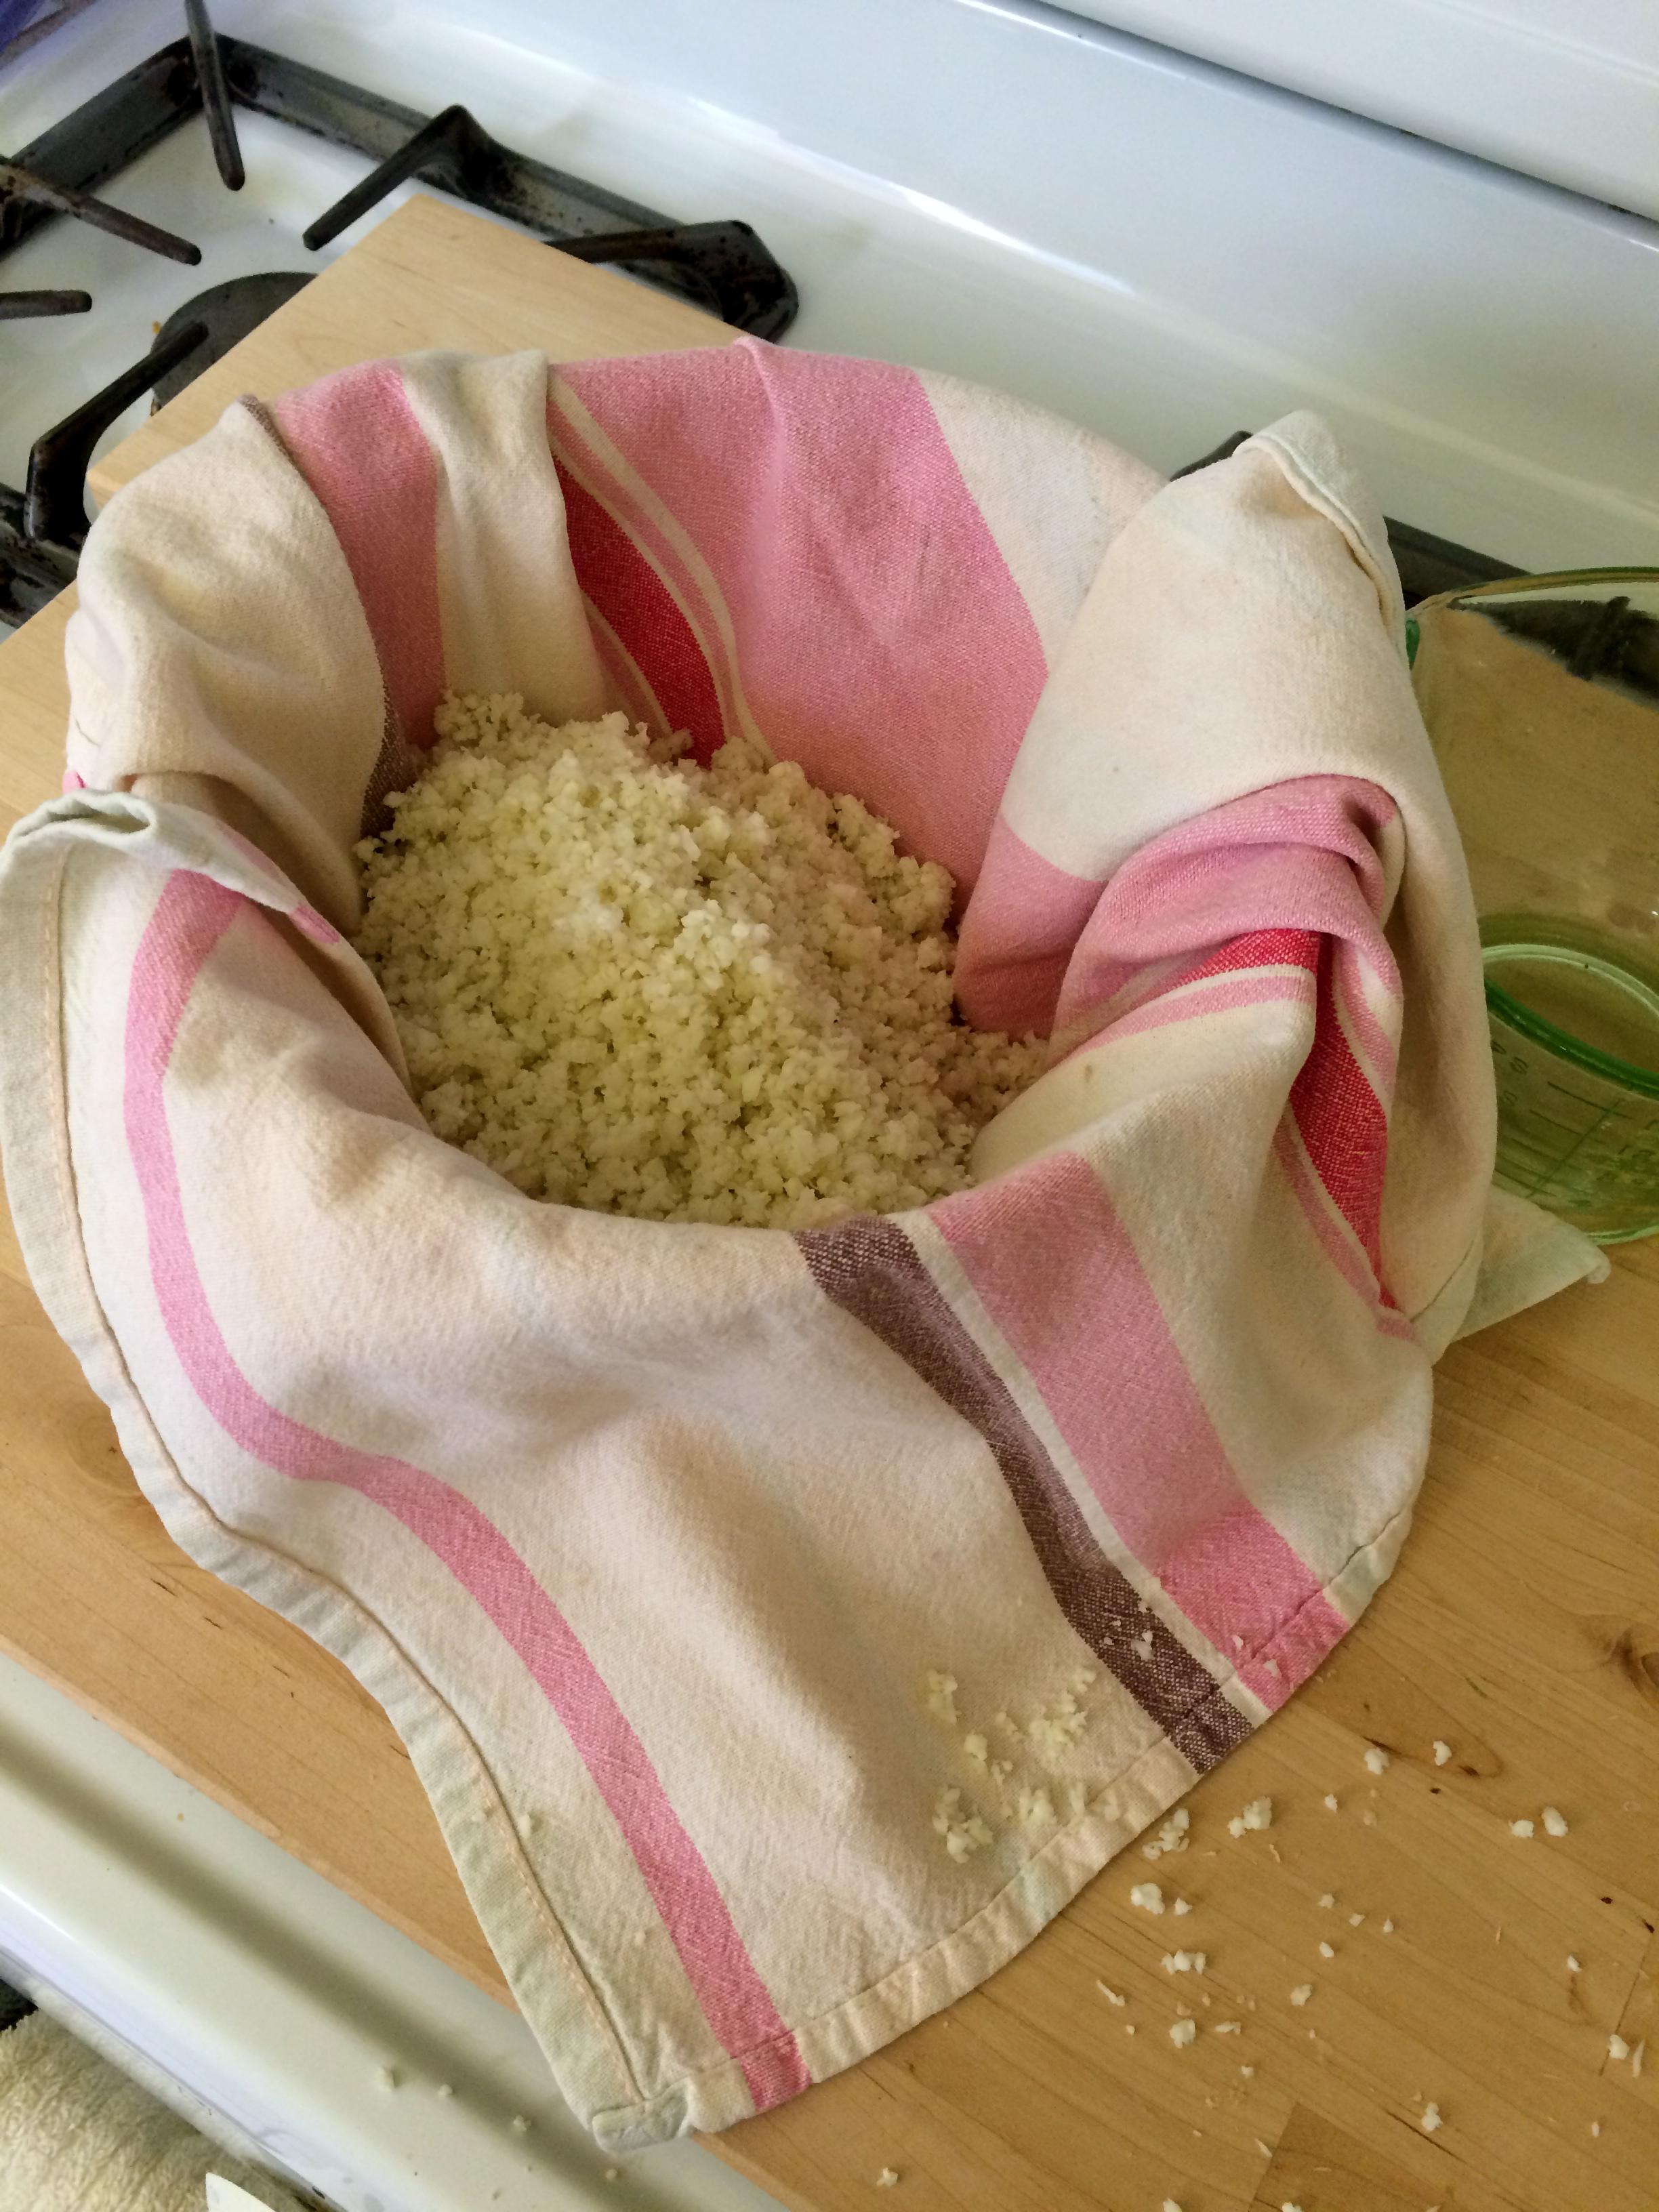
Once the cauliflower has been steamed, then transfer the rice to a mixing bowl that has been lined with a tea towel. Allow the rice to cool down a bit before the next step!

Cauliflower Crust | My Engineered Nutrition

Once cool, gather the towel, forming the rice into a ball and SQUEEZE! You will actually be surprised with how much liquid cauliflower contains. 

Cauliflower Crust | My Engineered Nutrition

This will take a few rounds of twisting and squeezing to make sure all of the liquid has been drained. ​

Cauliflower Crust | My Engineered Nutrition

The end result is a ball of cauliflower "flour" to which you add your egg white, cheese, spices, and coconut flour. I found the coconut flour to really hold this crust together. On my first attempt at making this, I still felt there was a bit too much moisture and needed a binder. The coconut flour seemed to do the trick! Once mixed, you flatten and  bake until golden brown.

The final step is adding toppings, treating the crust like you would any other pre-baked pizza crust!

Cauliflower Crust

Prep Time: 15 minutes

Cook Time: 10-15 minutes

Ingredients

  • 1 small to medium head of cauliflower, yielding about 3.5 cups flowerets (350g)
  • 1/3 cup shredded fat-free or low-fat monterey jack cheese (1.5 oz)
  • 1 egg white
  • 1 tbsp coconut flour
  • 1 tsp italian seasoning (equal parts dried oregano, basil, thyme and rosemary)
  • 1/4 tsp salt

Directions

  1. Preheat oven to 450°. 
  2. Chop cauliflower into small flowerets, discarding of leavings and stem. Place cauliflower into food processor and pulse until you get a "cauliflower rice" consistency. 
  3. Transfer cauliflower to a microwave-safe dish and microwave on high for 3 minutes. This steams the cauliflower. Alternatively, you can also bake the cauliflower for about 10-15 minutes (ensuring it doesn't begin to brown) if you do not have access to a microwave. You will need to spread the cauliflower rice out in a thin layer on baking sheets (this may require 2 sheets).  
  4. Once cooked, transfer cauliflower again to a tea towel lined bowl. Allow to cool for at least 5 minutes. When cool enough to handle, gather up the towel and squeeze the cauliflower into a ball -- and continue to squeeze! I can't stress enough how important it is to squeeze ALL the liquid out of the cauliflower. You should have about 1/2 cup of liquid when you are done. The end result is a ball of cauliflower "flour".
  5. In a mixing bowl combine cauliflower, shredded monterey jack cheese, egg white, coconut flour, seasonings and salt. Mix with hands until ingredients are well incorporated.
  6. On a parchment lined baking sheet flatten out dough, shaping into a thin round disk or a rectangle, about 1/4" thick.
  7. Bake in a 450° oven for 10-15 minutes or until it begins to turn golden.
Posted on September 16, 2015 and filed under Recipes, Vegetables/Sides.

Seared Ahi Tuna

Seared Ahi Tuna | My Engineered Nutrition

 On more than one occasion, I've thought to myself: that is far too basic to post, of course everyone knows how to do that. However, after asking a few close friends I realized quickly that in fact, not everyone knows some of the basic cooking techniques! I have quite a few of these "How To" recipes to share with you and I will be posting these more frequently along with a paired recipe post for that week. 

Seared Ahi Tuna | My Engineered Nutrition

To start things off we have: Seared Ahi Tuna. This pairs fantastically with my Crunchy Asian Slaw - but that recipe will be posted later this week!

It would be a stretch to call this a "recipe" as it really is no more than how to prepare ahi tuna. The ingredients are simple: ahi tuna steak, salt, pepper, sesame seeds and cooking oil of your preference - I use sesame oil but olive, coconut, etc will work just as well. 

Seared Ahi Tuna | My Engineered Nutrition

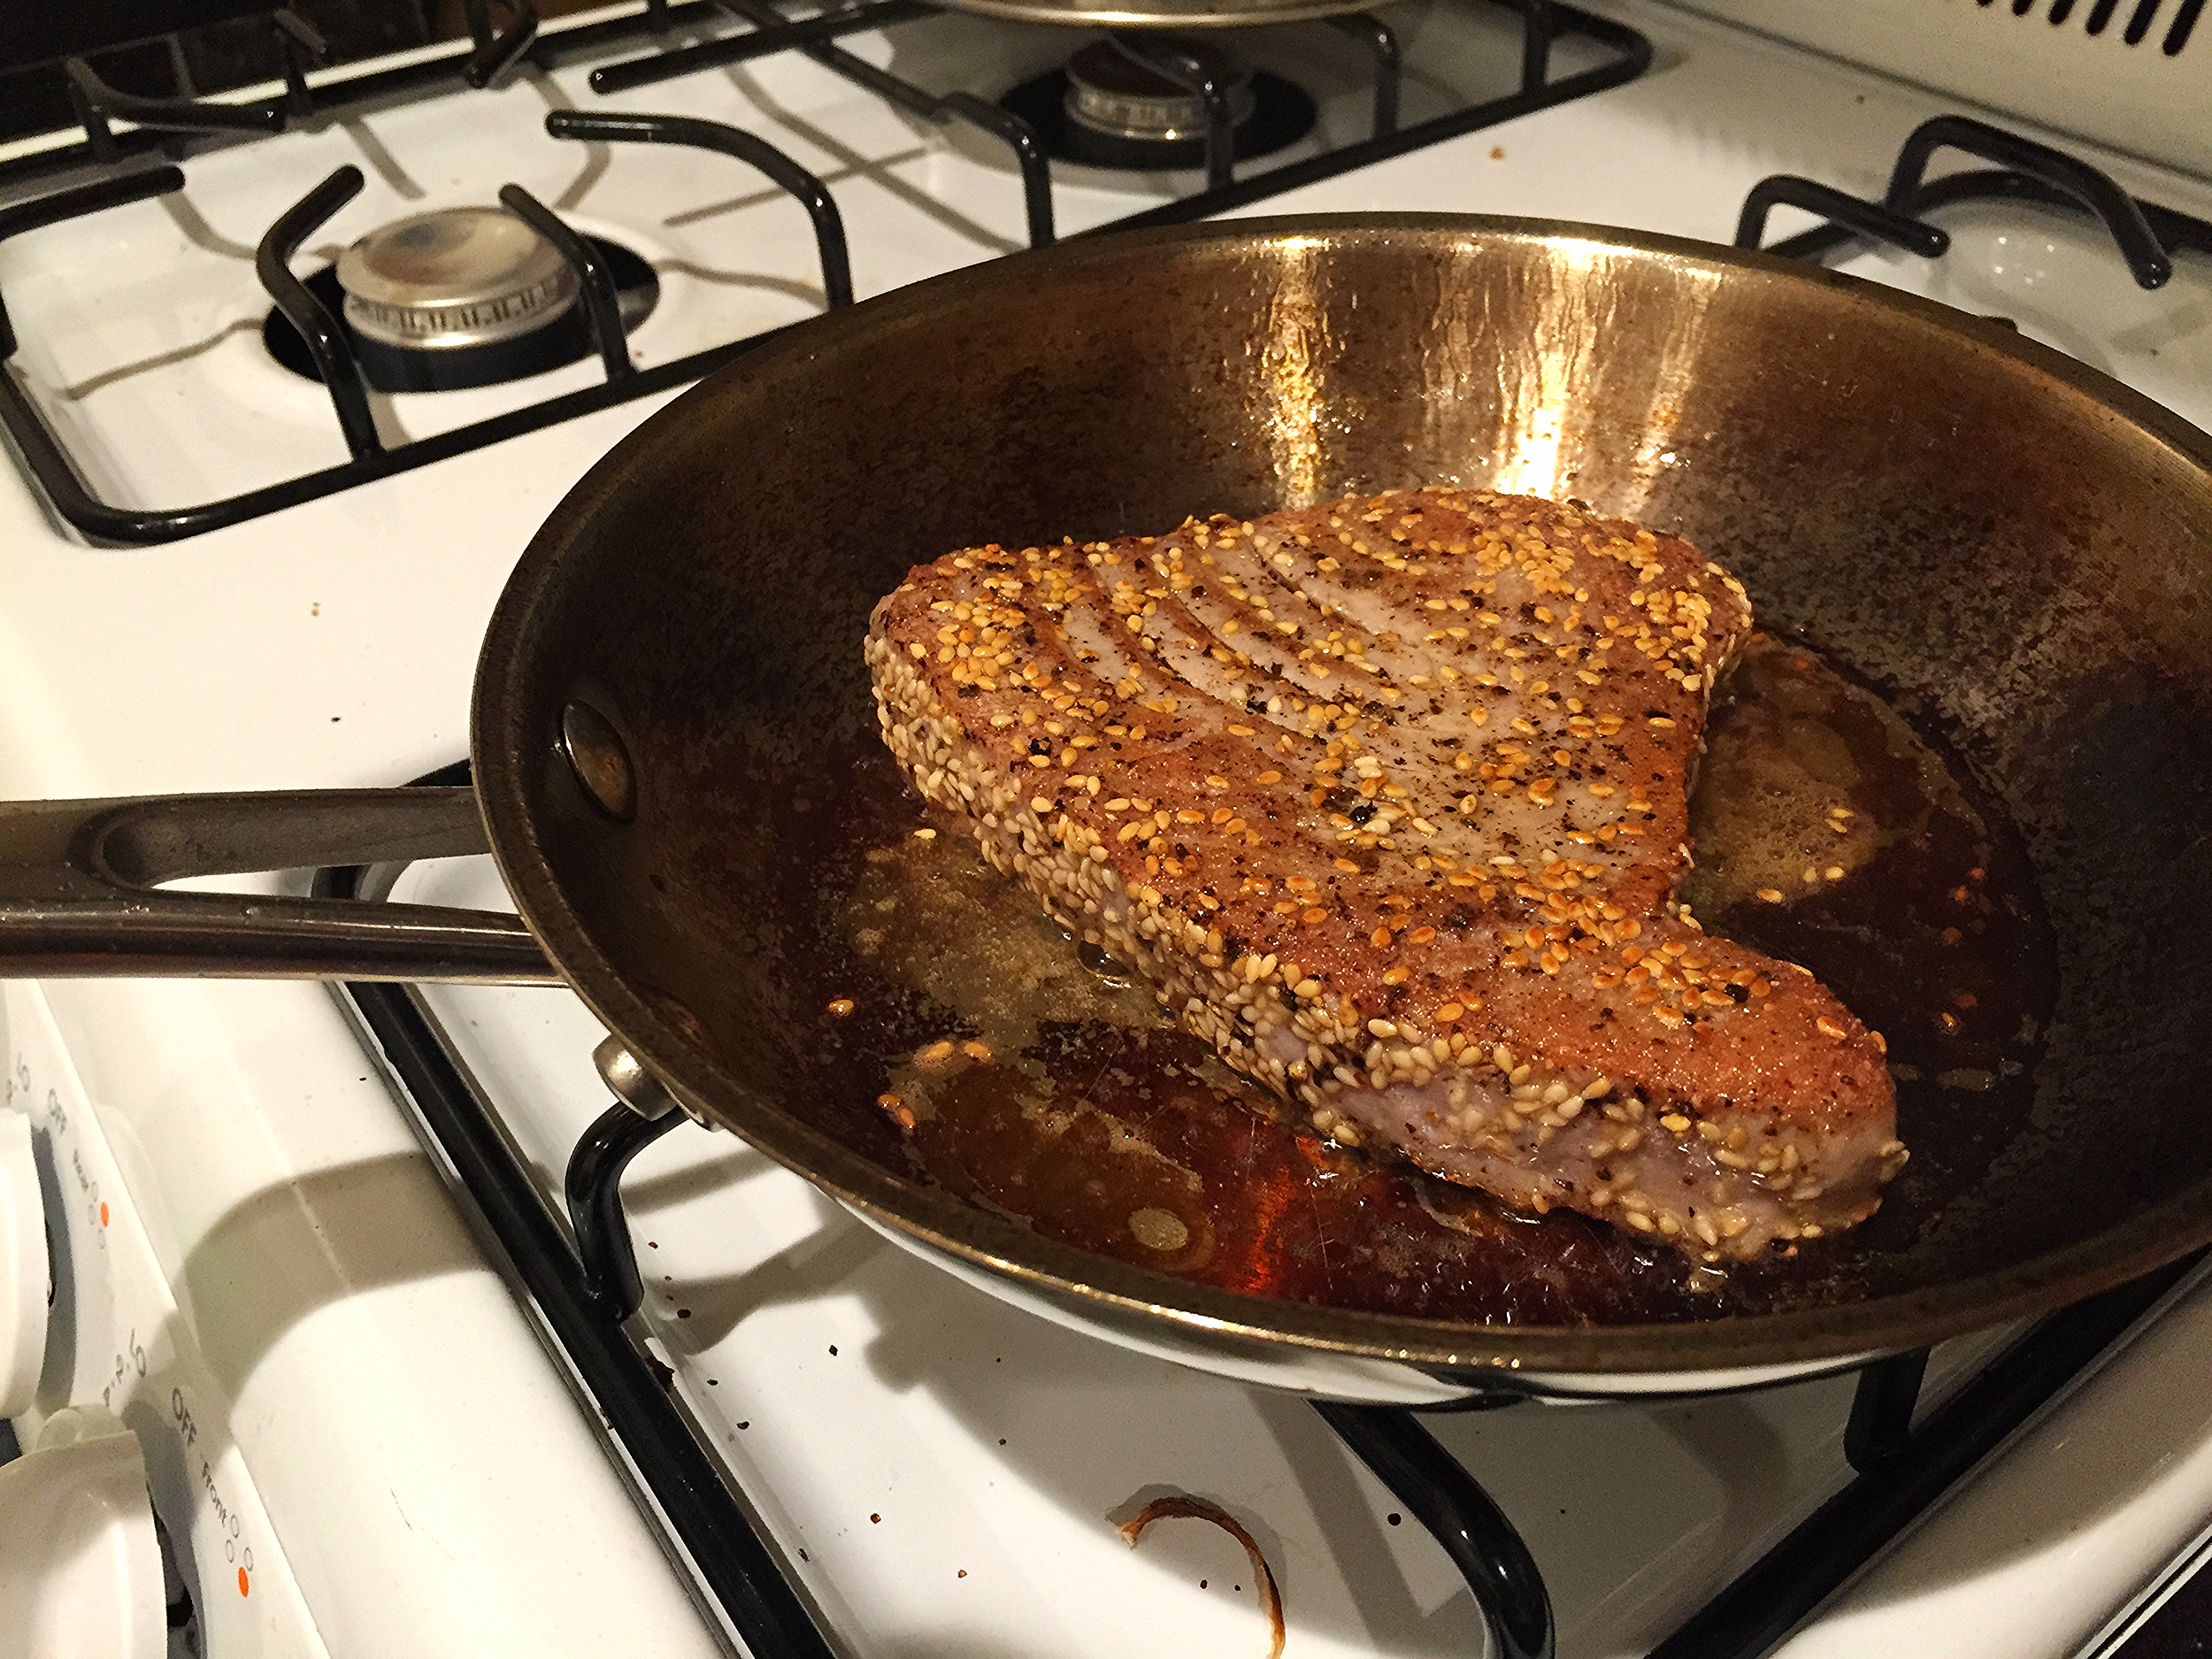
The preparation may be even  more simple than the ingredient list! Give the steak a healthy coating of salt, pepper and sesame seeds on both sides. 

Seared Ahi Tuna | My Engineered Nutrition

In a medium skillet over medium high heat, heat the oil until it is just about to reach its smoking point. Sear the ahi tuna for no more than 60 seconds on the first side, depending on thickness. It may only need 30 seconds if it is a thin cut and depending on level of rareness you like your ahi tuna. 

Seared Ahi Tuna | My Engineered Nutrition

Flip and cook on the other side for same amount of time. 

Seared Ahi Tuna | My Engineered Nutrition

Remove from skillet, slice and serve immediately! The beauty of something like this is that it is SO easy to scale the number of portions. My rule is 4-6 oz of tuna per serving, so if you are serving 4 people, buy 16-24 oz total. It is also important to remember not to overcrowd your skillet. If you can only fit one steak at a time comfortably, then only cook one steak at a time. I use enough oil to coat the bottom of the skillet (roughly 1 tbsp oil for every 8 oz of fish I cook). 

Seared Ahi Tuna

Prep Time: 5 minutes

Cook Time: 1 - 2 minutes

Servings: Varies

Ingredients

  • Ahi Tuna Steak, fresh (the best quality you can find from your fishmonger)
    • General rule: Plan for 4-6 oz per serving
  • Sesame Oil (Olive or Coconut Oil work just as well)
    • General rule: 1 tbsp for every 2 servings - enough to coat the bottom of your skillet
  • Salt
  • Pepper
  • Sesame Seeds (optional)

Directions

  1. Coat both sides of ahi tuna steak with salt, pepper and sesame seeds. 
  2. Heat oil in skillet over medium high heat until just before reaching smoking point. Sear ahi tuna for 30 - 60 seconds per side (30 seconds for thin and 60 seconds for a thick steak). This is a VERY quick cooking time - be sure to watch the steak so that you don't over cook it! Flip and cook on opposite side for same amount of time.
  3. Remove from skillet, slice and serve immediately. 

Nutritional Info (4 oz tuna steak + 1/2 tbsp oil for cooking)

175 calories - 28 g Protein, 0 g Carbs, 7 g Fat

Posted on August 18, 2015 and filed under Recipes, Fish/Seafood.