Posts tagged #Cauliflower Crust

Greek Cauliflower Crust Pizza

To Celebrate My Engineered Nutrition's 2nd Birthday, I'm bringing it back with another Cauliflower Crust Pizza! The first recipe I started the website with, enjoy!

Greek Cauliflower Crust Pizza | My Engineered Nutrition

Can you believe that My Engineered Nutrition just turn TWO on May 5th?! 

If you are thinking "Wow! No I can't believe it!" you are in good company, as I couldn't believe it either. So much so, that the actual birthday came and went before I even realized it...

Greek Cauliflower Crust Pizza | My Engineered Nutrition

But after shortly realizing it was my baby website's birthday, I got to the kitchen and created something I hope you love as much as I do. It seemed fitting to celebrate the 2nd year of my blog with an original: Cauliflower Crust Pizza. That's right, I love my original BBQ Chicken Pizza so much I had to do a spinoff! While I would love to take credit for coming up with this idea all on my own, it was actually a recommendation by my bestie. I often turn to her to ask her what I should make next because she's made many of my recipes and we share similar tastes (i.e. we both love food...a lot). 

She mentioned that she's been into making Greek pizzas lately and I knew I had to copy that. I am part Greek after all, and I grew up eating this familiar profile of flavors. There is no traditional pizza sauce to be found on this pizza, instead the cauliflower crust is topped with olive oil and fresh garlic. Then, it is really a free form of whatever toppings you are feeling or have on hand! For this little number, I used feta cheese, artichoke hearts, kalamata olive, pepperoncini, red onions, grape tomatoes and basil...whew, that's a mouthful. You'll notice I don't have exact measurements for the ingredients below - let's not overcomplicate things. I've made things extra simple too with my step-by-step guide to making the Cauliflower Crust

Greek Cauliflower Crust Pizza | My Engineered Nutrition

Seeing that it IS My Engineered Nutrition's 2nd birthday, I figured I'd share some fun stats! I am an engineer after all, and I love nothing more than looking at analytics and numbers.

In total, I've had over 104,000 page views in the last 2 years. Wow. Just wow. THANK YOU to everyone who supports me in my fun little hobby. It means the world to me.

My Top 10 Recipes over the last 2 years were:

  1. Pumpkin Protein Donuts (over 18,000 views!!)
  2. Cajun Baked Salmon
  3. Sweet Potato Stacks
  4. Fluffy Protein Pancakes
  5. Banana Chocolate Chip Protein Muffins
  6. How to Build an EPIC Cheese and Charcuterie Board
  7. Coffee Cake Protein Muffins
  8. Roasted Chicken Breast
  9. Chocolate Coconut Protein Donuts
  10. BBQ Chicken Pizza with Cauliflower Crust

Some of these really surprised me for being in the Top 10 and others I'm not surprised at all. I did slow down at posting and only brought you 14 new recipes this year. I'm hoping to be more regular this year and my goal is to post at least two recipes per month! 

As always, I'd love to hear your suggestions for recipes! Shoot me an email at myengineerednutrition@gmail.com

Greek Cauliflower Crust Pizza | My Engineered Nutrition

Greek Cauliflower Crust Pizza

Prep Time: 20-25 minutes

Bake Time: 20-30 minutes

Ingredients

For the cauliflower crust

  • 1 small to medium head of cauliflower, yielding about 3.5 cups flowerets (350g)
  • 1/3 cup shredded fat-free or low-fat monterey jack cheese (1.5 oz)
  • 1 egg white
  • 1 tbsp coconut flour
  • 1 tsp italian seasoning (equal parts dried oregano, basil, thyme and rosemary)
  • 1/4 tsp salt

For the pizza toppings

  • 1 tsp extra virgin olive oil
  • 1 tsp fresh garlic, minced
  • Salt
  • 1 oz feta cheese, crumbed
  • Artichoke hearts (about 2 whole canned, sliced)
  • Red onion, sliced
  • Pepperoncini, sliced
  • Grape tomatoes, halved
  • Fresh basil, sliced
  • Kalamata olives, halved

Directions

First, start with the the cauliflower crust. You can follow my step-by-step instructions here: Cauliflower Crust How-To

  1. Preheat oven to 450°F. 
  2. Chop cauliflower into small flowerets, discarding of leavings and stem. Place cauliflower into food processor and pulse until you get a "cauliflower rice" constancy.
  3. Transfer cauliflower to a microwave-safe dish and microwave on high for 3 minutes. This steams the cauliflower.
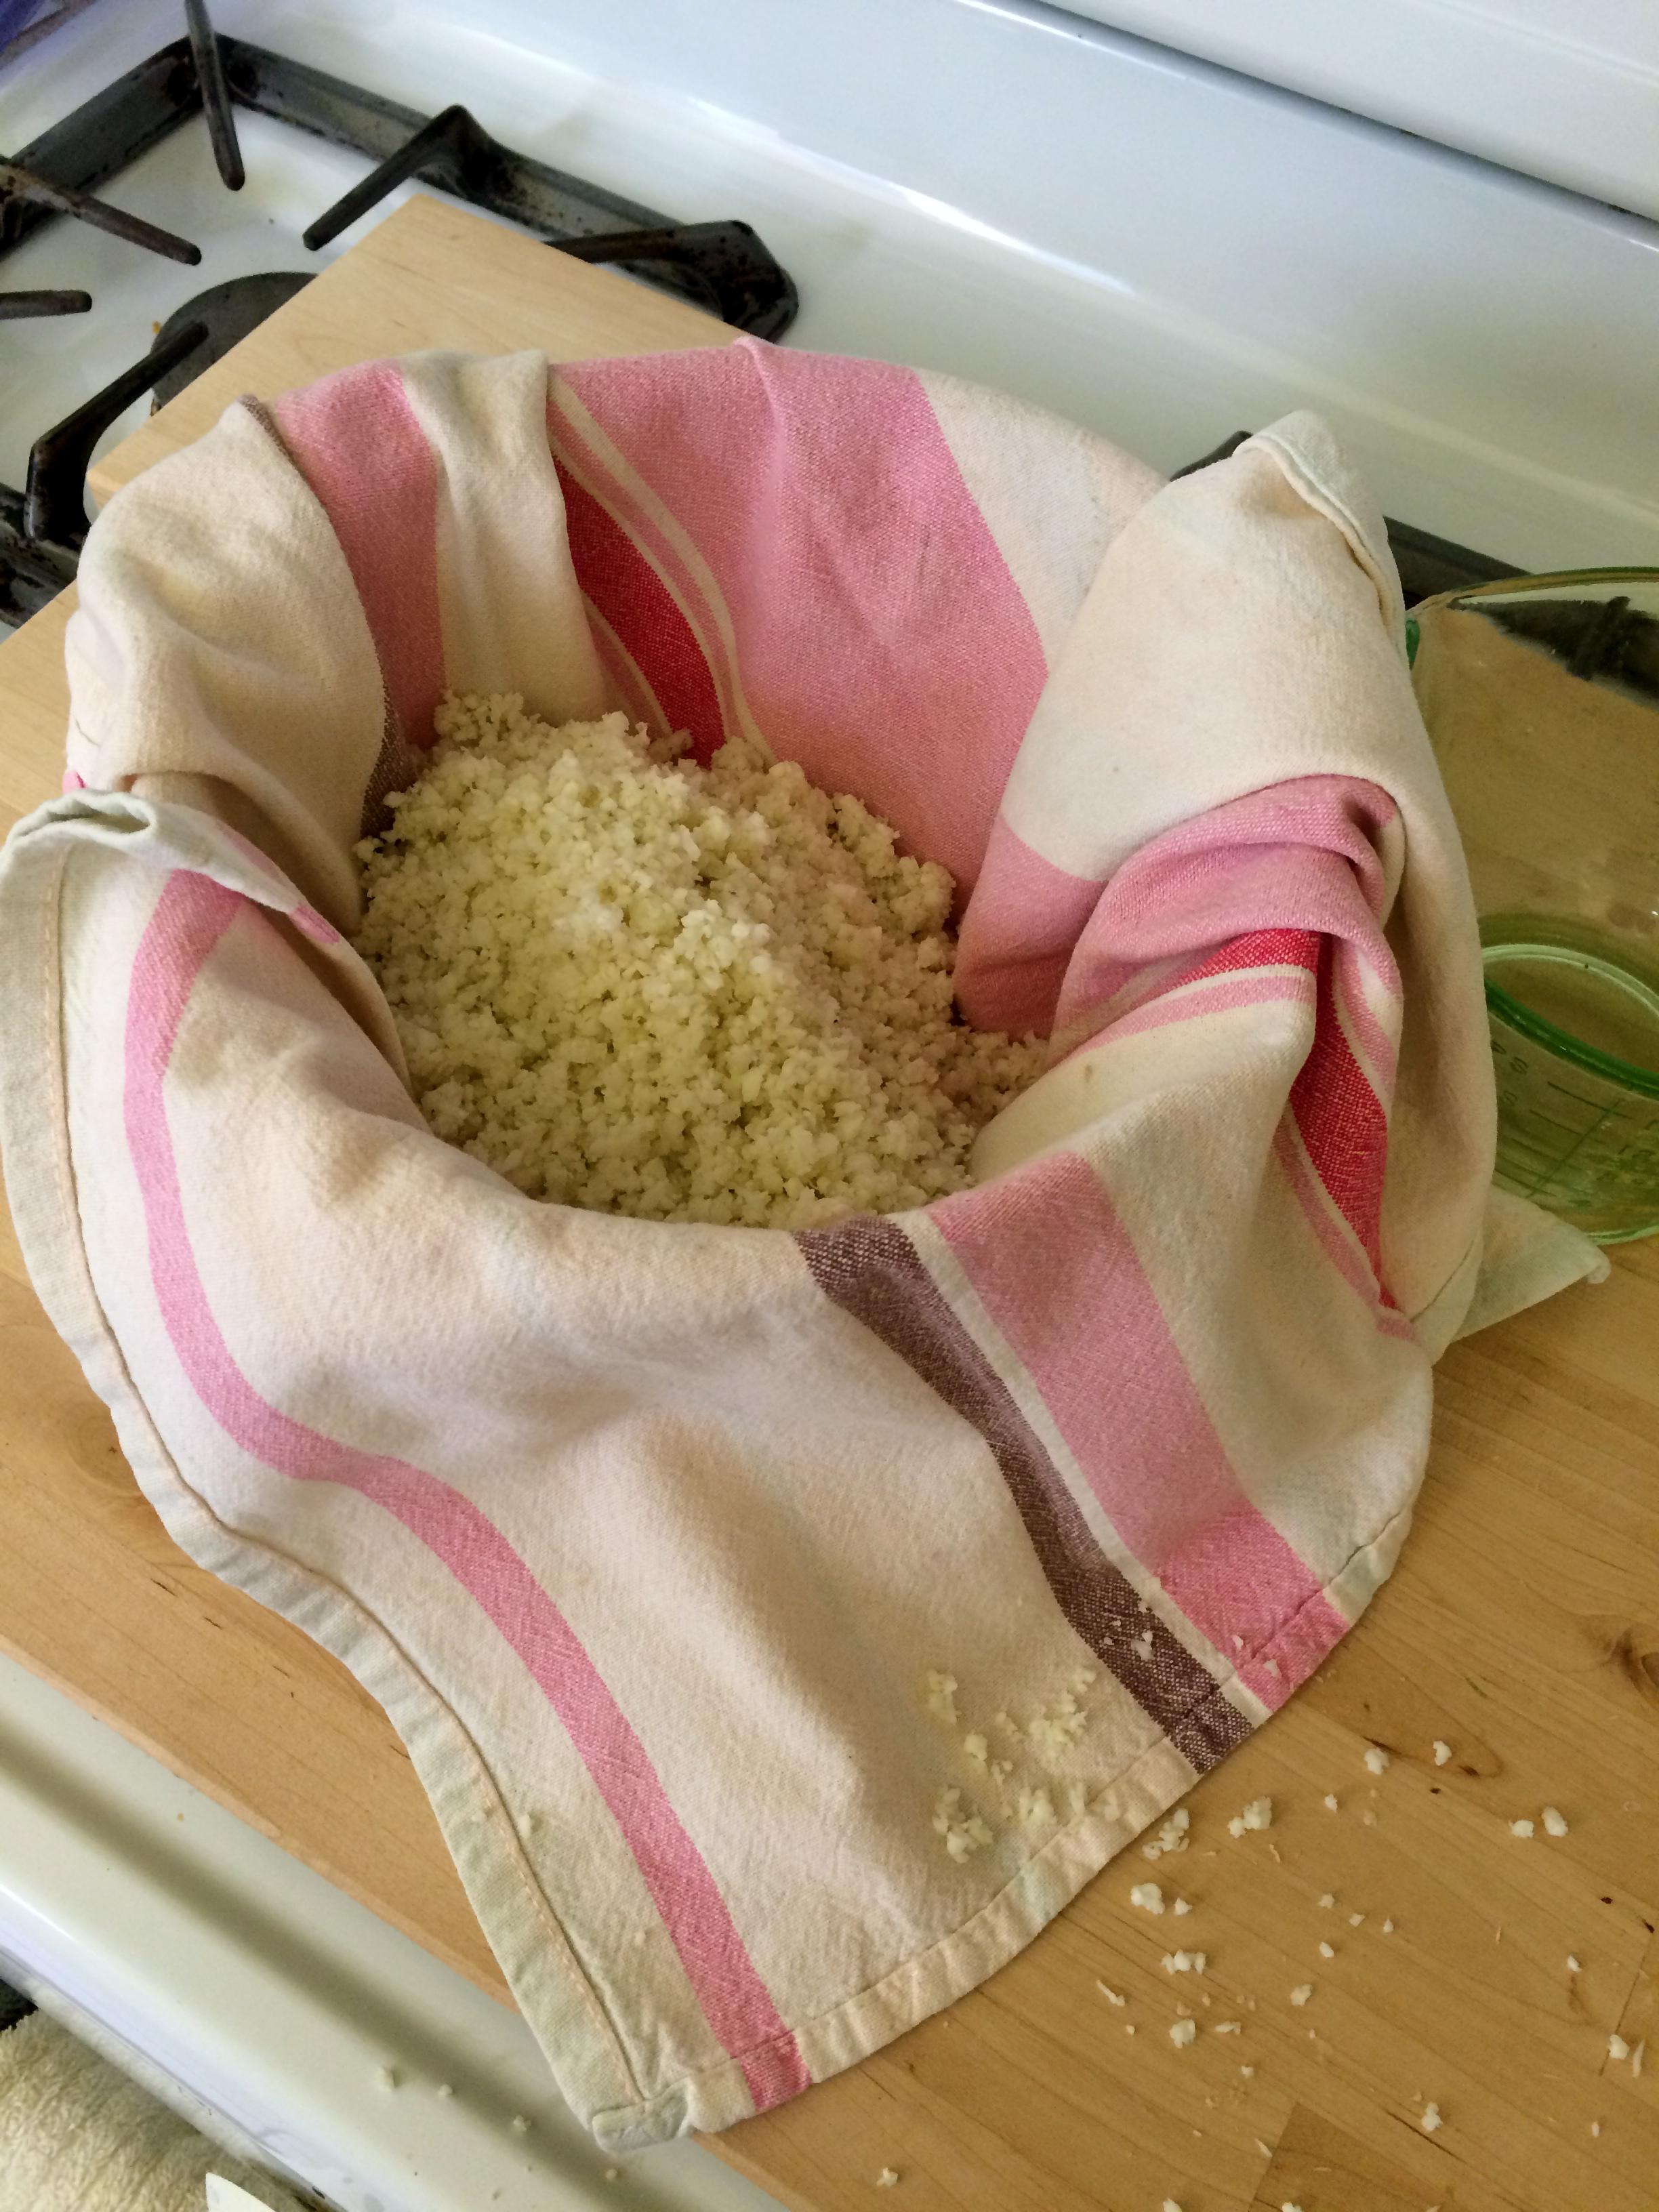
  4. Once cooked, transfer cauliflower again to a tea towel lined bowl. Allow to cool for at least 5 minutes. When cool enough to handle, gather up the towel and squeeze the cauliflower into a ball -- and continue to squeeze! I can't stress enough how important it is to squeeze ALL the liquid out of the cauliflower. You should have about 1/2 cup of liquid when you are done. The end result is a ball of cauliflower "flour".
  5. In a mixing bowl combine cauliflower, shredded monterey jack cheese, egg white, coconut flour, seasonings and salt. Mix with hands until ingredients are well incorporated.
  6. On a parchment lined baking sheet flatten out dough, shaping into a thin round disk, about 1/4" thick.
  7. Bake in a 450° oven for 10-15 minutes or until it begins to turn golden.

Assemble the pizza.

  1. Once baked, rub olive oil, minced garlic and salt over the crust.
  2. Add the remaining toppings to the pizza..
  3. Bake again at 450°F for 10 minutes or until cheese has melted slightly and onions have cooked.
  4. Remove pizza from oven and allow to cool slightly before slicing.

Nutrition Information (approximate for 1 whole pizza):

330 calories - 20g Protein, 31g Carbohydrates (11g Fiber), 14g Fat
Posted on May 8, 2017 and filed under Recipes, Vegetables/Sides, Baking.

Super Bowl Snacks: Healthy Eats for the Big Game!

Avid football fan or not, I'm going to bet you have a Super Bowl Party to attend this weekend. And let's be honest, unless you are a fan of the two teams playing, this Sunday is much more a gathering for good food, ranking your favorite commercials during the Super Bowl and of course, watching the Halftime Performance. 

Worried about how you are going to stay on track with healthy alternatives during Gametime? Fear not, My Engineered Nutrition is to the rescue! I've gather my FAVORITE healthy recipes perfect for watching Big Game. You'll be a hit at your Super Bowl Party if you bring one of these dishes...and no one will be the wiser that it's healthy!

Spinach Artichoke Pizza with Cauliflower Crust

Spinach Artichoke Pizza | My Engineered Nutrition

Squeezing in one last recipe for 2015!

What a great year it has been. Even though I didn't start this website until May of 2015, I still managed to bring you 48 (yes, FORTY EIGHT) recipes this year. Oh man! Since I started off this blog with my BBQ Chicken Pizza with Cauliflower Crust, it seemed fitting to close out the year with another cauliflower crust pizza.  

Spinach Artichoke Pizza | My Engineered Nutrition

Recently, I figured out the sad truth that I'm allergic to nightshade vegetables. What is a nightshade? It is a plant family (Solanaceae) including tomatoes, peppers (bell pepper, chili peppers, tomatillos, cayenne, etc), white potatoes, eggplant and goji berries. The term “nightshade” may have been coined because some of these plants prefer to grow in shady areas, and some flower at night. 

I've narrowed it down that when I eat tomatoes and peppers (two of my most favorite things) my face begins to itch where my psoriasis is located and I begin to turn red. I'm not 100% sure this is what causes that, but there is a strong correlation and I don't want to chance it by continuing to eat them.

That being said, eating traditional pizza presents a dilemma. The base of most pizzas, after all, is tomato sauce.

Spinach Artichoke Pizza | My Engineered Nutrition

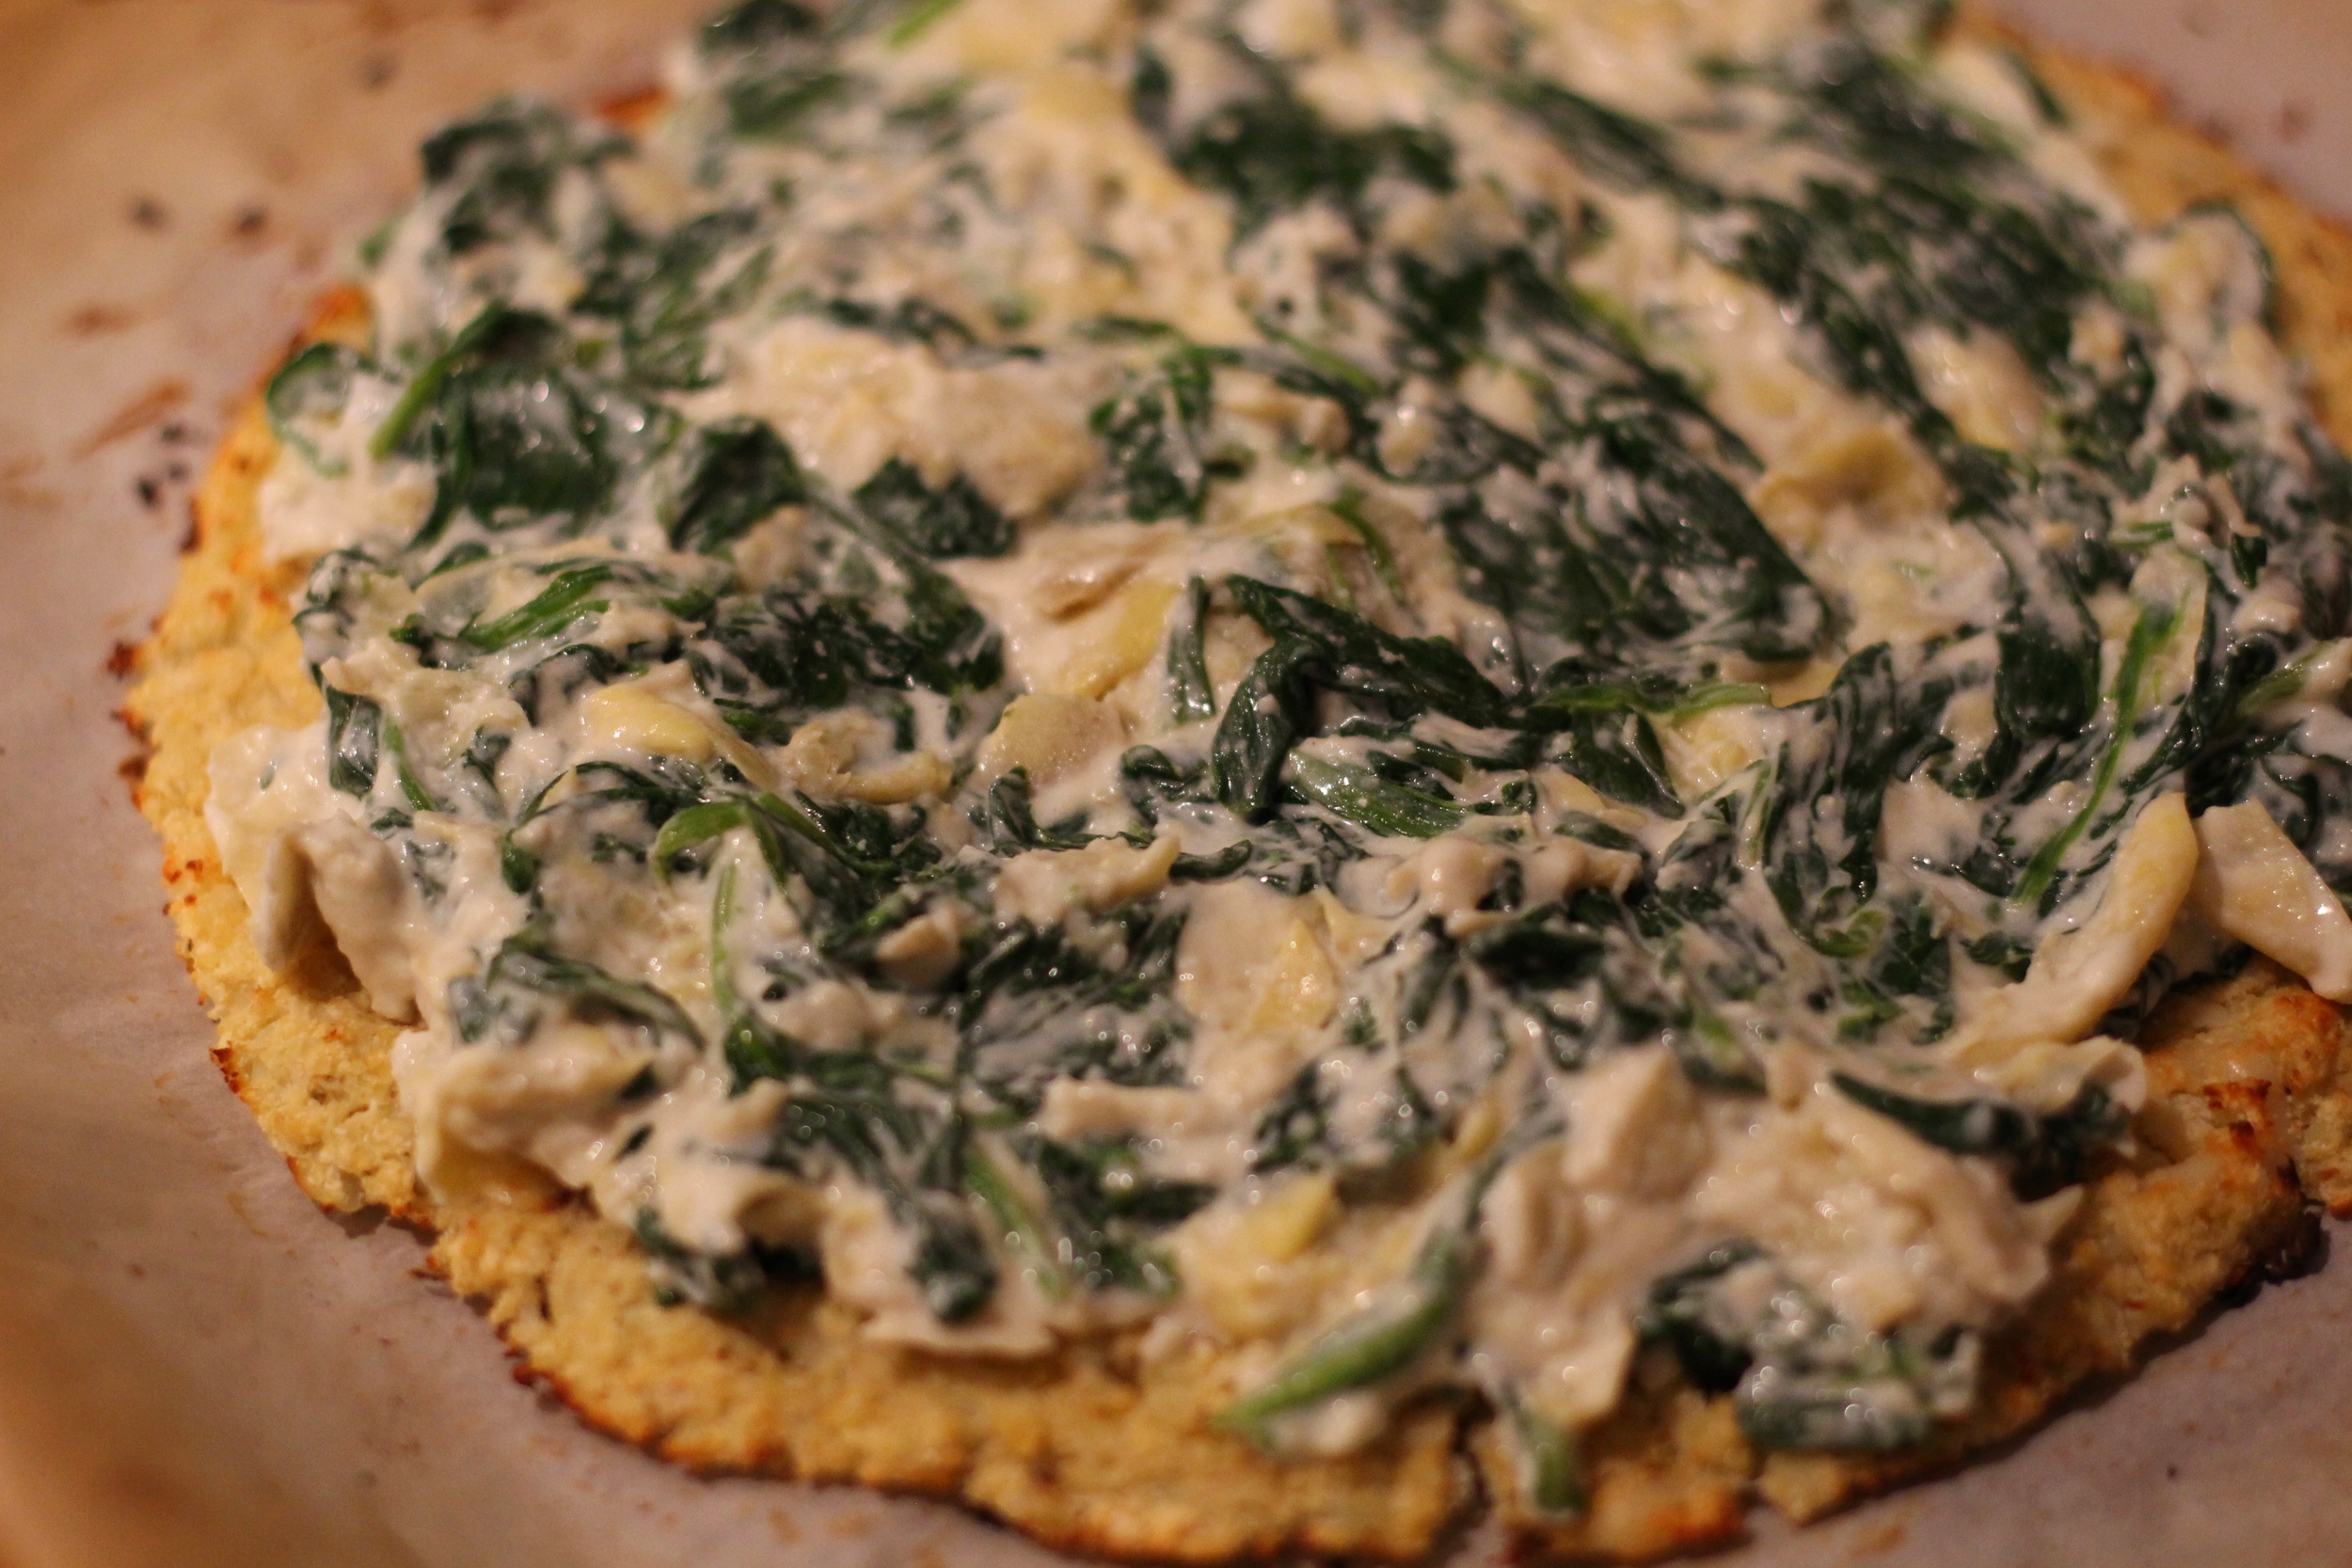
My mom recently saw a jar of Spinach Artichoke Pizza Sauce in Williams-Sonoma. I loved the idea of using that as the  base of my pizza! So yes - this isn't an original idea to use spinach and artichoke as the pizza sauce - gasp!

My mom always used to make (and still does) her spinach artichoke dip using canned artichokes, spinach, Miracle Whip and Kraft Parmesan Cheese. I tweaked this formula just a bit and made my spinach artichoke base using garlic, spinach, artichokes, nonfat Greek yogurt and freshly grated Parmesan cheese. Seriously, you could eat this stuff by the spoonful.

I spread that all over the top of my perfected Cauliflower Crust and finished things off with some turkey bacon and fresh mozzarella. The result is a super creamy pizza that tastes so decadent but is much better for you than eating traditional spinach artichoke dip, which can be loaded with fat. If you loved my BBQ Chicken Pizza then you must try this Spinach Artichoke Pizza today!

Spinach Artichoke Pizza | My Engineered Nutrition

Spinach Artichoke Pizza

Prep Time: 20 minutes

Cook Time: 15-25 minutes

Servings: 4 slices

Ingredients: 

  • 1 Cauliflower Crust  (see this post on how to make!)
  • 1/2 tbsp grass-fed butter
  • 3 cloves garlic, minced 
  • 5 oz baby spinach, roughly 4.5 cups or one small package of spinach
  • 1/2 cup artichokes hearts, chopped (75 g)
  • 1/2 tsp salt
  • 1/4 cup nonfat Greek yogurt (2 oz)
  • 1/4 cup shaved Parmesan cheese (1 oz)
  • 1.5 oz fresh mozzarella
  • 2 slices turkey bacon, cooked and chopped into small pieces

Directions:

  1. Preheat oven to 450°F. Prepare Cauliflower Crust per instructions, baking at 450°F for 10-15 minutes, until golden brown.
  2. While Cauliflower Crust is baking, melt butter in a nonstick skillet over medium high heat. Add garlic and brown for 1 minute. Next, add baby spinach and salt and allow to wilt, about 2-3 minutes. Once wilted add the artichoke hearts, stir to combine and cook for 1 minute to warm through. 
  3. Transfer spinach and artichokes to a mixing bowl, along with the Greek yogurt and Parmesan cheese. Mix until well incorporated.
  4. Once the Cauliflower Crust has finished baking, spread spinach artichoke mixture evenly over top the crust. Finish with a sprinkle of the turkey bacon and slices of fresh mozzarella. Bake at 450°F for 5-10 minutes, until cheese has melted. Remove from oven and allow to cool for 5 minutes before slicing. 

Nutritional Information (1 slice, 4 total slices in pizza):

163 calories - 16 g Protein, 9 g Carbohydrates (3.8 g Fiber), 7 g Fat

Posted on December 30, 2015 and filed under Recipes, Vegetables/Sides.

Fig, Ham and Arugula Flatbread

Fig, Ham and Arugula Flatbread

Fall is OFFICIALLY here! Today, September 23rd, is the fall equinox. Equal parts day and night. What better way to celebrate than with this very Fall-worthy flatbread!? Last week I posted an easy step-by-step guide to my Cauliflower Crust. I'm using this as the base for this Fig, Ham and Arugula Flatbread!

Fig, Ham and Arugula Flatbread | My Engineered Nutrition

I've already show you a fantastic recipe for PIZZA using my crust, but what about showing some love for flatbread? I absolutely love the pairing of figs and prosciutto (did you see my Cheese and Charcuterie board). It is a salty, sweet and rich tasting combination! 

You know what makes prosciutto so dang tasty? Fat, baby!! While it's perfectly acceptable to indulge every now and again, I wanted to create a lighter option that can be enjoyed for any occasion and is just as delectable. Enter: ham. Ham provides that deliciously salty pork flavor with a fraction of the fat. 

Fig, Ham and Arugula Flatbread | My Engineered Nutrition

Loaded up with ham and figs, sprinkled a top with shaved Parmesan cheese and finished off with arugula and a balsamic reduction drizzle - this flatbread packs a punch of flavor!

Fig, Ham and Arugula Flatbread

Prep Time: 15 minutes

Cook Time: 15-20 minutes

Servings: 9 pieces

Ingredients

  • 1 Cauliflower Crust  (see my post on how to make!)
  • 3 figs
  • 3 slices of ham, thinly cut (2.5 oz)
  • 1 oz shaved Parmesan cheese, about 1/4 cup
  • 1/2 cup arugula 
  • 1-2 tbsp Balsamic Reduction, optional (It is very simple to make for yourself! Here is an EXAMPLE
    • Alternatively: If you don't have the time (or patience) to make the reduction, you can very simply toss the arugula in balsamic vinegar before topping the flatbread!

Directions

  1. Begin by preparing the Cauliflower Crust. I have a detailed step-by-step guide on how to make this. When it comes to Step 6, shape crust into a rectangle/oval before baking.
  2. As crust is baking, prepare the toppings by thinly slicing the figs and cutting the ham into strips.
  3. Once the crust has baked, remove from oven. First, top with an even layer of Parmesan cheese. Follow with the ham and lastly the figs. Return to oven (450° F) for another 5 minutes or until the cheese has melted and the ham has warmed. 
  4. After the flatbread has been baked, top with fresh arugula and drizzle with a balsamic reduction. No balsamic reduction? No problem! Simply toss the arugula with 1 tbsp balsamic vinegar before topping the flatbread. 
  5. Slice the flatbread into 9 equal pieces and serve!

Nutritional Information (2 slices)

110 calories - 11 g Protein, 11 g Carbs (5.5 g Fiber), 2.4 g Fat 


Posted on September 23, 2015 and filed under Recipes, Pork.

Cauliflower Crust

Cauliflower Crust | My Engineered Nutrition

I've shared my recipe for Cauliflower Crust previously in my post for BBQ Chicken Pizza. However, it is so versatile and so fantastic I felt it deserved a page all on its own. The process of making a cauliflower crust may sound imtimidating, and sure, it requires a bit more effort in making BUT, once you understand the steps it can be very easy!

The process of making the crust starts just like you would for making cauliflower rice, if you are familiar with that. Loosely chop 1 head of cauliflower and pulse it in a food processor until a "rice" consistency is reached.

Cauliflower Crust | My Engineered Nutrition

You take it a step further once you have the rice by steaming the cauliflower and the squeezing all of the liquid out. This is a critical step in making a crust that keeps shape once it has been baked. You can steam the cauliflower rice in the microwave (quickest method) or by baking it in the oven, spread out in a single layer on a baking sheet. 

Cauliflower Crust | My Engineered Nutrition

Once the cauliflower has been steamed, then transfer the rice to a mixing bowl that has been lined with a tea towel. Allow the rice to cool down a bit before the next step!

Cauliflower Crust | My Engineered Nutrition

Once cool, gather the towel, forming the rice into a ball and SQUEEZE! You will actually be surprised with how much liquid cauliflower contains. 

Cauliflower Crust | My Engineered Nutrition

This will take a few rounds of twisting and squeezing to make sure all of the liquid has been drained. ​

Cauliflower Crust | My Engineered Nutrition

The end result is a ball of cauliflower "flour" to which you add your egg white, cheese, spices, and coconut flour. I found the coconut flour to really hold this crust together. On my first attempt at making this, I still felt there was a bit too much moisture and needed a binder. The coconut flour seemed to do the trick! Once mixed, you flatten and  bake until golden brown.

The final step is adding toppings, treating the crust like you would any other pre-baked pizza crust!

Cauliflower Crust

Prep Time: 15 minutes

Cook Time: 10-15 minutes

Ingredients

  • 1 small to medium head of cauliflower, yielding about 3.5 cups flowerets (350g)
  • 1/3 cup shredded fat-free or low-fat monterey jack cheese (1.5 oz)
  • 1 egg white
  • 1 tbsp coconut flour
  • 1 tsp italian seasoning (equal parts dried oregano, basil, thyme and rosemary)
  • 1/4 tsp salt

Directions

  1. Preheat oven to 450°. 
  2. Chop cauliflower into small flowerets, discarding of leavings and stem. Place cauliflower into food processor and pulse until you get a "cauliflower rice" consistency. 
  3. Transfer cauliflower to a microwave-safe dish and microwave on high for 3 minutes. This steams the cauliflower. Alternatively, you can also bake the cauliflower for about 10-15 minutes (ensuring it doesn't begin to brown) if you do not have access to a microwave. You will need to spread the cauliflower rice out in a thin layer on baking sheets (this may require 2 sheets).  
  4. Once cooked, transfer cauliflower again to a tea towel lined bowl. Allow to cool for at least 5 minutes. When cool enough to handle, gather up the towel and squeeze the cauliflower into a ball -- and continue to squeeze! I can't stress enough how important it is to squeeze ALL the liquid out of the cauliflower. You should have about 1/2 cup of liquid when you are done. The end result is a ball of cauliflower "flour".
  5. In a mixing bowl combine cauliflower, shredded monterey jack cheese, egg white, coconut flour, seasonings and salt. Mix with hands until ingredients are well incorporated.
  6. On a parchment lined baking sheet flatten out dough, shaping into a thin round disk or a rectangle, about 1/4" thick.
  7. Bake in a 450° oven for 10-15 minutes or until it begins to turn golden.
Posted on September 16, 2015 and filed under Recipes, Vegetables/Sides.