Posts filed under Recipes

Twice Baked Sweet Potato Casserole

Twice Baked Sweet Potato Casserole  | My Engineered Nutrition

I absolutely love sweet potatoes - the firm, light-skinned, pale flesh variety. Not to be confused with the soft, copper-skinned and orange flesh variety which stores often label as 'yams'.

Confusing, right? I've shared this article before, but if you want to nerd out on sweet potato varieties, read this article from The Kitchn.

Now that we are both on the same page about which glorious tuberous root I'm referring to, let's continue..

Twice Baked Sweet Potato Casserole | My Engineered Nutrition

I recently discovered that these pale fleshed sweet potatoes boil and mash BEAUTIFULLY...and quickly, I might add. One of my gripes I've always had with sweet potatoes is that they take for-ev-errr to bake or roast. And let's be real here, I'm usually starving when I actually start preparing my meals and the thought of waiting 45 minutes to an hour for them is unbearable and I'm not motivated enough to wait.  

All it takes is some boiling water and chopped sweet potatoes, and in just 10 MINUTES you've got yourself some wonderful mashed sweet potatoes. 

Twice Baked Sweet Potato Casserole | My Engineered Nutrition

Now, you could stop right after boiling and mashing the sweet potatoes and be well on your merry way eating as I've shown on through my Instagram HERE, HERE, HERE and HERE. However, these mashed potatoes can be oh-so-much better when transformed into this Twice Baked Casserole. 

This casserole is a breeze to make and it reheats wonderfully - perfect for those weeknight dinners when you are in need of something quick! This warm and creamy casserole is made of soft mashed sweet potatoes, low-fat or nonfat cheddar cheese, nonfat Greek yogurt garlic and green onions. It's like a loaded baked potato...but in casserole form.

Twice Baked Sweet Potato Casserole | My Engineered Nutrition

Twice Baked Sweet Potato Casserole

Prep Time: 20 minutes

Bake Time: 25 minutes

Servings: 6

Ingredients:

  • 2.5 lbs sweet potatoes (light-skinned, pale flesh), peeled and chopped **this is the weight after they've been peeled so account for a little more when purchasing
  • 2 tbsp grass-fed butter, melted
  • 1/2 cup nonfat Greek yogurt
  • 5 green onions, thinly sliced whites and greens
  • 4 oz nonfat or low-fat cheddar cheese, grated
  • 1 tsp garlic, minced (about 4 cloves)
  • 1/2 tsp salt

Directions:

  1. Preheat oven to 350°F and bring a pot of water to a boil. Once water as come to a rolling boil, add chopped potatoes. Boil for 10-15 minutes, until potatoes are soft when pierced with a fork.
  2. While potatoes are boiling, prepare other ingredients.  Once the potatoes have softened, drain and transfer to a large mixing bowl. With a large wooden spoon, simply mash the sweet potatoes. Add the butter, Greek yogurt, green onions, cheese, garlic and salt and mix until all ingredients are well incorporated.
  3. Transfer to a lightly greased casserole and bake for 25 minutes. Remove from oven and serve immediately. Casserole is also great reheated!

Nutritional Information (1 serving, 6 total each roughly 1 cup each):

245 calories - 11g Protein, 41g Carbohydrates, 4g Fat
 

Posted on February 18, 2016 and filed under Recipes, Vegetables/Sides, Sides.

Breakfast Quesadillas

Breakfast Quesadillas | My Engineered Nutrition

Can you think of a type of cuisine that pairs better with breakfast that Mexican? Maybe I'm partial having lived in Texas and now California, the Meccas of Tex-Mex and Mexican food in our great country, but nothing beats Mexican food for breakfast.

Breakfast Quesadillas | My Engineered Nutrition

In addition to your traditional Mexican-inspired breakfast fare (i.e. omelettes, scrambles, skillets, etc.) you also have devoted Mexican breakfast dishes such as huevos rancheros, chilaquiles, breakfast tacos, breakfast burritos, and these: breakfast quesadillas.

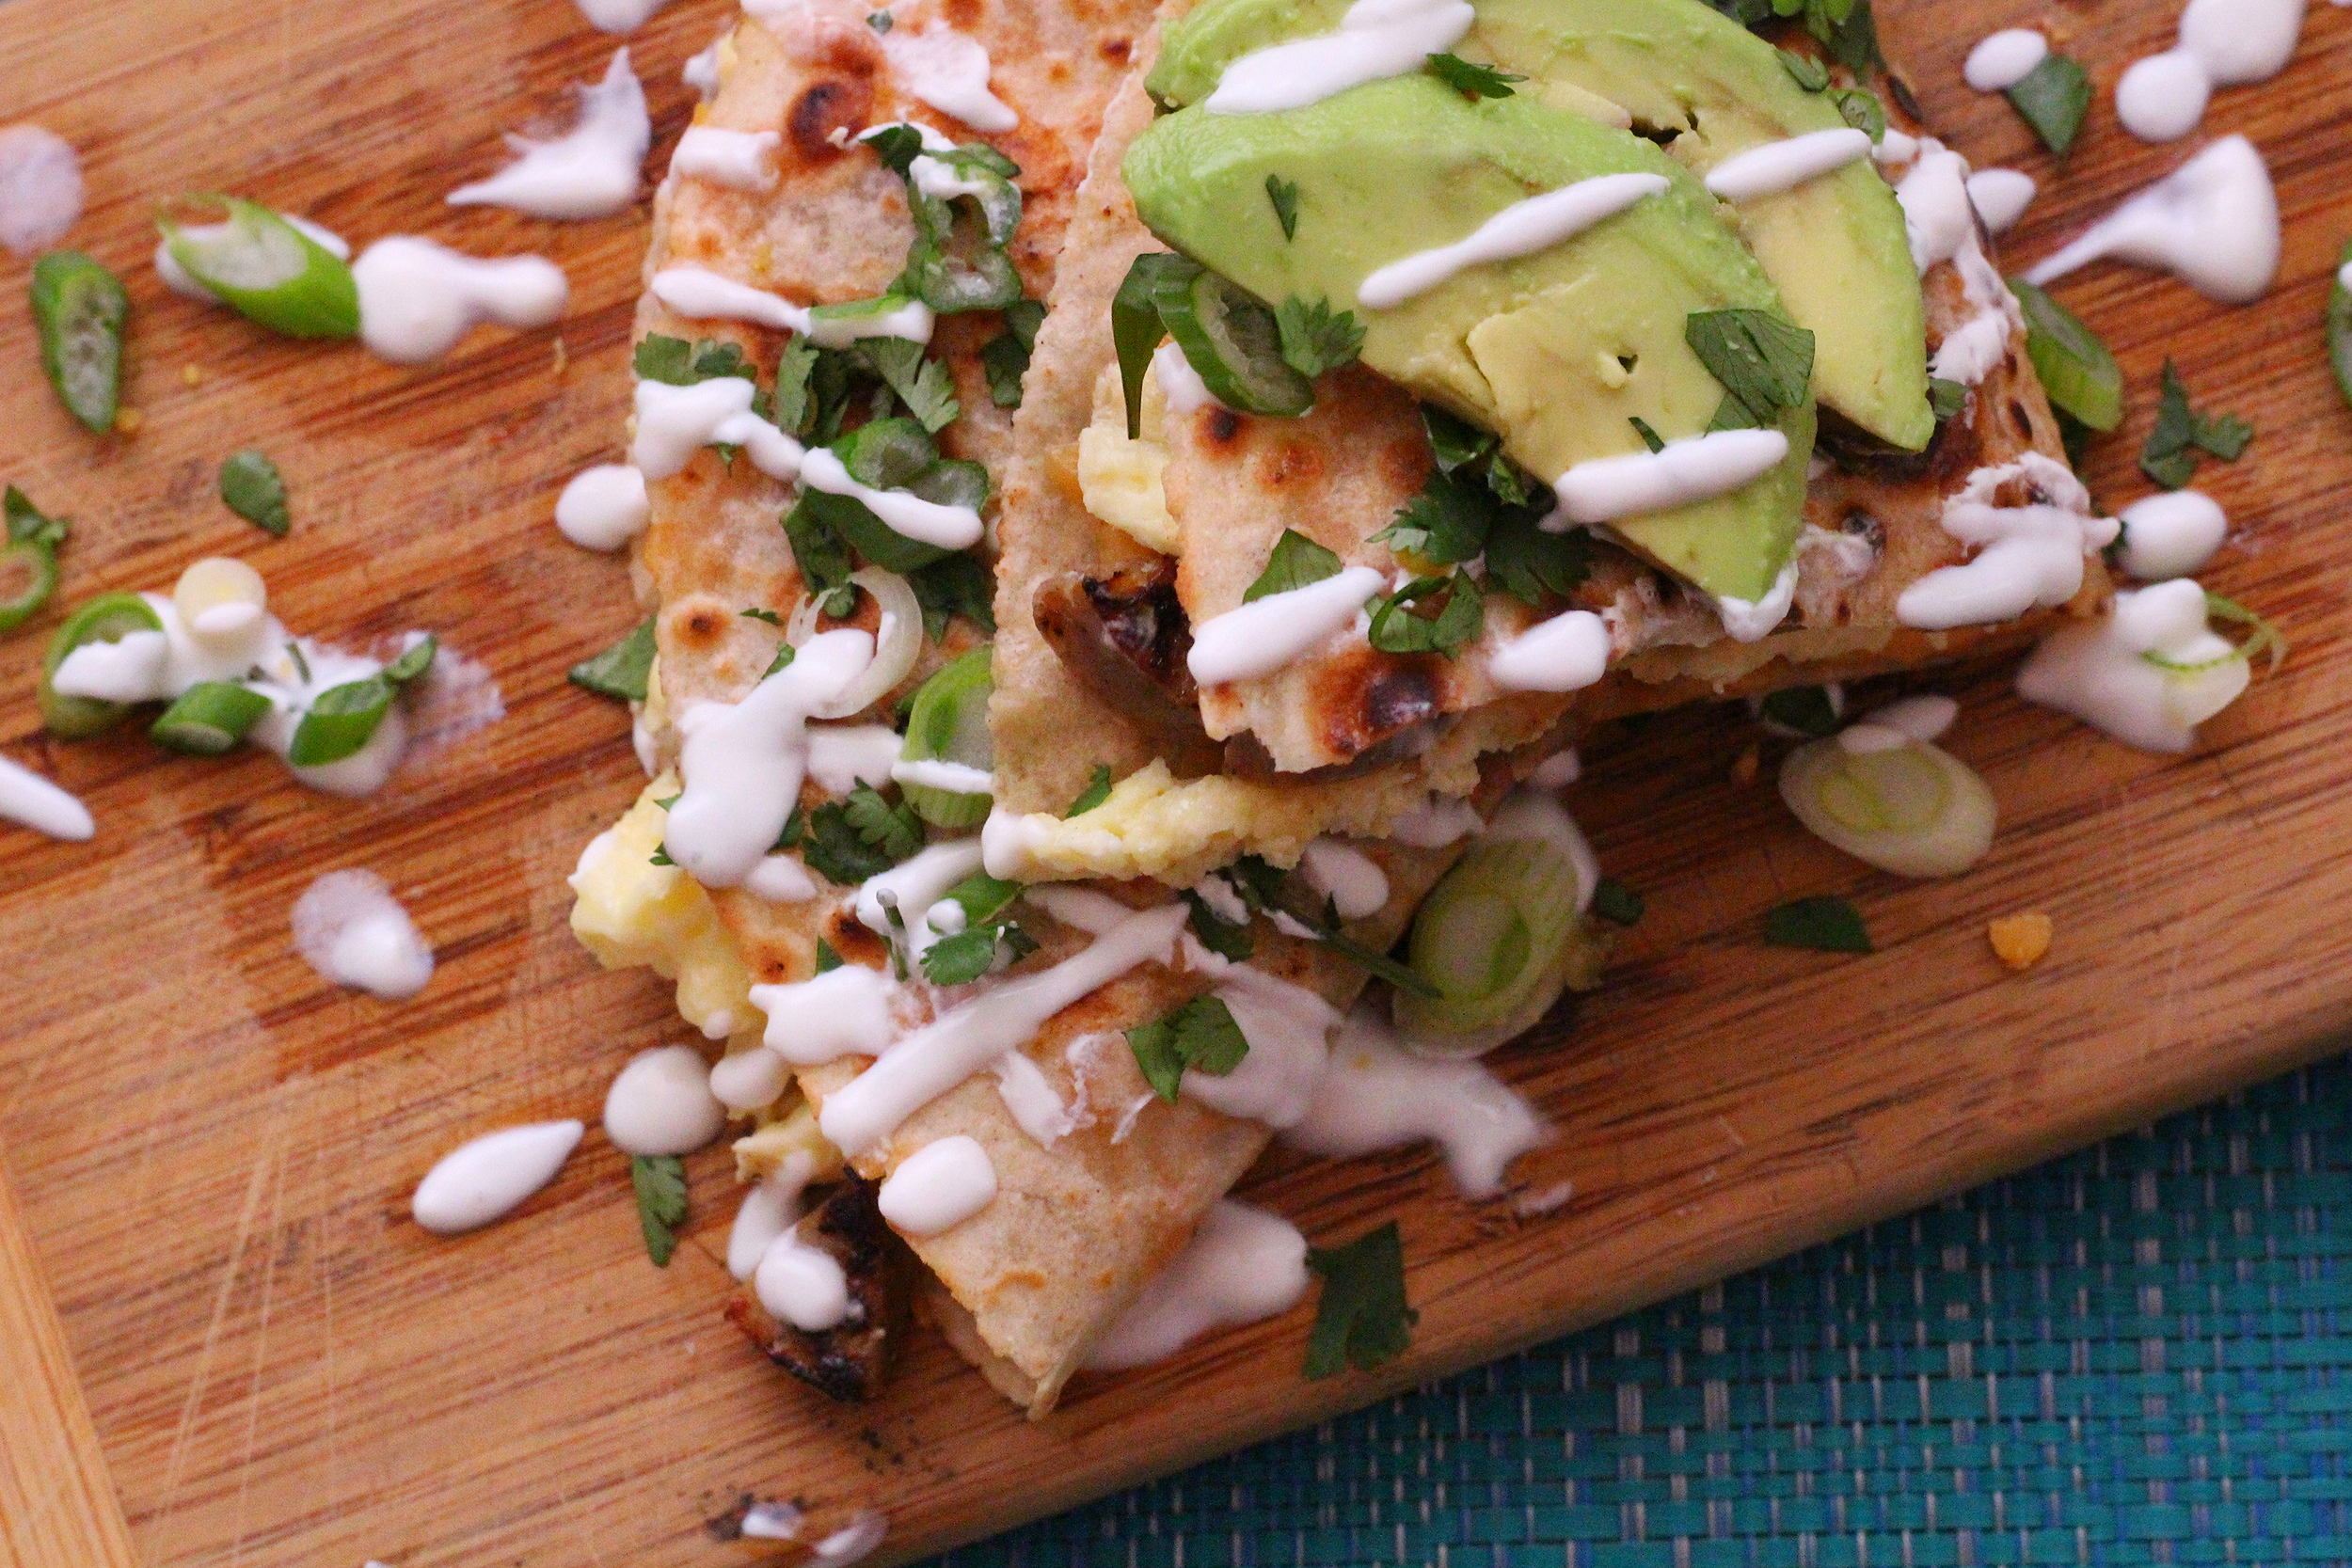
A perfectly toasted gluten free tortilla, filled with cheese, eggs and sausage and topped with avocado, lime and cilantro - it's the perfect breakfast combination!

Breakfast Quesadillas | My Engineered Nutrition

Like most of my recipes, I'm usually inspired to create them because I'm craving that dish.

(I know...a very sophisticated development process)

Recently, my friend at work that I sit across from brought in a breakfast quesadilla. Naturally, I had food envy and decided I had to just make one for myself. If you follow me on Instagram then you know how much girlfriend LOVE her quesadillas, but I've always been hesitant to post a recipe for them because they are so painfully simple to make. 

This unique spin on a classic, however, warranted a devoted post. Think of this recipe more as a 'road map' to creating your own delicious quesadilla. There are no rules! I hope I caused enough food envy in you to make this breakfast quesadilla ASAP! 

Breakfast Quesadillas | My Engineered Nutrition

Breakfast Quesadillas

Prep Time: 10 minutes

Servings: 2 Quesadillas

Ingredients:

Directions:

  1. Begin by preparing the ingredients to fill your quesadilla with. Grate the cheese, slice the green onions, chop the cilantro and slice the chicken sausage into half circle slices.
  2. Coat a nonstick pan with olive oil over medium heat and warm the chicken sausage. Set aside. Scramble egg and egg whites together in a small bowl. In the same pan used to cook sausage, melt butter over medium heat and pour eggs into pan. Scramble your eggs by cooking gently over medium heat and stirring with a rubber spatula. Once eggs are scrambled, set aside.
  3. In a large nonstick pan over medium high heat, warm one tortilla. Sprinkle half of the grated cheese in an even layer over the tortilla, allowing it to begin melting slightly. After 1 minute, spoon half of the eggs and half of the sausage onto on half of the tortilla and then fold the tortilla over in half. I prefer making 2 half quesadillas, as opposed to layering two tortillas directly on top of one another. Allow to cook for about a minute on that side before carefully flipping and continuing to cook on the opposite side. Use your best judgement on when the quesadilla is cooked through, ensuring not to burn your tortilla! Remove from heat and repeat process for second quesadilla with remaining tortilla, eggs, cheese and sausage. 
  4. In a small bowl mix together Greek yogurt and lime juice. Plate quesadillas and garnish with a drizzle of the Greek yogurt, a sprinkle of cilantro and green onion, and top with avocado slices. There is no right or wrong way to eat a quesadilla, so get creative!

Nutritional Information (1 quesadilla) - This will largely depend on what ingredients you choose to use! This is a rough estimate.

325 calories - 22 g Protein, 22 g Carbohydrates, 17 g Fat

Posted on February 11, 2016 and filed under Recipes, Breakfast, Chicken.

Super Bowl Snacks: Healthy Eats for the Big Game!

Avid football fan or not, I'm going to bet you have a Super Bowl Party to attend this weekend. And let's be honest, unless you are a fan of the two teams playing, this Sunday is much more a gathering for good food, ranking your favorite commercials during the Super Bowl and of course, watching the Halftime Performance. 

Worried about how you are going to stay on track with healthy alternatives during Gametime? Fear not, My Engineered Nutrition is to the rescue! I've gather my FAVORITE healthy recipes perfect for watching Big Game. You'll be a hit at your Super Bowl Party if you bring one of these dishes...and no one will be the wiser that it's healthy!

Greek Lemon Chicken

Greek Lemon Chicken | My Engineered Nutrition

Looking for a simple, healthy and flavorful weeknight dinner? Yes? You've landed on the perfect recipe for just that!

If you are like me you are in need of a shake up from your usual baked chicken. Don't get me wrong, sometimes I crave really basic baked chicken, but most times I want loves of flavor.

Greek Lemon Chicken | My Engineered Nutrition

This dish really couldn't get any easier to make. The marinade is just FOUR ingredients. That's it. Combine those together and just add chicken. Letting this marinate overnight allows the flavors to really develop in the chicken. The result is incredibly moist and zesty lemon chicken. 

The kalamata olives are the perfect complement to the lemon and fresh oregano. To really tie things all together I recommend garnishing with a sprinkle of feta cheese. The perfect combination of Greek flavors, delivered in a quick and easy weeknight dinner!

Greek Lemon Chicken | My Engineered Nutrition

Greek Lemon Chicken

Prep Time: 10 minutes + Marinate Time (at least 30 min, up to 24 hrs) 

Bake Time: 30-40 minutes

Servings: 6

Ingredients: 

  • 4 small chicken breasts, roughly 36 oz total weight
  • 1-1/2 lemons, juiced
  • 1-1/2 tsp garlic, minced
  • 1 tbsp fresh oregano, finely chopped  
  • 1/2 tbsp extra virgin olive oil
  • Salt + Pepper
  • 10 kalamata olives, sliced in half
  • 1/2 lemon, thinly sliced into 4 rounds and then cut in half

Optional Garnish

  • Feta cheese
  • Fresh dill

Directions:

  1. In a mixing bowl or Ziploc bag combine lemon juice, garlic, oregano, extra virgin olive oil, salt and pepper. Stir to combine and add chicken breasts. Seal Ziploc bag or cover mixing bowl with plastic wrap and return to refrigerator to marinate. This can be done for as little as 30 minutes or can marinate overnight. The longer the marinating time, the better the flavor!
  2. Preheat oven to 375°F. Remove chicken from refrigerator and arrange breasts in a baking dish. Discard remaining marinade, we don't want a lot of excess liquid in the dish with the chicken while baking. Sprinkle olives on top of chicken and arrange lemon slices, 2 halves per chicken breast. 
  3. Bake at 375°F for 30-40 minutes, or until internal temperature reaches 155°F. I highly recommend investing in an instant read thermometer (like I explain here!) so that you never overcook your meats again.
  4. Once baked through, remove from oven and transfer to plates. Garnish with a sprinkle of feta cheese or fresh dill.

Nutritional Information (1 serving, roughly 5 oz cooked):

210 calories - 38g Protein, 1g Carbohydrates, 5.8g Fat


Posted on January 28, 2016 and filed under Recipes, Chicken.

Chocolate Cherry Protein Truffles

Chocolate Cherry Protein Truffles | My Engineered Nutrition

Every time I make and share a dessert with other, the question I always hear is "so, like...this is healthy and good for me to eat? Right?"  

No.

It doesn't work like that. I provide healthier alternatives to the original treats, but by no means is eating half of my Pumpkin Pie or a dozen Toffee Bars "healthy".  

These may be the exception.  

Chocolate Cherry Protein Truffles | My Engineered Nutrition

These Chocolate Protein Truffles are made from honest and simple ingredients - plant based protein, medjool dates, dried cherries, cocoa powder, cashew milk, vanilla extract and coconut oil.

That's it.

It's important to note this recipe calls for plant-based (vegan) protein - like rice or pea protein. This is critical as you won't get the same texture without it! Whey protein will not work in these truffles.

Chocolate Cherry Protein Truffles | My Engineered Nutrition

My motivation for creating these was my upcoming figure show. As I sneak closer and closer to the date, I'm slowing decreasing my food intake. These protein truffles satisfy my sweet tooth and actually give me a serving of protein while doing so! Before you go and think this is one of those "desserts" that really doesn't taste like dessert, I had these taste tested by 3 friends and all gave these the thumbs up, so cast your skepticism away.

Go ahead and make these Protein Truffles - they're good for your health! :D

Chocolate Cherry Protein Truffles | My Engineered Nutrition


Chocolate Cherry Protein Truffles

Prep Time: 25 minutes

Servings: 10 truffles

Ingredients:  

  • 3 scoops plant-based chocolate protein (I use True Nutrition Chocolate Brownie Plant-Based Protein)
  • 2 medjool dates, pitted
  • 1/4 cup dried cherries
  • 1/2 tsp vanilla extract
  • 1 tbsp cocoa powder
  • 3/4 cup cashew milk* (start with 1/2 cup and continue adding until the mix starts holding together)
  • 1/2 tbsp coconut oil

Optional: 

  • Cocoa powder for dusting or melted chocolate for a drizzle on top!

Directions: 

  1. Combine all ingredients in a food processor and pulse until well mixed. This will required you to use a spatula to scrape ingredients which stick to the side of the food processor bowl back into the mix. Continue pulsing and scraping until all ingredients are combined and the batter begins to form into a ball.   
  2. Like you would roll meatballs, form the "truffles" into balls by rolling a pinch of the mix between your hands. The mixture yields 10 truffles. Add any additional toppings you desire, like rolling in cocoa or drizzling melted chocolate!

Nutritional Information (1 truffle):

86 calories - 7.5 g Protein, 11 g Carbohydrates, 1.5 g Fat


Posted on January 21, 2016 and filed under Sweet Treats, Recipes, Protein Powder.