Posts filed under Recipes

Ham, Leek & Sourdough Dressing

Ham, Leek & Sourdough Dressing | My Engineered Nutrition

The holiday season is so close I can taste it. Literally. I have already starting practicing my dishes for the holidays!!

From now until Christmas, I’ll be sharing with you my family favorites – all with my twist to make them easier on the diet this season. Going through contest prep during the holidays is no easy task. I’m starting to realize more and more how disciplined I must be to make sure I stay on course. Nothing I can’t handle, however!

First up for my holiday favorites and just in time for Thanksgiving: Dressing. Or stuffing…the great debate.

IMG_0333.JPG

The main reason I love the holidays is that each family has their own traditions. Mine, for example, calls that deliciously bready side dish served with turkey DRESSING, not stuffing. Why? Because stuffing is stuffed and cooked in the bird while dressing is cooked in a casserole outside of the turkey. Perfectly logical if you ask me. Whatever your family calls it, dressing or stuffing, there are hundreds of variations.

Because dressing is one of my favorite side dishes, I wanted to create a recipe I would have no problem eating this Thanksgiving while staying in line with my contest prep. Traditionally, dressing (or stuffing) is made with sausage. As tasty as it may be, it is extremely high in fat. I opted for ham – same animal, leaner cut of meat! 

I also recently found my new favorite gluten free bread: Bread SRSLY. This stuff is AMAZING. Gluten free breads usually tastes like gluten free breads. Not this. No, this actually tastes like an amazing slice of sourdough. Instead of relying on the bread to be the bulk of the dressing (like normal) I cut back significantly on the bread and loaded up on other vegetables and the ham.

With sourdough and ham being the foundation of the dressing, now comes the other fillers. A must-have in my family’s dressing are water chestnuts. They add the perfect crunch! I used leeks instead of onions as I feel they bring a greater depth of flavor to the dish. Celery, fresh cranberries, rosemary and thyme round things out.  Not only is this dish full of flavor, it is also beautiful and full of color!

Ham, Leek & Sourdough Dressing | My Engineered Nutrition

Ham, Leek and Sourdough Dressing

Prep Time: 25 minutes

Cook Time: 50 minutes

Servings: 6

Ingredients:

  • 1/2 lb. Gluten-free sourdough bread (or whichever you prefer - I recommend Bread SRSLY), cubed (about ½"), yields 4 cups
  • 1 lb. country ham steak, cubed (about ½")
  • 1-1/2 tbsp. butter
  • 4 cloves garlic, minced
  • 2 medium leeks, bulb and lower leaf portion, 2 cups thinly sliced and halved
  • 2 cups celery, sliced
  • 1 tbsp. fresh rosemary, finely chopped
  • 1 tbsp. fresh thyme, finely chopped
  • 1 tsp. salt
  • 1/4 tsp. pepper
  • 1 can water chestnuts (5 oz. can)
  • 1-1/2 cup fresh cranberries
  • 1 cup chicken stock (see note 5 below)

Directions:

  1. Preheat oven to 350°F. Slice bread into ½" cubes, yielding about 4 cups of bread. Spread out evenly on a baking sheet and bake in oven for 10 minutes or until toasted.
  2. While bread is toasting, prepare the ham, leeks and celery. Slice the ham into ½" cubes like you did the bread. Slice the celery and leeks, setting aside. Remove bread from oven after it has toasted and set aside. Increase temperature to 375°F.
  3. In a large cast iron pot (or soup pot) sauté ham over medium heat for about 5 minutes, until the outside starts to brown and caramelize. Remove and set aside.
  4. Melt butter over medium heat. Add garlic, celery, leeks, herbs, salt and pepper. Sauté for about 5 minutes or until leeks soften and become slightly translucent. (This part smells SO flavorful!!). Turn stovetop heat off.
  5. Add drained water chestnuts, cranberries and ham back to the pot with the vegetables. Stir to mix evenly. Add 1/2 cup of the chicken stock, stir to incorporate, and then add the bread. If all liquid has soaked up, add remaining 1/2 cup of chicken stock. We don't want our mixture to become too wet - if liquid starts to pool at the bottom of the pot we've added too much! We want the mixture to be saturated but not swimming!
  6. Transfer to a casserole or baking dish. Cover dish with tin foil and bake at 375°F for 20 minutes covered. Remove tin foil after 20 minutes and continue baking for another 30 minutes uncovered. Let rest for 10 minutes before serving.
 

Posted on November 11, 2015 and filed under Recipes, Vegetables/Sides, Pork.

Rosemary Balsamic Pork Tenderloin

Rosemary Balsamic Pork Tenderloin | My Engineered Nutrition

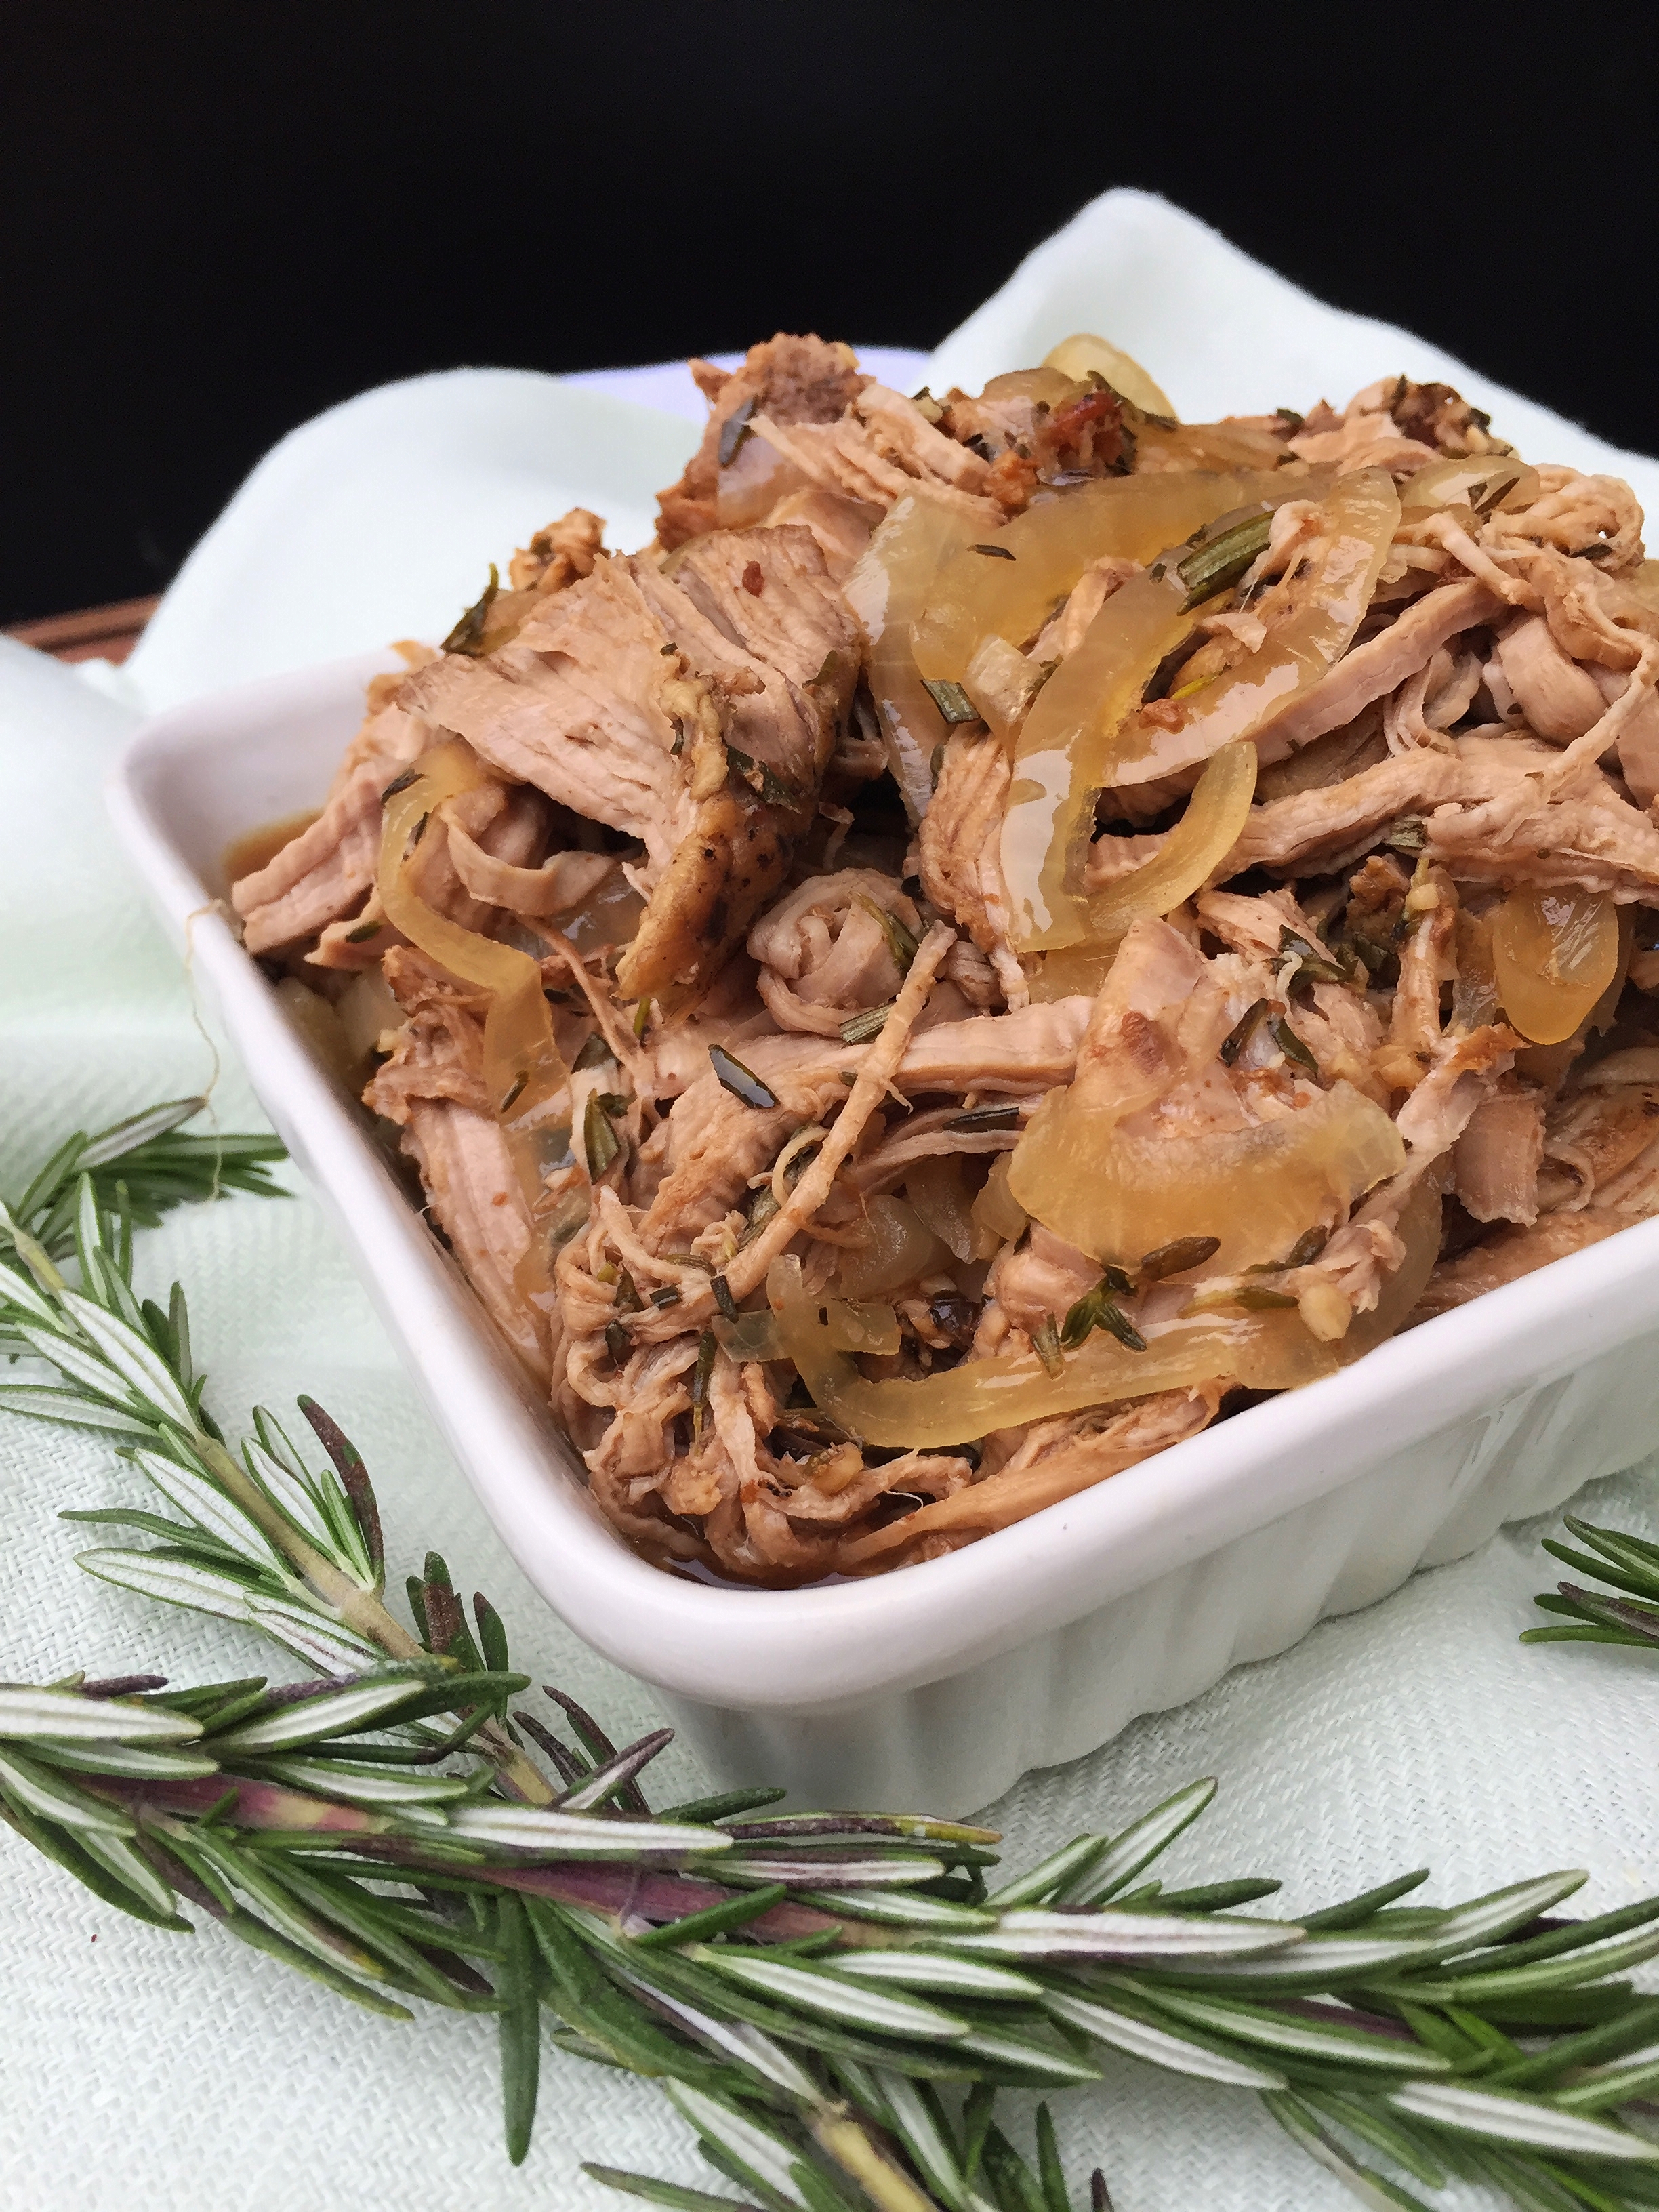
It's (unofficially) crock pot season! Warm, slow cooked meals are almost necessary when it gets dark and chilly by 7pm. Add to that a meal that takes minimal effort and you've got yourself a staple dinner in your meal planning rotation for this Fall and Winter!

Rosemary Balsamic Pork Tenderloin | My Engineered Nutrition

If you loved my Slow Cooker Carnitas as much as I do, then you are in for a treat with this Rosemary Balsamic Tenderloin. Normally with lean cuts of meat you can't cook them too long or you run the risk of drying out the meat. This crock pot recipe completely voids that rule. You are left with a pork tenderloin that is so incredibly tender it shreds with only the touch of a fork. 

Dig in! 

Rosemary Balsamic Pork Tenderloin | My Engineered Nutrition

Rosemary Balsamic Pork Tenderloin

Prep Time: 15 minutes

Cook Time: 6-8 hours

Servings: 6

Ingredients:

  • 1 tbsp coconut oil
  • 1.5 lb pork tenderloin
  • 1 medium onion, sliced into rings
  • 1/4 cup apple cider vinegar
  • 1/4 cup balsamic vinegar
  • 4 cloves garlic, minced
  • 1 tbsp rosemary, fresh, chopped
  • 1 tbsp thyme, fresh, chopped
  • 1 cup chicken bone broth
  • Salt and Pepper

*You will also need a crock pot for this recipe. 

Directions:

  1. Generously salt and pepper pork loin on all sides and set aside. Chop onions and layer them in bottom of crockpot. 
  2. In a large skillet over medium heat, melt coconut oil. Sear pork tenderloin on all sides to create a crust. Once all sides have been seared (about 10 minutes) transfer tenderloin to crockpot, placing on top of onions. Pour bone broth into skillet to de-glaze, scrapping up any delicious pieces that were left in the pan.  Carefully pour the broth into bottom of crockpot around the pork tenderloin, but not directly over the meat.
  3. Mix apple cider vinegar, balsamic vinegar and garlic together and then pour mixture over tenderloin. Lastly, sprinkle the fresh rosemary and thyme over pork and onions. 
  4. Place lid on crockpot and set heat to low. Cook for 6-8 hours, until tenderloin is tender and can easily be pulled apart with a fork. Once cooked, shred tenderloin within crockpot, mixing with onions and drippings. 

Nutritional Information (1 serving - approximately 7.25 oz cooked)

210 calories - 30 g Protein, 5.5 g Carbohydrates, 7.5 g Fat

Posted on November 6, 2015 and filed under Pork, Recipes.

Apple Cider Protein Donuts

Apple Cider Protein Donuts | My Engineered Nutrition

Somehow, someway, it is already November. 

I think we've (I've) done our fair share of celebrating pumpkins throughout October, but what about apples? They shouldn't be forgotten! Apples are just as much of a star to Fall as pumpkins are. My Pumpkin Protein Donuts were just SO good that I couldn't resist making my next batch of donuts.  

Apple Cider Protein Donuts | My Engineered Nutrition

Apples are made to be baked with.

Sure, they are delicious on their own or served chilled. But warm, soft apples are something special. Recently, I feel like I've seen an overload of Apple Cider Donuts on the Internet. Or maybe I've just been craving apples and donuts so it just seems like it... either way, I had to satisfy my craving.

Apple Cider Protein Donuts | My Engineered Nutrition

I think it is safe to say I more than satisfied my craving with this newest batch of pronuts. The baking process alone sends your nose into a state of euphoria. My kitchen was filled with a warm scent of apple cider, cinnamon, allspice and cloves - a wonderful accompaniment to the pronuts which were about to be consumed.

I've made these low fat, gluten-free and guilt-free with 6 grams of protein to boot! Welcome Fall and all its glory with a fresh batch of these donuts straight from the oven. 

Apple Cider Protein Donuts | My Engineered Nutrition

Apple Cider Protein Donuts

Prep Time: 30 minutes

Bake Time: 10 minutes

Servings: 12 Donuts

Ingredients:

Donuts:

  • 1-1/2 cup apple cider
  • 1/2 cup grated apple
  • 1/4 tsp allspice
  • 1-1/2 cup cassava flour (I talk about why I use this flour HERE!)
  • 1/2 cup vanilla whey protein isolate (I use True Nutrition and love their products)
  • 2 tbsp coconut palm sugar
  • 1 tsp baking powder
  • 1/2 tsp baking soda
  • 1-1/2 tsp cinnamon
  • 1/4 tsp nutmeg
  • 1/4 tsp salt
  • 1/2 cup nonfat greek yogurt
  • 1 tsp vanilla extract
  • 1 egg

Topping:

  • 1-1/2 tbsp butter, melted
  • 1 tbsp coconut palm sugar
  • 1 tsp cinnamon

Directions:

  1. In a small pot over medium high heat, combine apple cider, grated apple and allspice. Bring to a boil. Reduce heat and let simmer for 20 minutes. We want this to reduce to 1 cup of concentrate cider. After the 20 minutes, pour into a small ball to cool slightly.
  2. While the cider is simmering, preheat oven to 350°F. Prepare 2 donut pans by greasing with a bit of coconut oil. If you only have one pan, no worries! Just bake in batches. 
  3. Whisk together dry ingredients (flour, protein, sugar and spices) in a small mixing bowl and set aside.
  4. In a large bowl, whisk together the yogurt, vanilla extract and egg. Slowly pour Apple cider and grated apple into bowl, continuing to whisk. Slowly add dry ingredients and mix until a well incorporated batter has formed. This will be a bit of a wetter batter - that's ok!
  5. Transfer batter to a piping bag or large ziploc bag. Pipe batter into donut pan. Bake for 10 minutes or until a toothpick comes out clean when inserted.  
  6. Melt butter and set aside in a small bowl which is wide enough to fit a donut. Mix sugar and cinnamon together in another small bowl or on a plate. Once donuts have baked, allow to cool slightly on a large cutting board. Dip tops of donuts into melted butter and then lightly into the sugar/cinnamon mix.  

Faux-tato and Leek Soup

Faux-tato & Leek Soup | My Engineered Nutrition

Comfort food.

We all have our own definition of what comfort food is for us. Regardless of the dish, more than likely it is something warm and inviting. For me, stews and soups come to mind as 'comfort food'. Slow cooked, rich dishes that are filled with love. What this also means is that comfort food and healthy food very rarely apply to the same dish. 

Most recently, completely out of the blue, I had a craving for loaded baked potato soup. But again, while comforting for the soul, it is not comforting for my diet.

Faux-tato and

Potage Parmentier (Leek and Potato Soup) is a classic French soup. I used this basic recipe as inspiration for my loaded Faux-tato and Leek Soup. So...what is faux about this? 

No potatoes. (GASP!)

I've swapped the white potatoes for cauliflower in this soup, and I'm here to tell you this is just as delicious. I managed to keep the thick and creamy consistency while cutting the carbs and fat normally found in a potato soup, in half. Now THAT is some comfort food I can get down with! 

Faux-tato and Leek Soup | My Engineered Nutrition

Faux-tato and Leek Soup

Prep Time: 15 minutes

Cooking Time: 45 minutes

Servings: 10 cups **this makes a LOT of soup, recipe could easily be cut in half

Ingredients: 

  • 2 small heads of cauliflower, florets chopped (about 10 cups)
  • 1 large leek, white base thinly sliced and green tops removed and set aside
  • 1 cup celery, chopped
  • 4 cloves garlic, minced
  • 2 tbsp butter
  • 1 tsp salt
  • 1/4 tsp pepper
  • 2 sprigs of thyme, leaves removed and chopped
  • 2 bay leaves
  • 5 cups chicken bone broth - homemade or I love Pacific Organic Bone Broth when I'm in a pinch
  • 1 cup half and half
  • Optional toppings: reduced-fat or non-fat cheddar cheese and turkey bacon

Directions: 

  1. In a large pot, melt butter over medium heat. Add leeks, celery and garlic, cooking until soft and wilted, about 10 minutes. Don't rush this step, we don't want to caramelize the leeks and garlic. 
  2. Next, add cauliflower, salt, pepper, thyme, bay leaves and chicken broth. Increase to high heat and bring to boil, about 10 minutes.
  3. Once at a boil, reduce to a simmer and cover. Simmer for 15 minutes. 
  4. Remove bay leaves and blend the soup. This step can be done with either with an immersion blender or regular blender. If using a normal blender, remove soup and batches and blend, pouring smooth soup into a secondary bowl.
  5. Once all soup has been blended, return to large pot and add half and half. Bring to a boil and simmer for another 10 minutes, uncovered. 
  6. Serve as is or top with shredded cheese and turkey bacon!

Nutritional Information (1 cup)

110 calories - 7.5 g Protein, 9.5 g Carbohydrates (2.9 g Fiber), 4.8 g Fat


Posted on October 29, 2015 and filed under Recipes, Soup.

Pumpkin Bread

Pumpkin Bread | My Engineered Nutrition

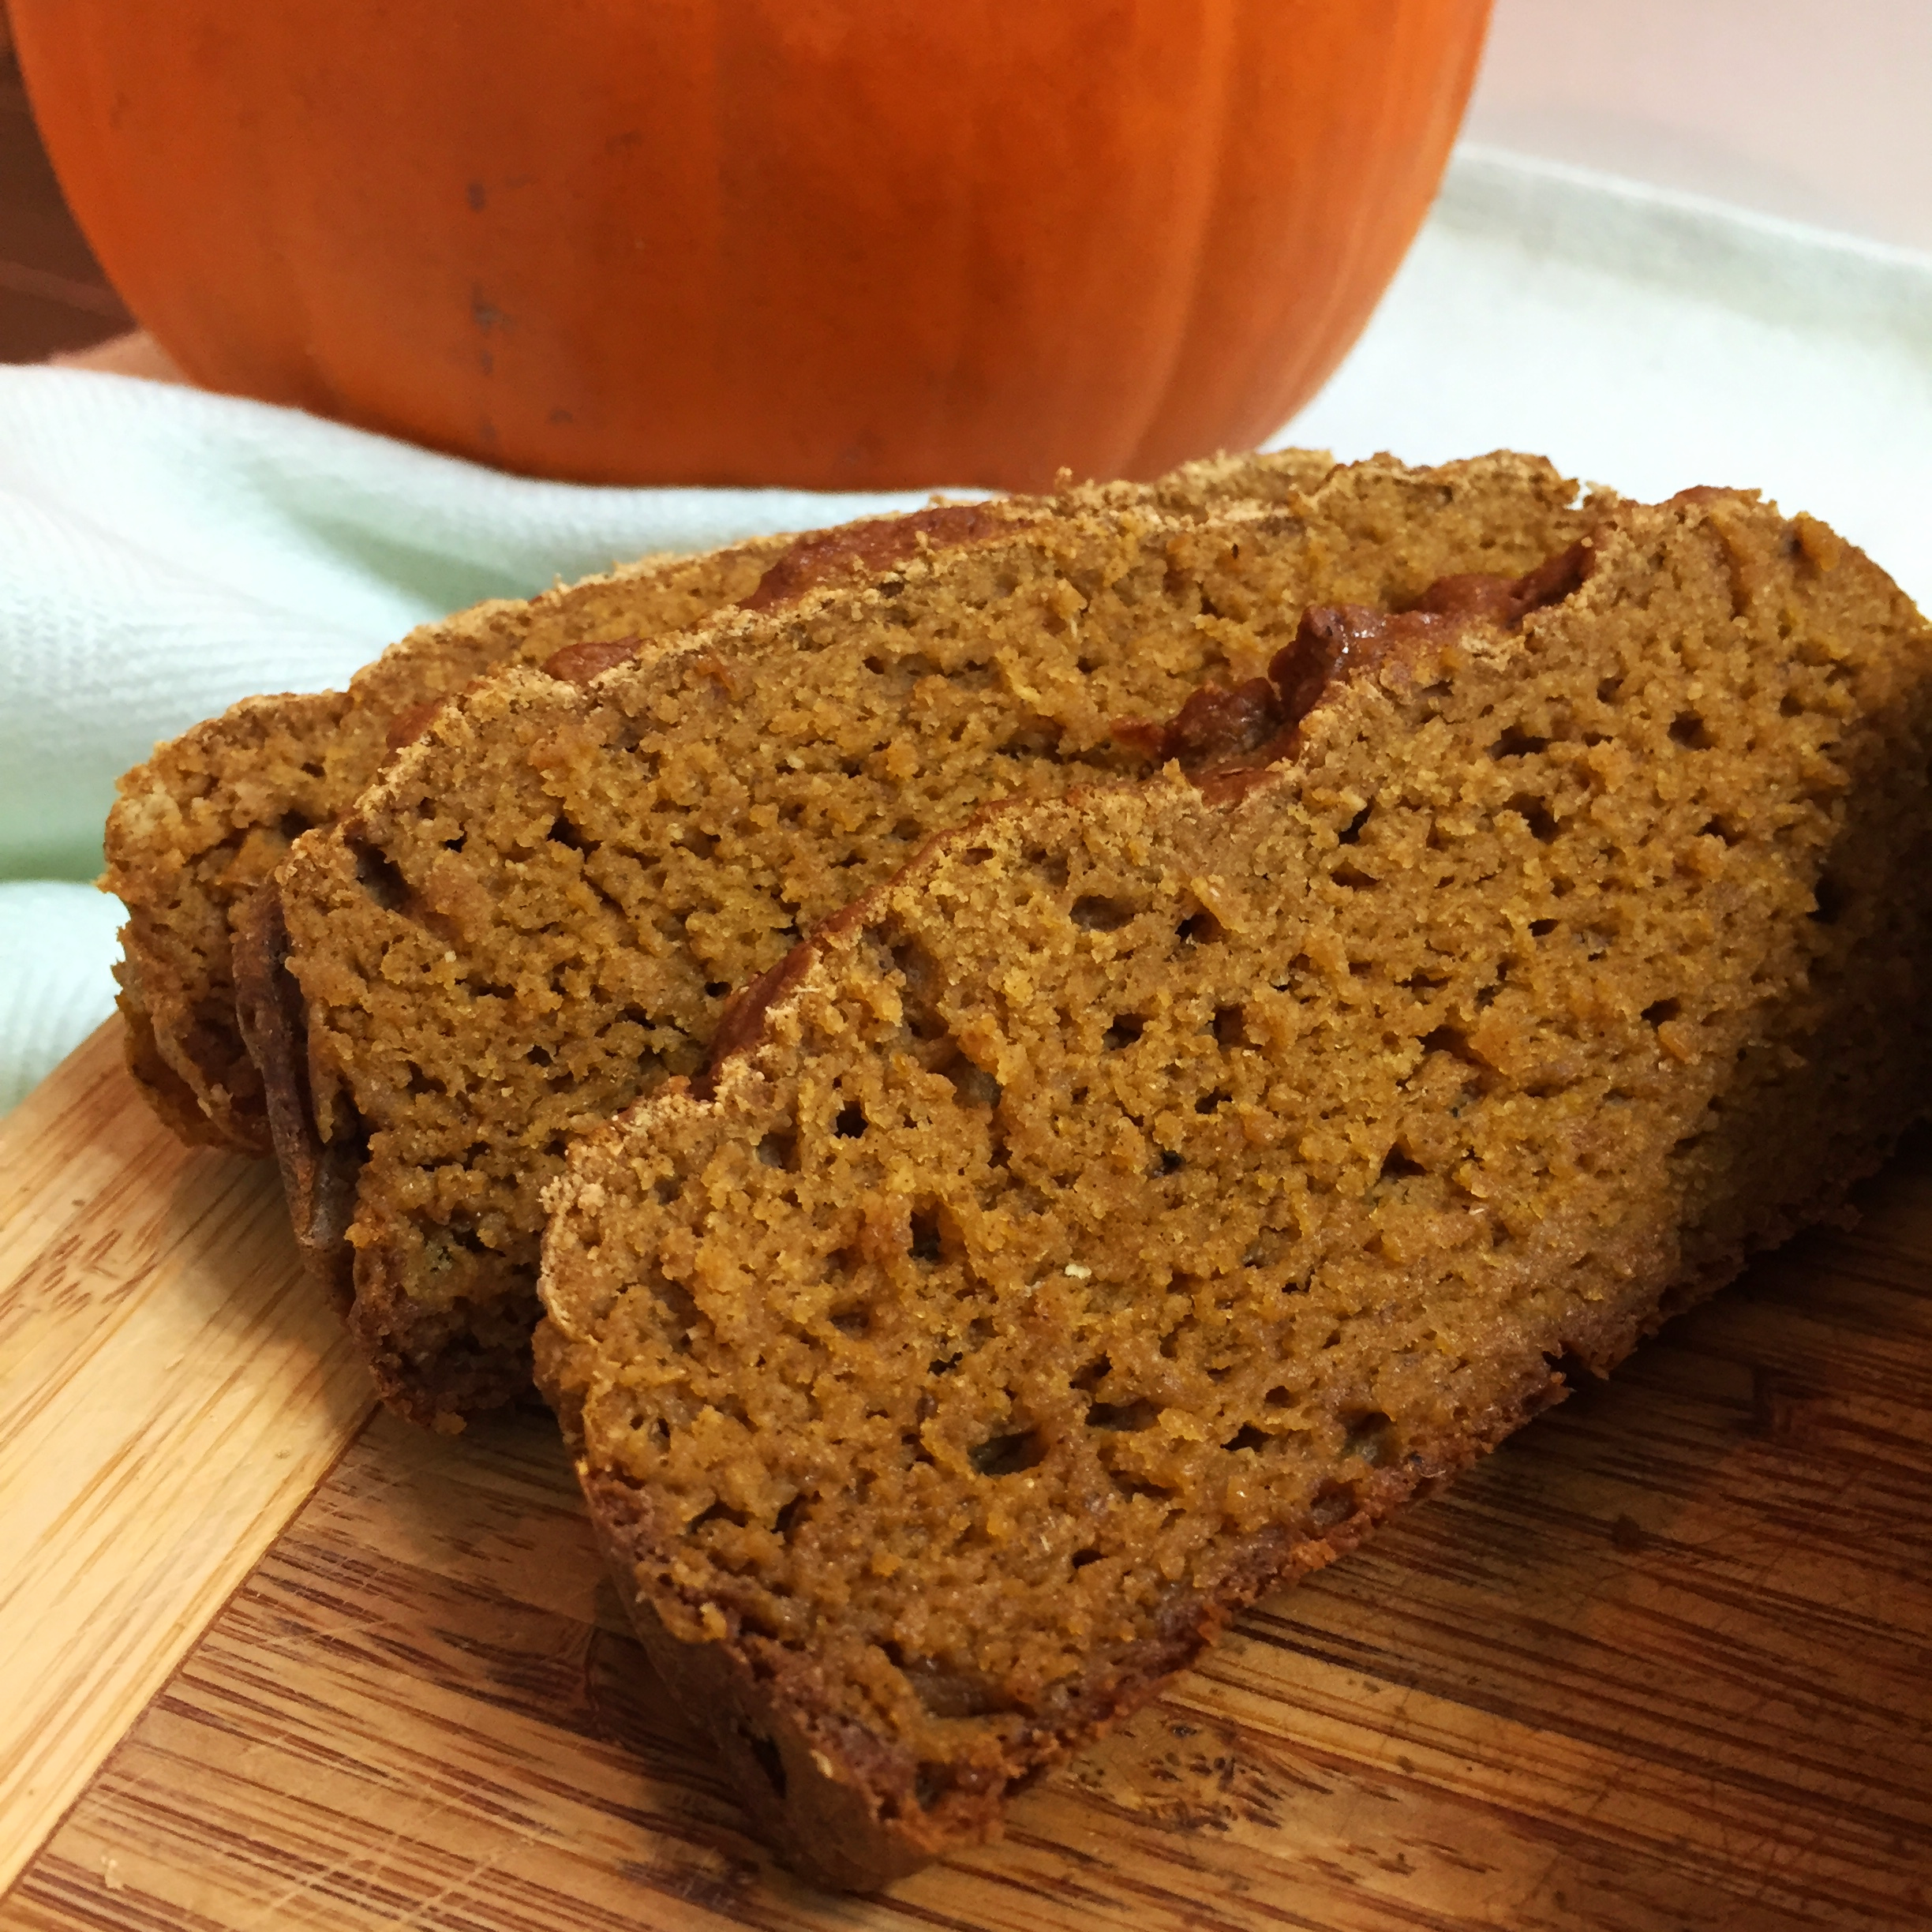
WARNING: This bread is HIGHLY addictive. May cause urges to eat entire loaf in one sitting.

You think I'm kidding? Wait until you have one bite of this deliciously moist, dense, pumpkin-spice-filled loaf of goodness. 

Did I mention this is also low fat, dairy free and gluten free? 

Pumpkin Bread | My Engineered Nutrition

I made this merely on a whim. With my competition prep in full swing, I wanted to create a dessert that could fit within my nutrition plan. This meant something that was low in fat for my training days, but at the same time not super high in carbohydrates either. Because I absolutely hate wasting food, I first investigated what I had in my refrigerator - an open can of pumpkin puree and an overly ripe banana. In addition to that, I also had a few newly acquired loaf pans (thanks mom!) that I was itching to use. I saw a great opportunity for a low fat treat as pumpkin and banana are regularly used as butter and oil substitutes in baking!

Baking is always tricky to do without a recipe, at least for me. Add in the fact that this was a low fat recipe and gluten free, I had absolutely no idea how this would turn out. The base of this bread is cassava flour. This flour has changed the way I approach gluten free baking. Cassava is a hard root vegetable, also called yuca (not to be confused with yucca), arrowroot or tapioca. This flour is 100% grain, nut and gluten free! Cassava flour, flour made from the cassava root, is almost indistinguishable from all-purpose flour. While I use cassava flour in my recipe (and I highly recommend and encourage you to give it a try!) you could probably substitute an alternative gluten-free flour blend like Cup 4 Cup, however not almond or coconut flour as they have very different baking characteristics. If you absolutely must have wheat based all-purpose, I'm sure that will work as well, although I haven't tried it with different flours.

This bread isn't overly sweet, which is just the way I like it. In fact, I've only added 1/4 cup of unrefined coconut palm sugar. When I was researching recipes for pumpkin bread I was surprised to find that most had upwards of 2 cups refined sugar! Not for me! The majority of the sweetness comes from a ripened banana - nature's sweetener. Rest assured, with all natural ingredients this is a guilt free treat! 

Pumpkin Bread | My Engineered Nutrition

Pumpkin Loaf

Prep Time: 10 min

Baking Time: 45-55 minutes

Servings: 12

Ingredients: 

  • 1-1/2 cup cassava flour (or Bob's 1-to-1 Gluten Free Flour or All-Purpose Flour works just as well!)
  • 1/2 tsp salt
  • 1 tsp baking soda
  • 1/2 tsp baking powder
  • 1-1/2 tsp pumpkin pie spice
  • 1/4 cup coconut palm sugar
  • 1 ripened banana (brown spotted) 
  • 1 cup pumpkin purée 
  • 2 eggs

Directions: 

  1. Preheat oven to 350F. Line a loaf pan with parchment paper or grease with a small bit of butter or coconut oil. 
  2. Whisk together cassava flour, salt, baking powder, baking soda and pumpkin pie spice in a small mixing bowl. Set aside. 
  3. In a large mixing bowl, beat banana and coconut palm sugar with a hand mixer or in a stand mixer until banana is 'creamed', much like if you were beating butter and sugar. Do this until light and fluffy and sugar is well incorporated.
  4. Add eggs, one at a time, and beat well until fluffy, about 5 minutes. Add pumpkin and mix to incorporate.
  5. Beat flour mixture into wet ingredients. Pour batter into prepared loaf pan.
  6. Bake for 45-55 minutes or until inserted toothpick comes out clean. Remove pan from oven and allow to cool 10 minutes in pan before removing. After 10 minutes, remove from pan to a board or plate and all to cool completely.

Nutritional Information (1 slice, total loaf makes 12 slices) 

90 calories - 1.5g Protein, 18g Carbohydrates, 1g Fat