Posts tagged #Gluten Free

Low Carb Protein Biscuits

Low Carb Protein Biscuits | My Engineered Nutrition

In the time since I've started creating recipes with protein powders, I've experimented with a wide variety of different powder types. While each powder yielding a slightly different end product, but one constant remained: they were all sweet baked goods. This isn't really a surprise, however, given that most of the time you think of flavored powders, which have also been sweetened.

The beauty of baking with protein powder is the ability to substitute a flour with protein powder, sometimes significantly reducing the carbohydrates in a given recipe. Why should that only be limited to desserts and breakfast items? 

I've been on a mission answer this question by creating a savory protein-packed baked good!

Low Carb Protein Biscuits | My Engineered Nutrition

Not only is this recipe the FIRST of my experiments in the savory, non-sweet realm of baking with protein powder, it is also my first successful recipe attempt using Beef Protein Isolate!

Now, before you go getting skeptical of this recipe because of the fact it uses a protein powder you likely aren't familiar with, let me clear the air - NO, this does not taste like BEEF.

Low Carb Protein Biscuits | My Engineered Nutrition

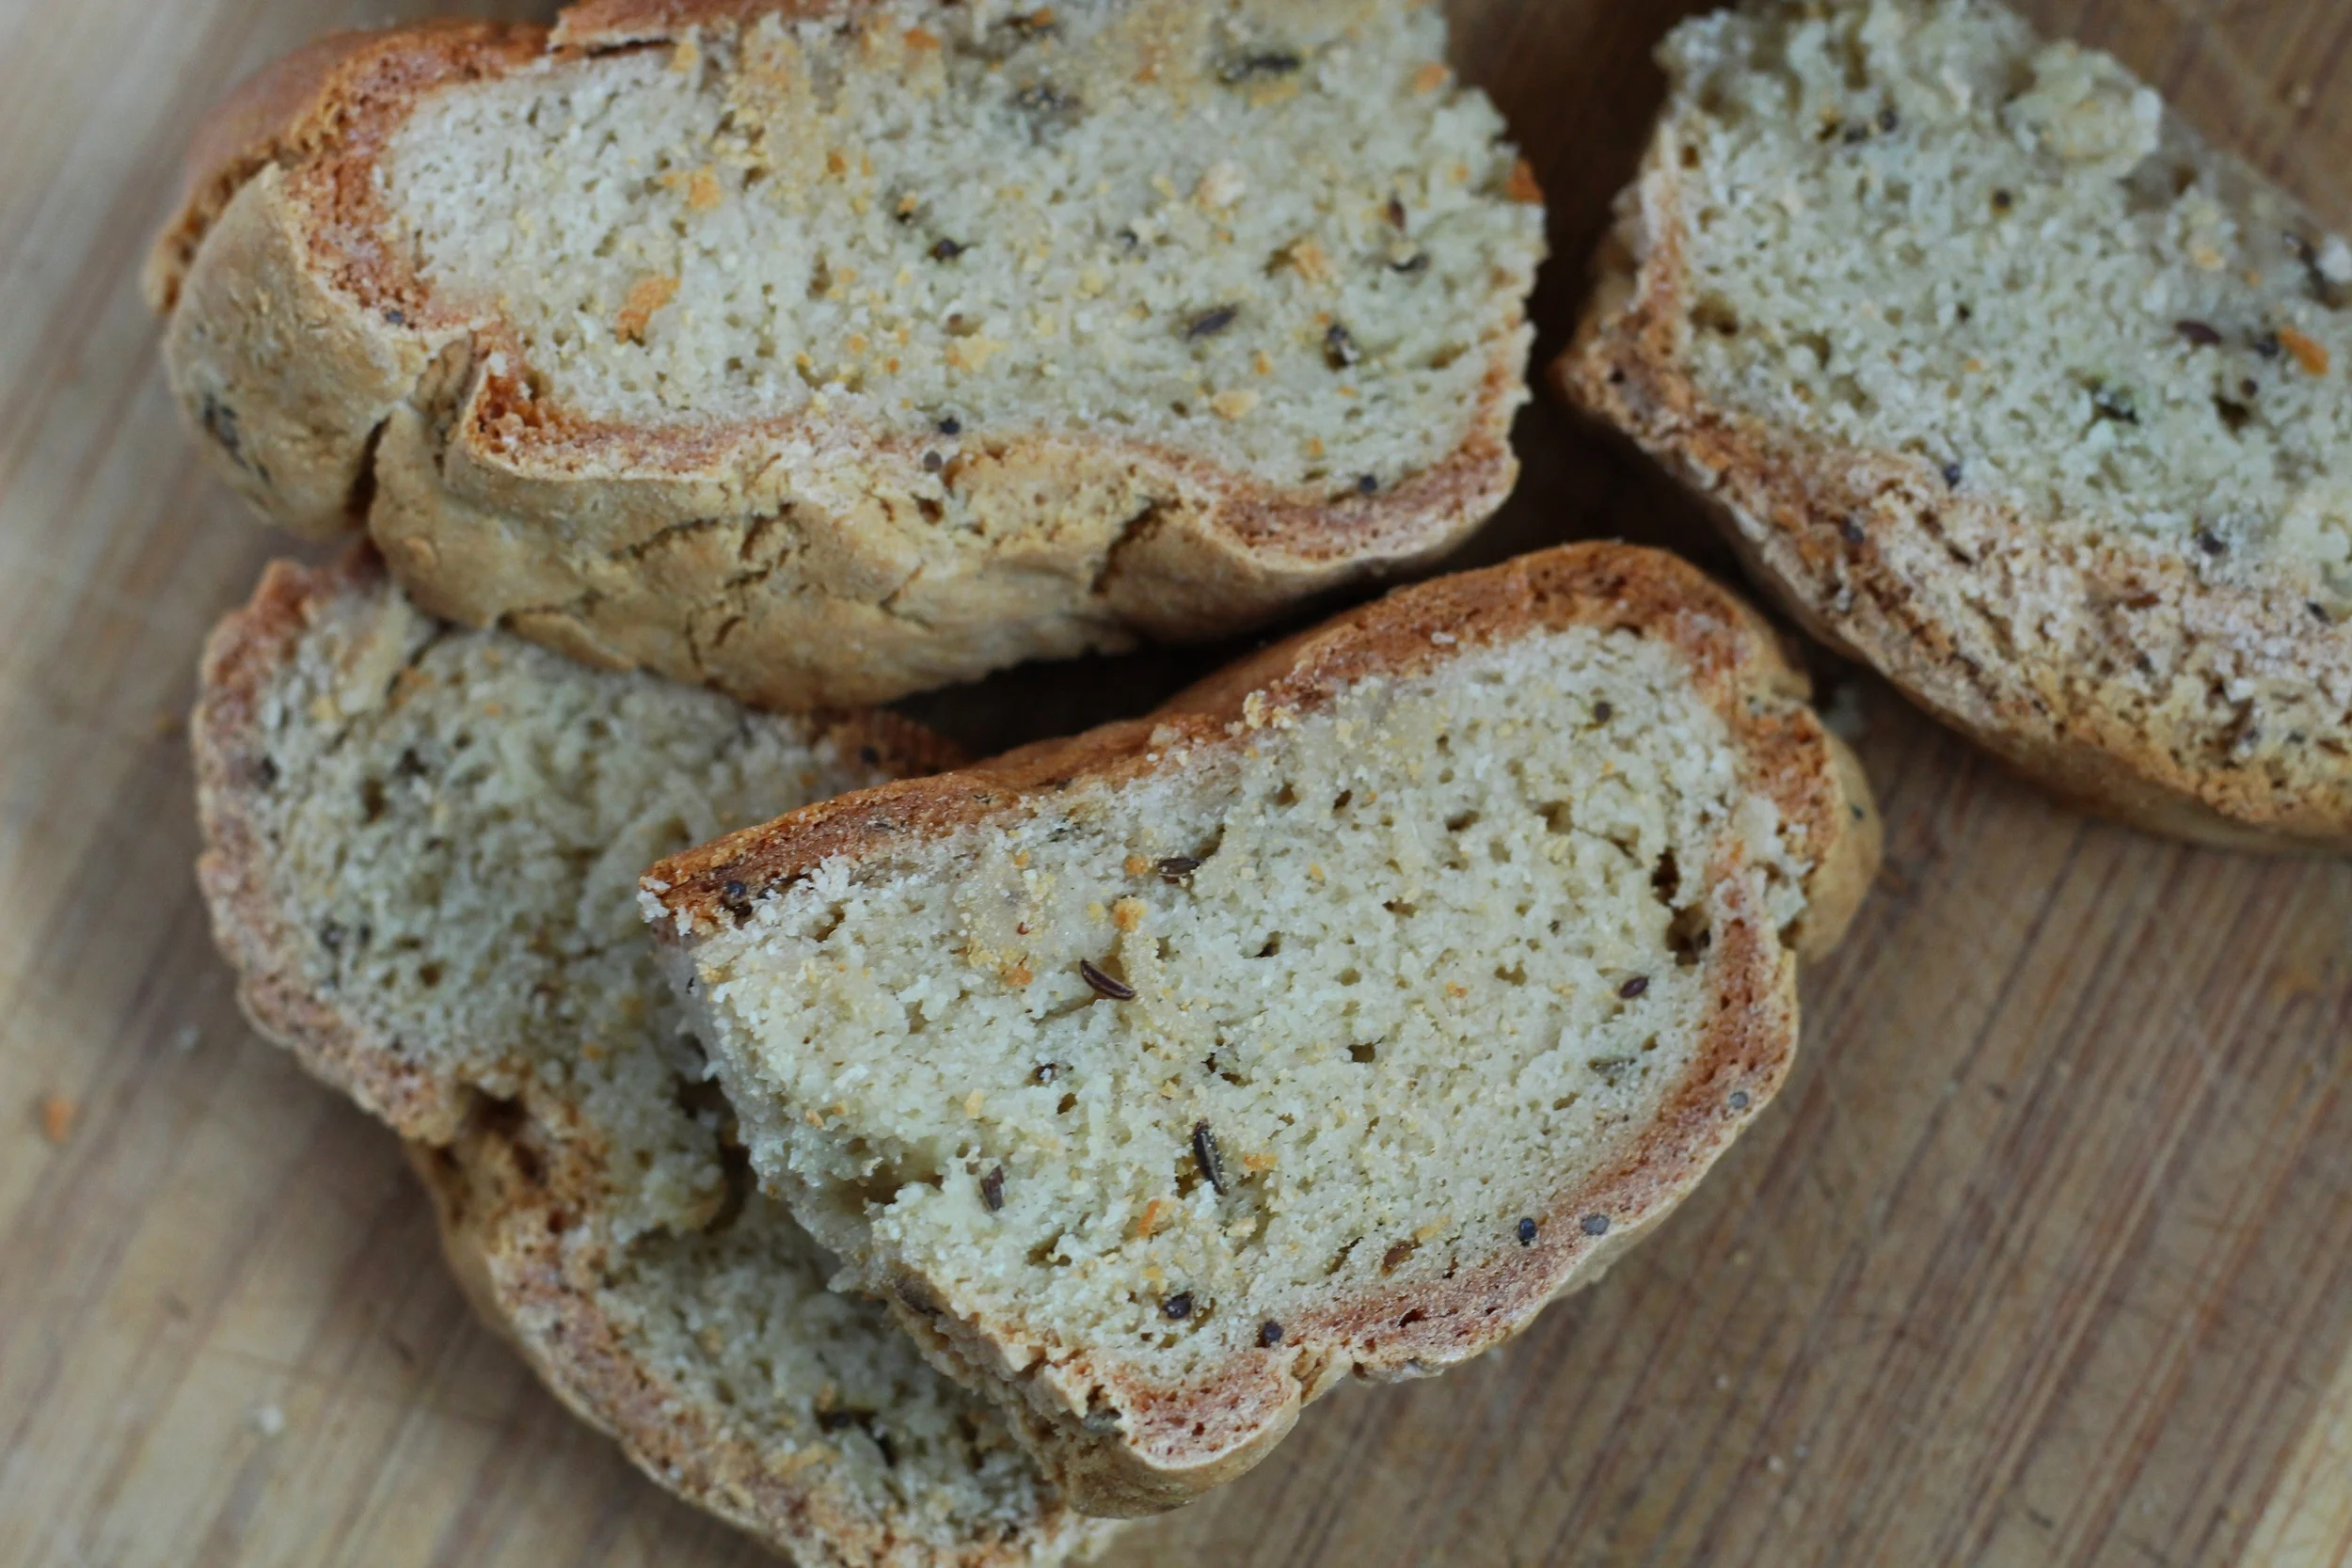
In fact, I've found that unflavored Beef Protein Isolate is actually quite neutral in taste. This pairs so very nicely with the other main star of these biscuits: coconut flour. I personally love baked goods that use coconut flour - I'm a huge fan of the nutty flavor it brings to the final product. Coconut flour is gluten free, low in carbohydrates and high in fiber! Win win win!

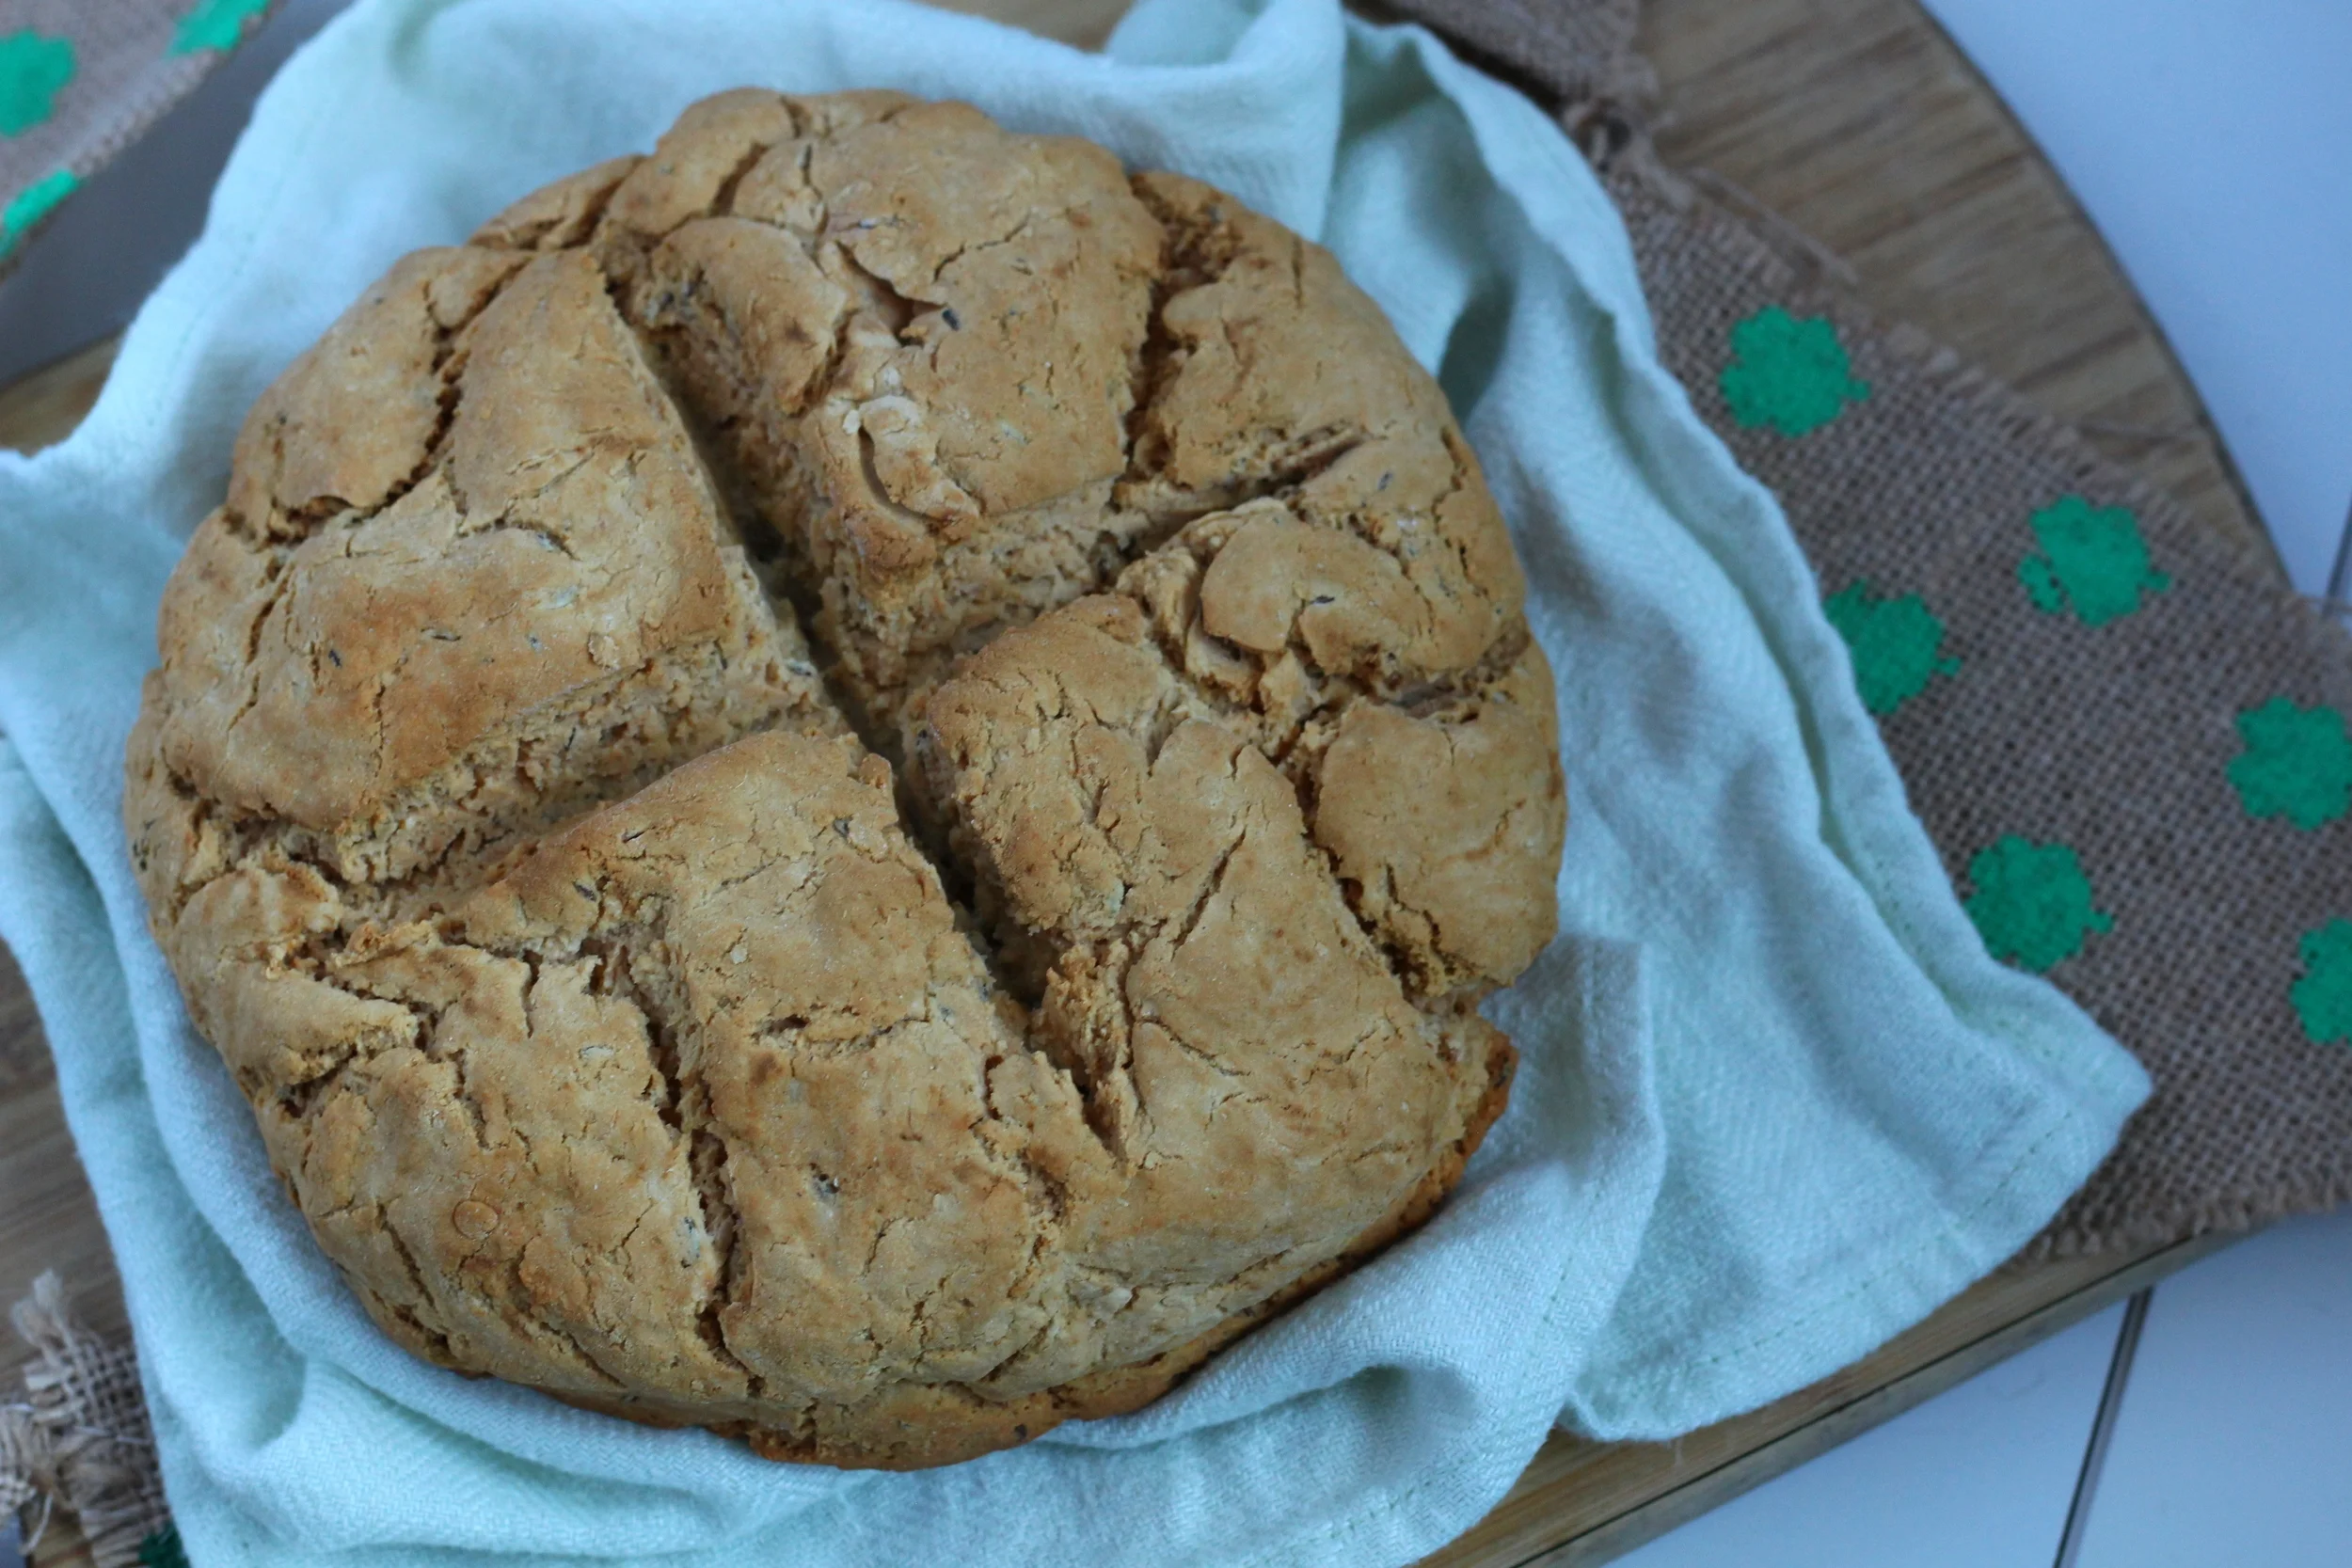
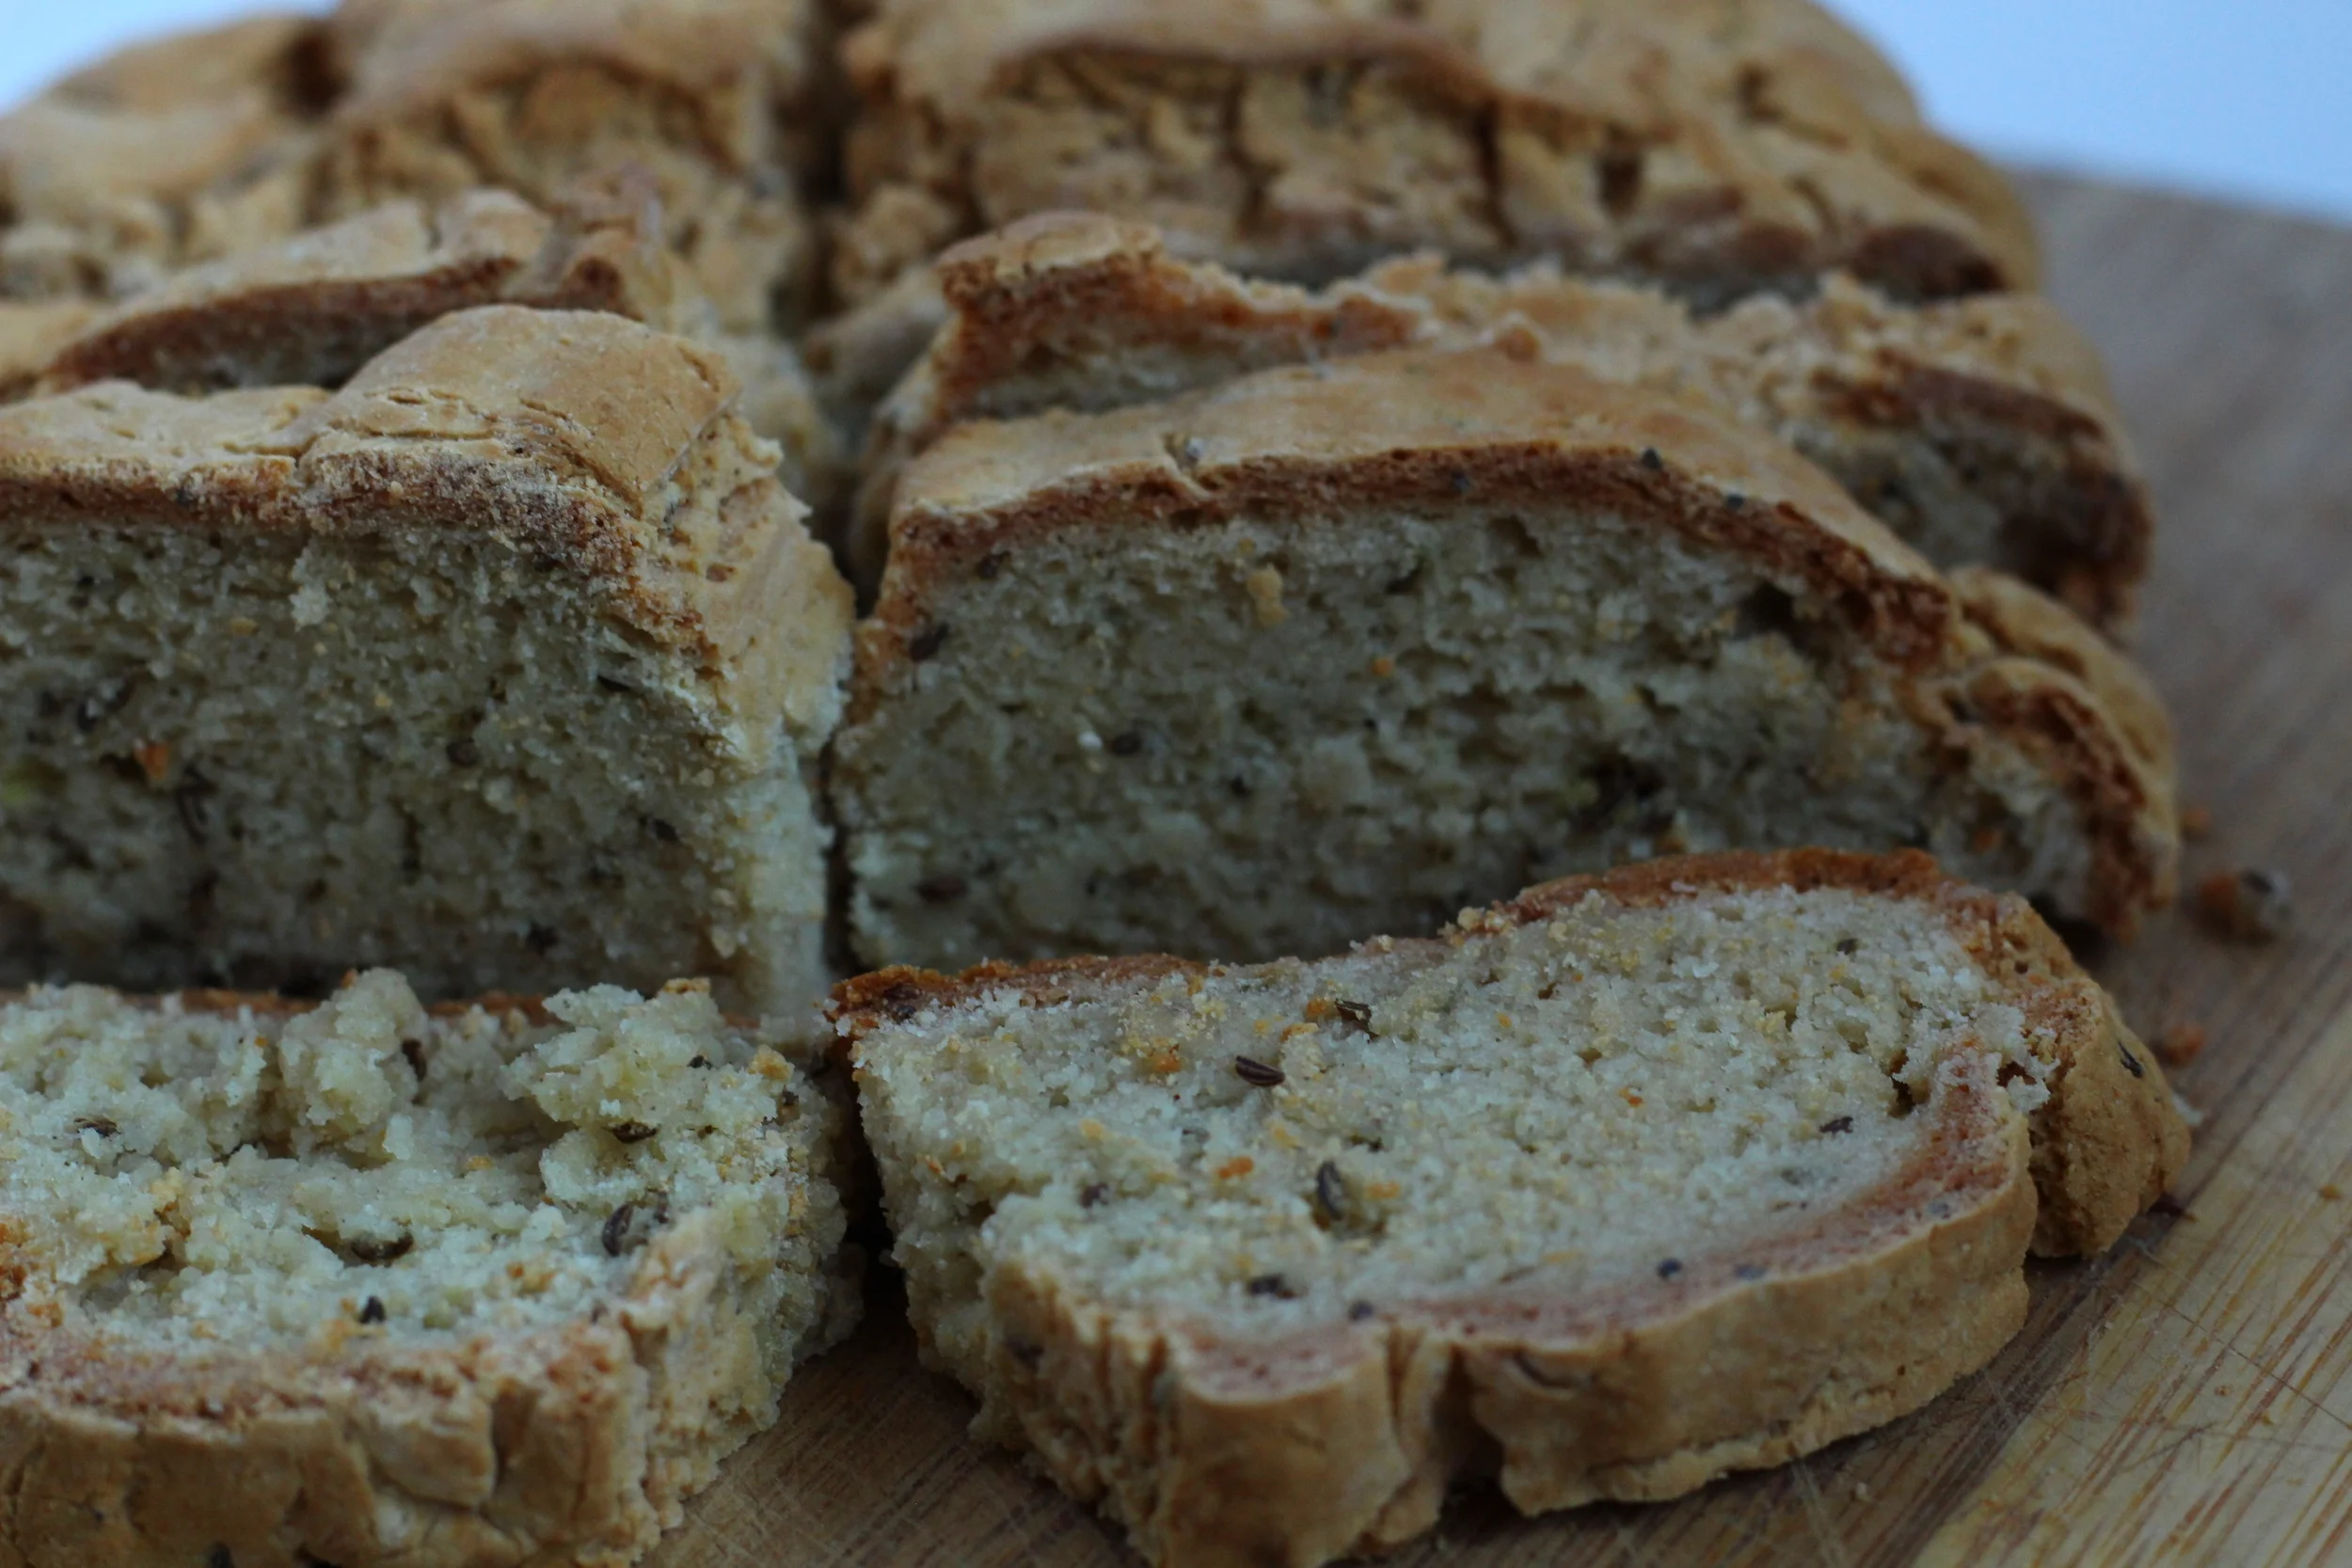
These biscuits seriously couldn't be simpler. I know many times baking can be daunting because of the precise measurements and detailed preparation. Not with these. It is as easy as mixing the wet and dry ingredients together into a dough (Warning: it will be sticky!) and forming said dough into biscuits. That's it! It is important to not the main difference between gluten free baking from baking with a wheat flour: the absence of gluten also means that your baked good won't rise or expand as much (or at all) as you may be used to. Simply put, the shape and size you make your biscuits pre-baking is how they will look post-baking. 

Low Carb Protein Biscuits | My Engineered Nutrition

The nutritional information for each biscuit is so incredible that you will have a hard time not pacing yourself when it comes to eating these! They are high and protein and fiber plus low in carbs and fat. They are great on their own but are also a fantastic option for creating a sandwich and using the biscuit cut in half as a bun.

Here's your solution for wanting to have your [biscuit] and eat it too! 

Low Carb Protein Biscuits | My Engineered Nutrition

Low Carb Protein Biscuits

Prep Time: 10 minutes

Cook Time: 20 minutes

Servings: 4 biscuits

Ingredients: 

  • 1/4 cup Beef Protein Isolate (1 scoop), unflavored
  • 1/2 cup coconut flour 
  • 1 tsp baking powder
  • 1/2 tsp salt
  • 2 eggs
  • 1/4 cup water

Baking Accessories:

  • Baking Sheet
  • Parchment Paper 

Directions:

  1. Preheat oven to 375°F. Prepare baking sheet by lining with parchment paper. 
  2. In a mixing bowl combine your dry ingredients: beef protein, coconut flour, baking powder and salt. Whisk to fully mix ingredients. Add eggs and water to the bowl and whisk until batter is smooth. This can be done in a stand mixer, with an electric hand mixer or by hand with a whisk.
  3. When all is combined, dough will be sticky - don't fret! Form the dough into 4 equal biscuits on your parchment paper lined baking sheet. Because this is a gluten free batter, the biscuits won't rise much from the original shape you form them into. 
  4. Place in oven to bake for 18-20 minutes. Biscuits are done baking when a toothpick inserted into the center of a biscuit comes out clean. Serve immediately or allow to cool completely and store in an air tight container for later.

Special Note: I've created this recipe based upon using Beef Protein Isolate. I have not tried other powder types so I can not guarantee the recipe will turn out the same using a different powder type (i.e. whey, pea, egg, etc.)

Nutritional Information (1 biscuit):

125 calories - 12 g Protein, 8.5 g Carbohydrates (5 g Fiber), 4.5 g Fat

Fluffy Protein Pancakes

Fluffy Protein Pancakes | My Engineered Nutrition

Protein pancakes are usually one of the first recipes health-minded individuals try their hand at when venturing into the world of cooking with protein powder. Seems simple enough right?

Here's the thing - I've never liked eating protein pancakes. They (typically) turn out rubbery, flat or hard. Honestly, I'd rather just have the real deal than a mediocre alternate. 

Until these.

Fluffy Protein Pancakes | My Engineered Nutrition

Here's the thing - in the past, I've made pancakes using whey protein however, not all protein powders are created equal! 

These pancakes (these fluffy, big, fat pancakes) are made using Egg White Protein

BINGO! 

Fluffy Protein Pancakes | My Engineered Nutrition

It makes perfect sense.

Egg white protein powder reacts to heat similarly to the way eggs do when baking. Don't get me wrong, I still love baking with whey protein, but some recipes just work better with different protein powders! Whey protein doesn't seem to like high heat (hence rubbery or hard baked goods that are cooked for too long), but after my first experiment with egg white protein it seems this powder can stand up to the heat much more nicely. I'm excited for my baking experiments with this powder!

If you've never tried Egg White Protein Powder, here is your chance! True Nutrition has a great selection of protein powders and an exceptional Egg White Protein. As an added bonus, use my code 'MYENG' to receive 5% off your order!

Fluffy Protein Pancakes | My Engineered Nutrition

Fluffy Protein Pancakes

Prep Time: 5 minutes

Cook Time: 2 minutes

Servings: 6 pancakes

Ingredients: 

  • 1/2 cup Egg White Protein Powder (2 scoops), unflavored or vanilla
  • 1/2 cup flour (I use 1-to-1 Gluten Free Baking Flour, but regular flour would work as well)
  • 1 tbsp coconut palm sugar
  • 1 1/2 tsp baking powder
  • 1/2 tsp baking soda
  • 1/2 tsp salt
  • 1 tbsp butter, melted
  • 3/4 cup reduced fat milk, 2%
  • Additional butter or oil for making pancakes
  • Optional: Pure maple syrup for serving!

Directions:

  1. In a mixing bowl combine your dry ingredients: whey protein, flour, coconut palm sugar, baking powder, baking soda and salt. Whisk to fully mix ingredients. Add butter and milk to the bowl and whisk until batter is smooth.
  2. Heat a lightly greased griddle or frying pan over medium heat - you don't want the pan too hot that it burns your pancakes! Scoop batter (approximately 1/4 c) onto pan. Cook the first side until you begin to see bubbles form, about 1 minute. Flip and continue to cook until both sides are browned, about another 30-45 seconds. Serve while hot! 

Nutritional Information (1 pancake):

115 calories - 10 g Protein, 13.5 g Carbohydrates, 2.5 g Fat

Parmesan Garlic Croutons (Gluten-Free)

Parmesan Garlic Croutons | My Engineered Nutrition

Croutons are arguably the best part of a salad. Toasty, crunchy, garlicky cubes of bread which still have that chewy, soft center.

Let there be no mistake - these are not qualities you will find in store bought boxed croutons. Oh no, the best croutons are always homemade. 

Parmesan Garlic Croutons | My Engineered Nutrition

I personally cannot stand boxed croutons.  The are usually hard enough to break a tooth on and are covered in a powdered flavoring of some kind. If I'm going to be putting croutons on my salad, the only way that is happening is if they are homemade. Croutons are SO easy to make and I'm going to go ahead and say that 100% of the time, they will taste better than anything store bought (gasp!).

While any loaf I bread technically can be turned into a crouton, I prefer to use BreadSRSLY Gluten-Free Sourdough. I HIGHLY recommend using this bread as not only is it some of the best sourdough I've ever tasted...it is also gluten-free. Win-Win! 

Parmesan Garlic Croutons | My Engineered Nutrition

Aside from the bread, you only need garlic, olive oil and Parmesan cheese. It couldn't be any more simple than that.

I guarantee you won't ever think about buying boxed croutons again after you make these once. Throw these on a salad, your favorite bowl of soup...or simply eat them freshly toasted and warm out of the oven. I don't judge! 

Parmesan Garlic Croutons | My Engineered Nutrition

Parmesan Garlic Croutons (Gluten-Free!)

Prep Time: 5 minutes

Bake Time: 15 minutes

Servings: 4

Ingredients: 

  • 3 cups sourdough bread (gluten free), cut into 1" cubes - I recommend BreadSRSLY gluten-free sourdough, but any sourdough would do
  • 4 cloves garlic, minced
  • 1 tbsp extra virgin olive oil
  • 4 tbsp Parmesan cheese, grated

Baking Accessories:

  • Baking Sheet
  • Parchment Paper 

Directions:

  1. Preheat oven to 375°F. Prepare baking sheet by lining with parchment paper. 
  2. Slice bread into 1" cubes. This should yield about 3 cups of bread. In a large mixing bowl, toss bread with olive oil and garlic. 
  3. Transfer bread to baking sheet and bake for 5 minutes. After 5 minutes, toss croutons on baking sheet and return to oven for another 5 minutes. 
  4. After a total of 10 minutes of baking, sprinkle cheese over croutons and return to oven for a final 5 minutes to melt cheese and finish toasting croutons. 
  5. Remove from oven and add to dish of your choice. If you would like to reserve for later use, these keep well stored in an airtight container. 

Nutritional Information (1 serving):

155 calories - 4 g Protein, 23 g Carbohydrates, 5.5 g Fat

Posted on May 26, 2016 and filed under Recipes, Vegetables/Sides, Baking.

Gluten Free Irish Soda Bread

Gluten Free Irish Soda Bread | My Engineered Nutrition

One more recipe, just in time, for St. Patrick's Day!  Yesterday I posted that warm and hearty Cabbage, Ham and Potato Soup and you know what goes perfectly with it? THIS Irish Soda Bread! I'll have to admit, I am by no means a connoisseur of Irish soda bread. I've had it a time or two, but since I stay away from gluten it isn't a frequent food I consume.

I wanted that to change, so I set out determined to make a gluten free version of this simple bread in honor of the holiday.

Gluten Free Irish Soda Bread | My Engineered Nutrition

It took me a time or two (or five) to get a bread that I was satisfied with. The star of this bread is Bob's Red Mill Gluten Free 1-to-1 Baking Flour. This flour, which is a blend of various gluten-free flours, is amazing to bake with.  The basic recipe for the bread is quick and simple. Flour, buttermilk and baking soda, which is the levaning agent instead of yeast. I've adapted the original formula some and have swapped Greek yogurt in place of buttermilk and have added caraway seeds (I love that Rye bread flavor!).

Gluten Free Irish Soda Bread | My Engineered Nutrition

This bread is dense and savory. If you are expecting a light and airy slice of bread, this is not the loaf for you. If, however, you are looking for a thick and dense slice, able to withstand dipping into a hearty soup - look no further! 

Gluten Free Irish Soda Bread | My Engineered Nutrition

Gluten Free Irish Soda Bread

Prep Time: 15 minutes

Bake Time: 50-60 minutes

Servings: 16 slices

Ingredients: 

Baking Accessories:

  • Baking Sheet
  • Parchment Paper 

Directions:

  1. Preheat oven to 375°F. Prepare baking sheet by lining with parchment paper. 
  2. In a large mixing bowl combine flour, salt, baking soda and baking powder.
  3. In a medium bowl combine Greek yogurt with water and whisk until well incorporated. In a small bowl crack egg and whisk. Add both wet ingredients to the dry in the large mixing bowl. Initially, stir with a spatula and then use hands until dough forms into a ball. 
  4. Once a ball has formed, turn out onto a floured surface and add caraway seeds. Kneed until caraway seeds are even incorporated throughout the dough. You may need to add a bit of water if the dough is not holding together - carefully add 1 tbsp of water at a time! If dough becomes to sticky and wet, dust with a small bit of flour. Form into a disc about 8" in diameter.
  5. Transfer to prepared baking sheet. Bake for 50-60 mins or until a toothpick inserted into bread comes out clean and you hear a hollow sound when you knock on the bottom of the loaf. Allow to cool for at least 10 minutes before slicing or bread may be too warm and gummy. Serve warm or store in air-tight container for later. I find it is easiest to slice this loaf by cutting in half and then cutting into slices, rather than trying to slice the original diameter of loaf.

Nutritional Information (1 slices):

125 calories - 3.5 g Protein, 27 g Carbohydrates, 0.3 g Fat

Posted on March 16, 2016 and filed under Recipes, Baking.

Banana Chocolate Chip Protein Muffins

Banana Chocolate Chip Protein Muffins | My Engineered Nutrition

In case you haven't heard, I am now a Guest Blogger and Athlete for True Nutrition! This is such an exciting opportunity for me as I've been using True Nutrition products for years. I've already created a handful of recipes using various True Nutrition protein powders and you can now find all of those and future recipes on the newly created Protein Powder page!

So what exactly does being a Guest Blogger entail, you may ask? It means I get to flex my creativity by using the wide range of True Nutrition proteins in new tasty recipes!

Let's get started, shall we?

Banana Chocolate Chip Protein Muffins | My Engineered Nutrition

Bananas are a staple grocery item in my house, as I love eating them after I lift. The problem is, sometimes I overbuy and I end up with overly ripened bananas that I don't want to waste...but also lose their appeal to eat as is.

Enter: Baking

Baking with bananas is amazing because:

1. They act as a natural sweetener (no added sugar required for these muffins!)

2. They can be used as a substitute for butter or oil in baking, thus lightening up the fat

3. They keep your baked goods incredibly moist and tender

Banana Chocolate Chip Protein Muffins | My Engineered Nutrition

Baking with whey protein can be tricky. It isn't a simple 1-for-1 substitution with flour in a recipe. Often times baked goods using whey protein turn out spongy or dry, neither of which is a way I want to describe a muffin! The key is to make you balance the dry ingredients with enough wet, and ensure there is some cooking fat. Luckily, the bananas in the recipe play a roll as both, adding moisture and tenderness to your baked goods. In addition to vanilla whey protein, I'm also using coconut and almond flours for my "dry", which will help give volume to our magnificent muffins.

The result? Flavorful tender muffins that are hardly distinguishable from its non-protein packed alternative. Not only are these high in protein, they are also gluten-free and low in fat! They are amazing with your morning coffee as a great breakfast option, especially if you are looking for a way to shake up your normal routine. Or, if you are more like me and don't eat breakfast normally, these are an amazing guilt free dessert option, especially when warmed and served along side a scoop of ice cream!

Banana Chocolate Chip Protein Muffins

Prep Time: 15 minutes

Bake Time: 20 minutes

Servings: 8 muffins

Ingredients: 

Baking Accessories:

  • Muffin tin
  • Muffin/Cupcake liners

Directions:

  1. Preheat oven to 375°F. Prepare muffin tin with 8 liners. In a mixing bowl combine your dry ingredients: whey protein, coconut flour, almond flour and baking powder. Set aside.
  2. In a stand mixer or large mixing bowl with hand mixer, combine your wet ingredients: banana, eggs and vanilla. Mix at medium speed until light and fluffy. Add dry ingredients and mix and medium speed until well combined. Add chocolate chips and hand fold into batter with spatula.
  3. Spoon batter evenly among 8 muffin liners. Bake for 20 mins or until a toothpick inserted into muffin comes out clean. Allow to cool 5 minutes in tin before eating...this is the hardest part of the whole recipe! Serve warm or store in air-tight container for later. 

Nutritional Information (1 muffin):

140 calories - 10 g Protein, 15 g Carbohydrates, 4.5 g Fat

Posted on March 2, 2016 and filed under Breakfast, Sweet Treats, Protein Powder, Baking.