Posts tagged #Football

Super Bowl Snacks: Healthy Eats for the Big Game!

Avid football fan or not, I'm going to bet you have a Super Bowl Party to attend this weekend. And let's be honest, unless you are a fan of the two teams playing, this Sunday is much more a gathering for good food, ranking your favorite commercials during the Super Bowl and of course, watching the Halftime Performance. 

Worried about how you are going to stay on track with healthy alternatives during Gametime? Fear not, My Engineered Nutrition is to the rescue! I've gather my FAVORITE healthy recipes perfect for watching Big Game. You'll be a hit at your Super Bowl Party if you bring one of these dishes...and no one will be the wiser that it's healthy!
Buffalo Chicken Nachos

Buffalo Chicken Nachos | My Engineered Nutrition

If someone were to ask me "what is the first food that comes to mind when you think of football", my answer without hesitation would be BUFFALO CHICKEN WINGS. They just go with football like peanut butter and jelly. Wings, a basket of fries and beer - doesn't exactly scream "healthy choices", right? 

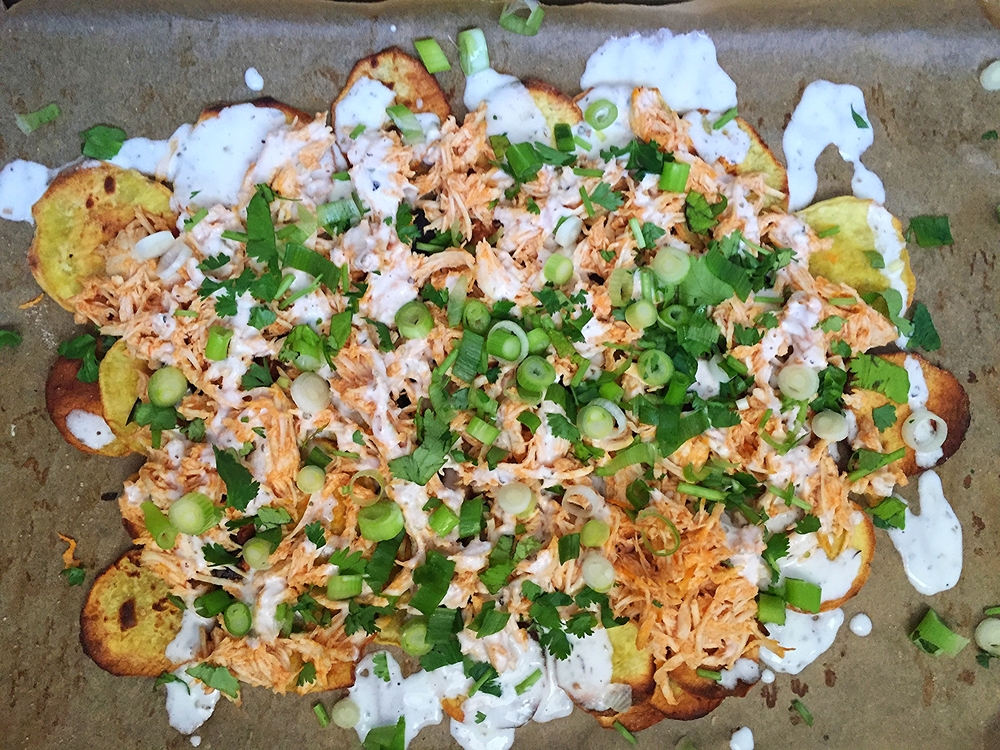
While wings are great, I wanted to shake things up a bit and create a healthy alternative to the Gametime food we know and love. Why not combine buffalo chicken AND nachos?! These nachos have all the flavor elements you'd have with wings and a basket of fries...just in nacho form.

Buffalo Chicken Nachos | My Engineered Nutrition

 I'm using my Perfectly Baked Sweet Potato Chips as the base to this nacho creation. Because they are so crisp and perfectly baked, they stand up to the test of acting as nachos. Next, they are topped with shredded chicken that I've slow cooked with Frank's Hot Sauce (yes, 2 ingredients - does it get any easier?) and a goat cheese ranch dressing that is bomb dot com. 

Buffalo Chicken Nachos | My Engineered Nutrition


Buffalo Chicken Nachos

Prep Time: 20 minutes

Cook Time: 4 hours 10 minutes

Servings: 4

Ingredients: 

Sweet Potato Chips

  • 1 recipe of Baked Sweet Potato Chips (4 servings) 

Buffalo Chicken (this will make more than you need for the nachos) 

  • 2 chicken breasts
  • 1/2 cup Frank's Hot Sauce

Goat Cheese Ranch Dressing

  • 2 oz goat cheese  
  • 2-4 tbsp light coconut milk (or milk of your choice)
  • 1/4 tsp garlic powder
  • 1/4 tsp onion powder  
  • 1/4 tsp oregano
  • salt and pepper  

For nacho assembly: 

  • 4 servings Sweet Potato Chips
  • 1 cup Buffalo Chicken  
  •  Goat Cheese Dressing 
  • 2 scallions, thinly sliced
  • 1/4 cup cilantro, chopped

Directions:

  1. Start by making the Buffalo Chicken. Place chicken breasts in crock pot and coat with buffalo hot sauce. Allow to cook on HIGH for 4 hours.
  2. During the last hour of the chicken cooking, prepare your sweet potato chips by following the instructions in my previous post.  
  3. Also while the chicken is cooking, prepare the goat cheese ranch dressing. In a bowl, combine all ingredients and mix until a creamy dressing consistency is reached. I recommend to start by adding only 2 tbsp of milk. Check consistency - if it is too thick add more milk, tbsp by tbsp, until your desired consistency is met.
  4. Once chicken has cooked, shred chicken with forks within the crockpot. Mix chicken with the sauce within the crockpot - we don't want to drain this! 
  5. To assemble, on a parchment lined baking sheet arrange sweet potato chips. Top with 1 cup of shredded chicken. Next, drizzle ranch dressing over chicken and finish with scallions and cilantro.  

Nutritional Information (1 serving) 

200 calories - 15.5 g Protein, 21.5 g Carbohydrates, 6 g Fat

Posted on October 9, 2015 and filed under Recipes, Chicken.

Bison Sliders

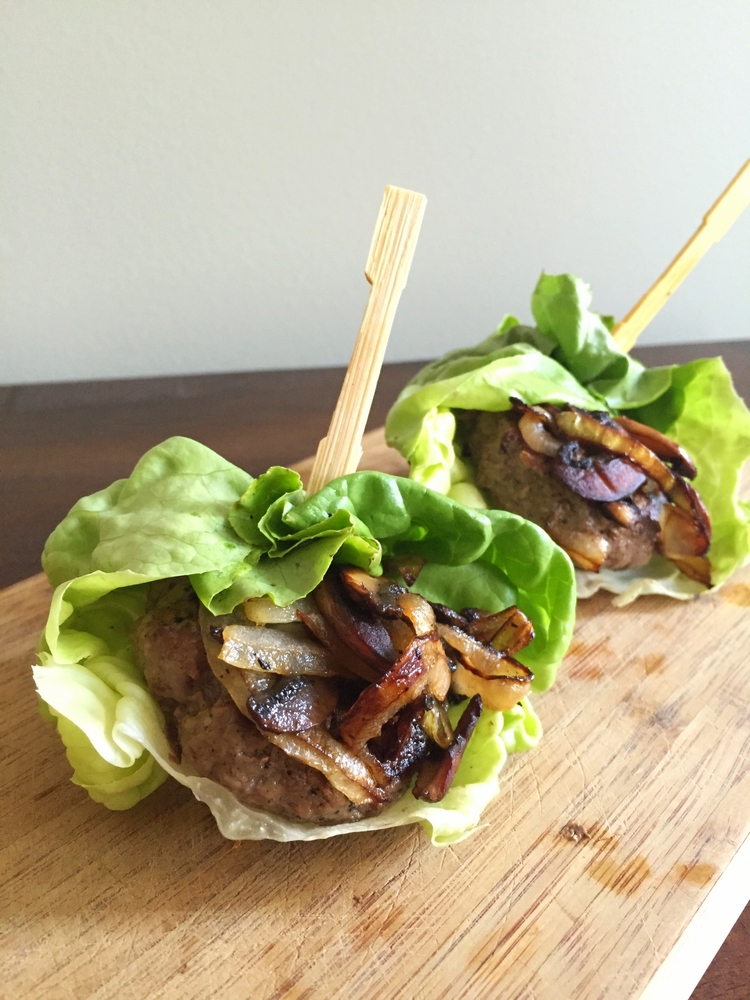
Bison Sliders | My Engineered Nutrition

These little sliders are so much fun! Burgers aren't exactly an ideal food to serve during a party - they can get messy and are quite a filling meal to eat. If I'm watching a football game or at a cocktail party, I don't want my hands to be a mess from trying to eat a big ol' burger, I'd rather have easy to eat finger foods.

Fear not! These little sliders solve all these problems. These are absolutely perfect to serve during a party. They are an easy 2 bite slider packing a punch of flavor! They aren't overly heavy, as I've ditched the bun and cheese. With the flavors of the bison patty plus sautéed onions and mushrooms you get all the best burger qualities - in a single bite.

Bison Sliders | My Engineered Nutrition

Bison Sliders

Prep Time: 5 minutes

Cook Time: 10 minutes

Servings: 8 sliders

Ingredients:

  • 1 lb ground buffalo/bison meat
  • 1/2 tsp garlic powder
  • 1/2 tsp onion powder
  • Salt and Pepper to taste
  • 1 cup sweet yellow onion, sliced
  • 1 1/2 cup mushrooms, sliced
  • 1.5 tbsp butter
  • 1 head of Bibb lettuce
  • 8 bamboo skewers (optional but great for presentation!)

Directions: 

  1. Start by preparing the silder patties. Mix ground buffalo, garlic powder, onion powder, salt and pepper so that the meat is well seasoned. Form 8 patties, 2 oz each, ensuring they are an even thickness. Set aside at room temperature while you prepare the onions and mushrooms.
  2. Thinly slice onion and mushrooms. In a saucepan, melt butter over medium heat. Once melted, saute onions and mushrooms, about 5 minutes. Season with an additional bit of salt and pepper and remove from heat. 
  3. Separate 8 lettuce leaves in preparation for the assembly of the sliders. Set aside.
  4. Heat a cast iron skillet over medium high heat. Cook patties in skillet - these cook very quickly! Because these patties are so small, they should take about 2 minutes per side. 
  5. To assemble sliders, place a bison patty on one of the lettuce leaves, top with sautéed onions and mushrooms. You could simply serve like this OR you could get fancy like I did and fold the lettuce around the patty (like an envelope) and secure with a wooden skewer.  

Nutritional Information (1 slider)

130 calories - 12.5 g Protein, 3.2 g Carbohydrates, 7.6 g Fat

Posted on October 7, 2015 and filed under Recipes, Beef.

Baked Sweet Potato Chips

Baked Sweet Potato Chips | My Engineered Nutrition

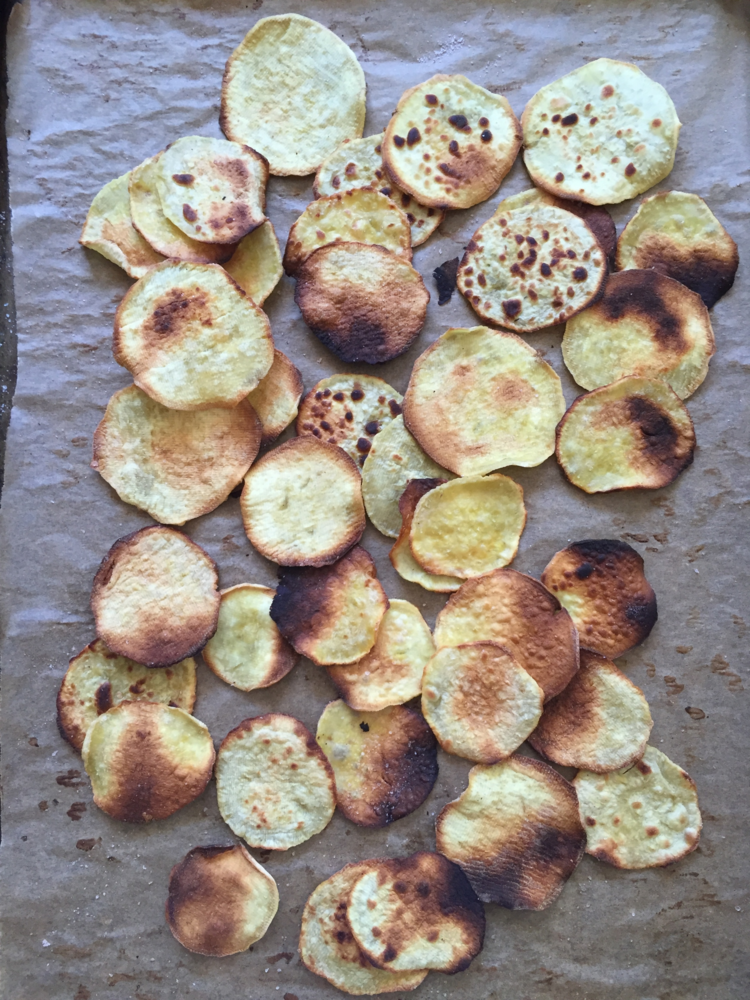
Another healthy snack alternative comin' atcha! Ditch the store bought chips that are high in fat and artificial flavorings. Opt for these homemade sweet potato chips that are perfectly crispy, simple and delicious. 

I must stress that baked sweet potato chips work best with SWEET POTATOES, not YAMS. Sweet potatoes have a white interior and a pale brown skin. Very different from a yam, which has a bright orange interior. If you want to learn more about the difference in potatoes I suggest reading this article! What's the Difference Between Yams and Sweet Potatoes?

Baked Sweet Potato Chips | My Engineered Nutrition

If you ask me, the key to great chips is starting with thinly sliced sweet potatoes, all of which are uniformly cut. This ensures even baking. I can't stress how much easier a mandoline slicer makes your life with this step!

Baked Sweet Potato Chips | My Engineered Nutrition

Next, you need patience. You need to allow the chips ample baking time and you need to be diligent and watchful so that they do not burn! It is important to space the chips out on multiple baking sheets. If they are too close together they won't bake properly. Additionally, you will need to flip the chips one by one, halfway through their baking. 

Tedious? Yes. Worth it? Absolutely!

Baked Sweet Potato Chips | My Engineered Nutrition

Baked Sweet Potato Chips

Prep Time: 10-015 minutes

Cook Time: 20-25 minutes

Servings: 4

Ingredients:

  • 2 small/medium WHITE sweet potatoes, peels and sliced (14 oz)
  • 1/2 tbsp extra virgin olive oil
  • Salt to taste

Directions:

  1. Preheat oven to 400°F. Line multiple baking sheets with parchment paper. Prepare your potato chips by peeling your potatoes and then thinly slicing (about 1/8" thick) with a mandoline slicer or parring knife. Once both potatoes have been sliced, toss with olive oil and salt. 
  2. Evenly space chips out on parchment lined baking sheets. Bake for 12-15 minutes, or until bottom sides of chips begin to brown. Carefully flip each chip over and return to oven to continue baking for another 10 minutes. During this step it is important to keep a watchful eye on the chips. I remove individual chips if they have baked fully, allowing the remaining to continue baking. 
  3. Remove from oven and allow chips to cool - this also allows them to crisp up! Once cooled, enjoy!

Nutritional Information (1 serving)

110 calories - 2 g Protein, 21 g Carbohydrates, 2 g Fat

Posted on October 6, 2015 and filed under Recipes, Vegetables/Sides.

Brussels Sprout Chips

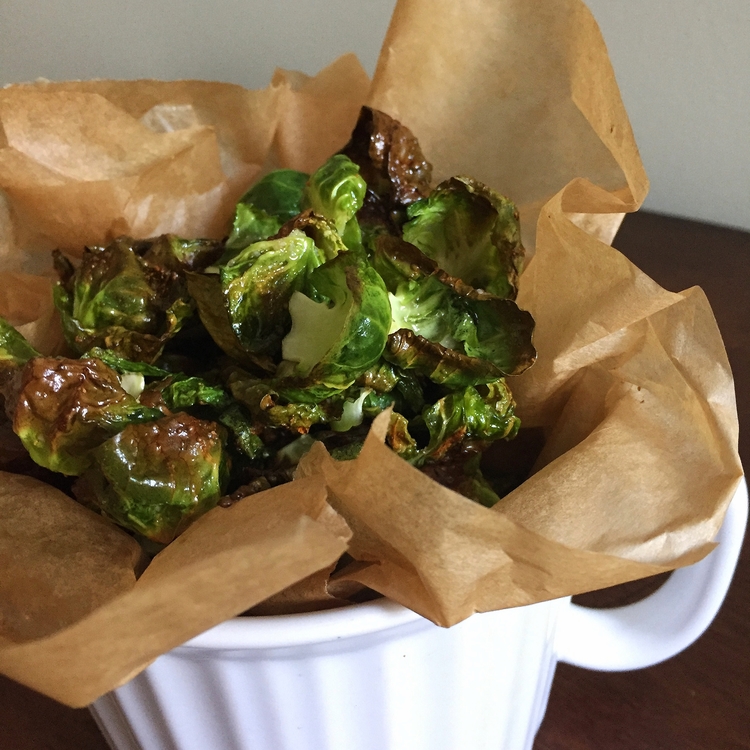
Brussels Sprout Chips | My Engineered Nutrition

Why are chips so addicting? Why is it that you can never just have one?

It's the salty, crunchiness of the chip that makes them just so damn tasty and addictive. 

Brussels Sprout Chips | My Engineered Nutrition

With a little extra effort, these brussels sprout chips provide a guilt-free alternative to the not-so-good-for-you bagged chips you find  in the grocery store and at nearly every party. For the longest time I never attempted making brussels sprout chips because...well, they seemed like more effort than what they were worth. 

Boy, was I wrong. 

I PROMISE that these are so worth it. So much so that you won't want to share. But, I urge you to share (maybe the second batch) at your next party! These would be a perfect snack to nibble on while watching football this fall or as a great snack for a cocktail hour with friends. 

Brussels Sprout Chips | My Engineered Nutrition

Brussels Sprout Chips

Prep Time: 15 minutes

Cook Time: 15 minutes

Servings: 2

Note: This recipe is EASILY scaled, just keep the ratio of 3 cups brussel sprout leaves to 1/2 tbsp extra virgin olive oil

Ingredients:

  • 3 cups brussels sprout leaves, yielded after separating
  • 1/2 tbsp extra virgin olive oil
  • 1/2 tsp salt
  • 1/2 tsp garlic powder

Directions:

  1. Preheat oven to 350°F. Line a baking sheet with parchment paper and set aside. 
  2. To separate leaves, but bottoms of brussel sprout off and discard. Carefully separate the outer leaves from the sprout until you are just left with the sprout core. Transfer the leaves into a mixing bowl. You can keep the sprout core for a different use - I usually slice in half and roast separately like normally done with brussels sprouts. Continue to separate the sprout leaves until you have 3 cups of leaves. Toss brussels sprout leaves with olive oil, salt and garlic power.
  3. Spread brussels sprout leaves in a single layer on the parchment lined baking sheet and bake for about 15 minutes, or until leaves become golden brown. Remove from oven and serve immediately. 

Nutritional Information (1 serving)

52 calories - 1.4 g Protein, 3.6 g Carbohydrates, 3.6 g Fat

Posted on October 6, 2015 and filed under Recipes, Vegetables/Sides.