Posts tagged #Dinner

Cajun Baked Salmon

Cajun Baked Salmon | My Engineered Nutrition

Growing up, I was very lucky to have been exposed to a wide variety of cuisines. I can thank my mom for introducing me to a world of flavors, all before I could reach the kitchen counter top without the help of a stool. Surprisingly enough, however, there are some foods I just didn't really get introduced to until later in life. This was mainly due to either my mom or dad's taste preferences. The list, while very short, included salmon, mushrooms and tomatoes. 

My mom doesn't care for mushrooms or raw tomatoes (stewed or cooked tomatoes pass her test!) so very rarely did we see those making an appearance on the dinner table. My dad's list is also very short, but for as long as I can remember consists of: mint, melon, and SALMON. 

Cajun Baked Salmon | My Engineered Nutrition

Salmon has long been a neglected protein in my rotation of meals. This changed, however, when I began dating my boyfriend who happens to love salmon. He grew up eating it regularly - quite the opposite of my young culinary career. Recently he requested we have salmon for dinner, and when asked how he wanted it prepared he replied with "do you have Cajun rub?".

My spice cabinet is overflowing with jars of spices. I guarantee I'll have almost ANYTHING you are looking for. His cabinet consists of 2 jars of pre-made spice blends: Cowboy Rub and Cajun Seasoning. To his disappointment, I informed him that I did not have the pre-made Cajun spice blend. As a consolation, I offered to make an even BETTER blend. This salmon is healthy, easy to prepare and takes almost no time to bake! 

Lucky for me, this recipe passed the test of The Salmon Man.

Cajun Baked Salmon | My Engineered Nutrition

Cajun Baked Salmon

Prep Time: 5 Minutes

Bake Time: 20-25 minutes

Servings: 2-4

Ingredients:

  • 1 lb skin-on-salmon fillet
  • 1 tsp garlic, minced
  • 1 tsp olive oil
  • 1/2 lemon
  • Cajun spice blend

Cajun Spice Blend

  • 1/4 tsp paprika
  • 1/4 tsp chili powder
  • 1/4 tsp onion powder
  • 1/4 tsp oregano
  • 1/4 tsp salt
  • 1/4 tsp pepper

Kitchen Equipment

  • Baking sheet
  • Parchment paper or aluminum foil

Directions:

  1. Preheat oven to 425°F. Line baking sheet with parchment paper or aluminum foil. Mix spices together for the Cajun spice blend and set aside.
  2. Place the salmon, skin side down, on the prepared baking sheet. Drizzle olive oil over salmon and squeeze lemon juice over top. Spread garlic over the fillet. Cover the salmon fillet evenly with the spice blend and massage into the salmon a bit, ensuring to cover the entire piece of fish.
  3. Bake for 20-25 minutes. Depending on the thickness of your fillet, it could take more or less time. Keep an eye on the salmon and check after 15 minutes. When the thickest part of the salmon is easily flaked with a fork, the salmon is done cooking. Remove from oven and serve immediately. 

Nutritional Information (one-4 oz serving, recipe makes four-4 oz servings)

150 calories - 23 g Protein, 0 g Carbohydrates, 6 g Fat


Posted on April 1, 2016 and filed under Recipes, Fish/Seafood.

Bison Pesto Meatballs with Zucchini Ribbons

Bison Pesto Meatballs with Zucchini Ribbons | My Engineered Nutrition

OK. So it may be a stretch to call this a "recipe". I mean, it is so simple and I didn't make everything completely from scratch (gasp!). However, this combination of flavors is just too good not to share. 

The zoodle craze (zucchini noodles, for those not in "the know") has really taken over. I had yet to jump on the zoodle train, merely because I couldn't justify spending $50 on a kitchen tool that could do just one task: spiral slice vegetables. However, the more and more I saw new recipes involving zucchini noodles, the more I really wanted to try them. Enter: my mandoline slicer. 

Zucchini Ribbons | My Engineered Nutrition

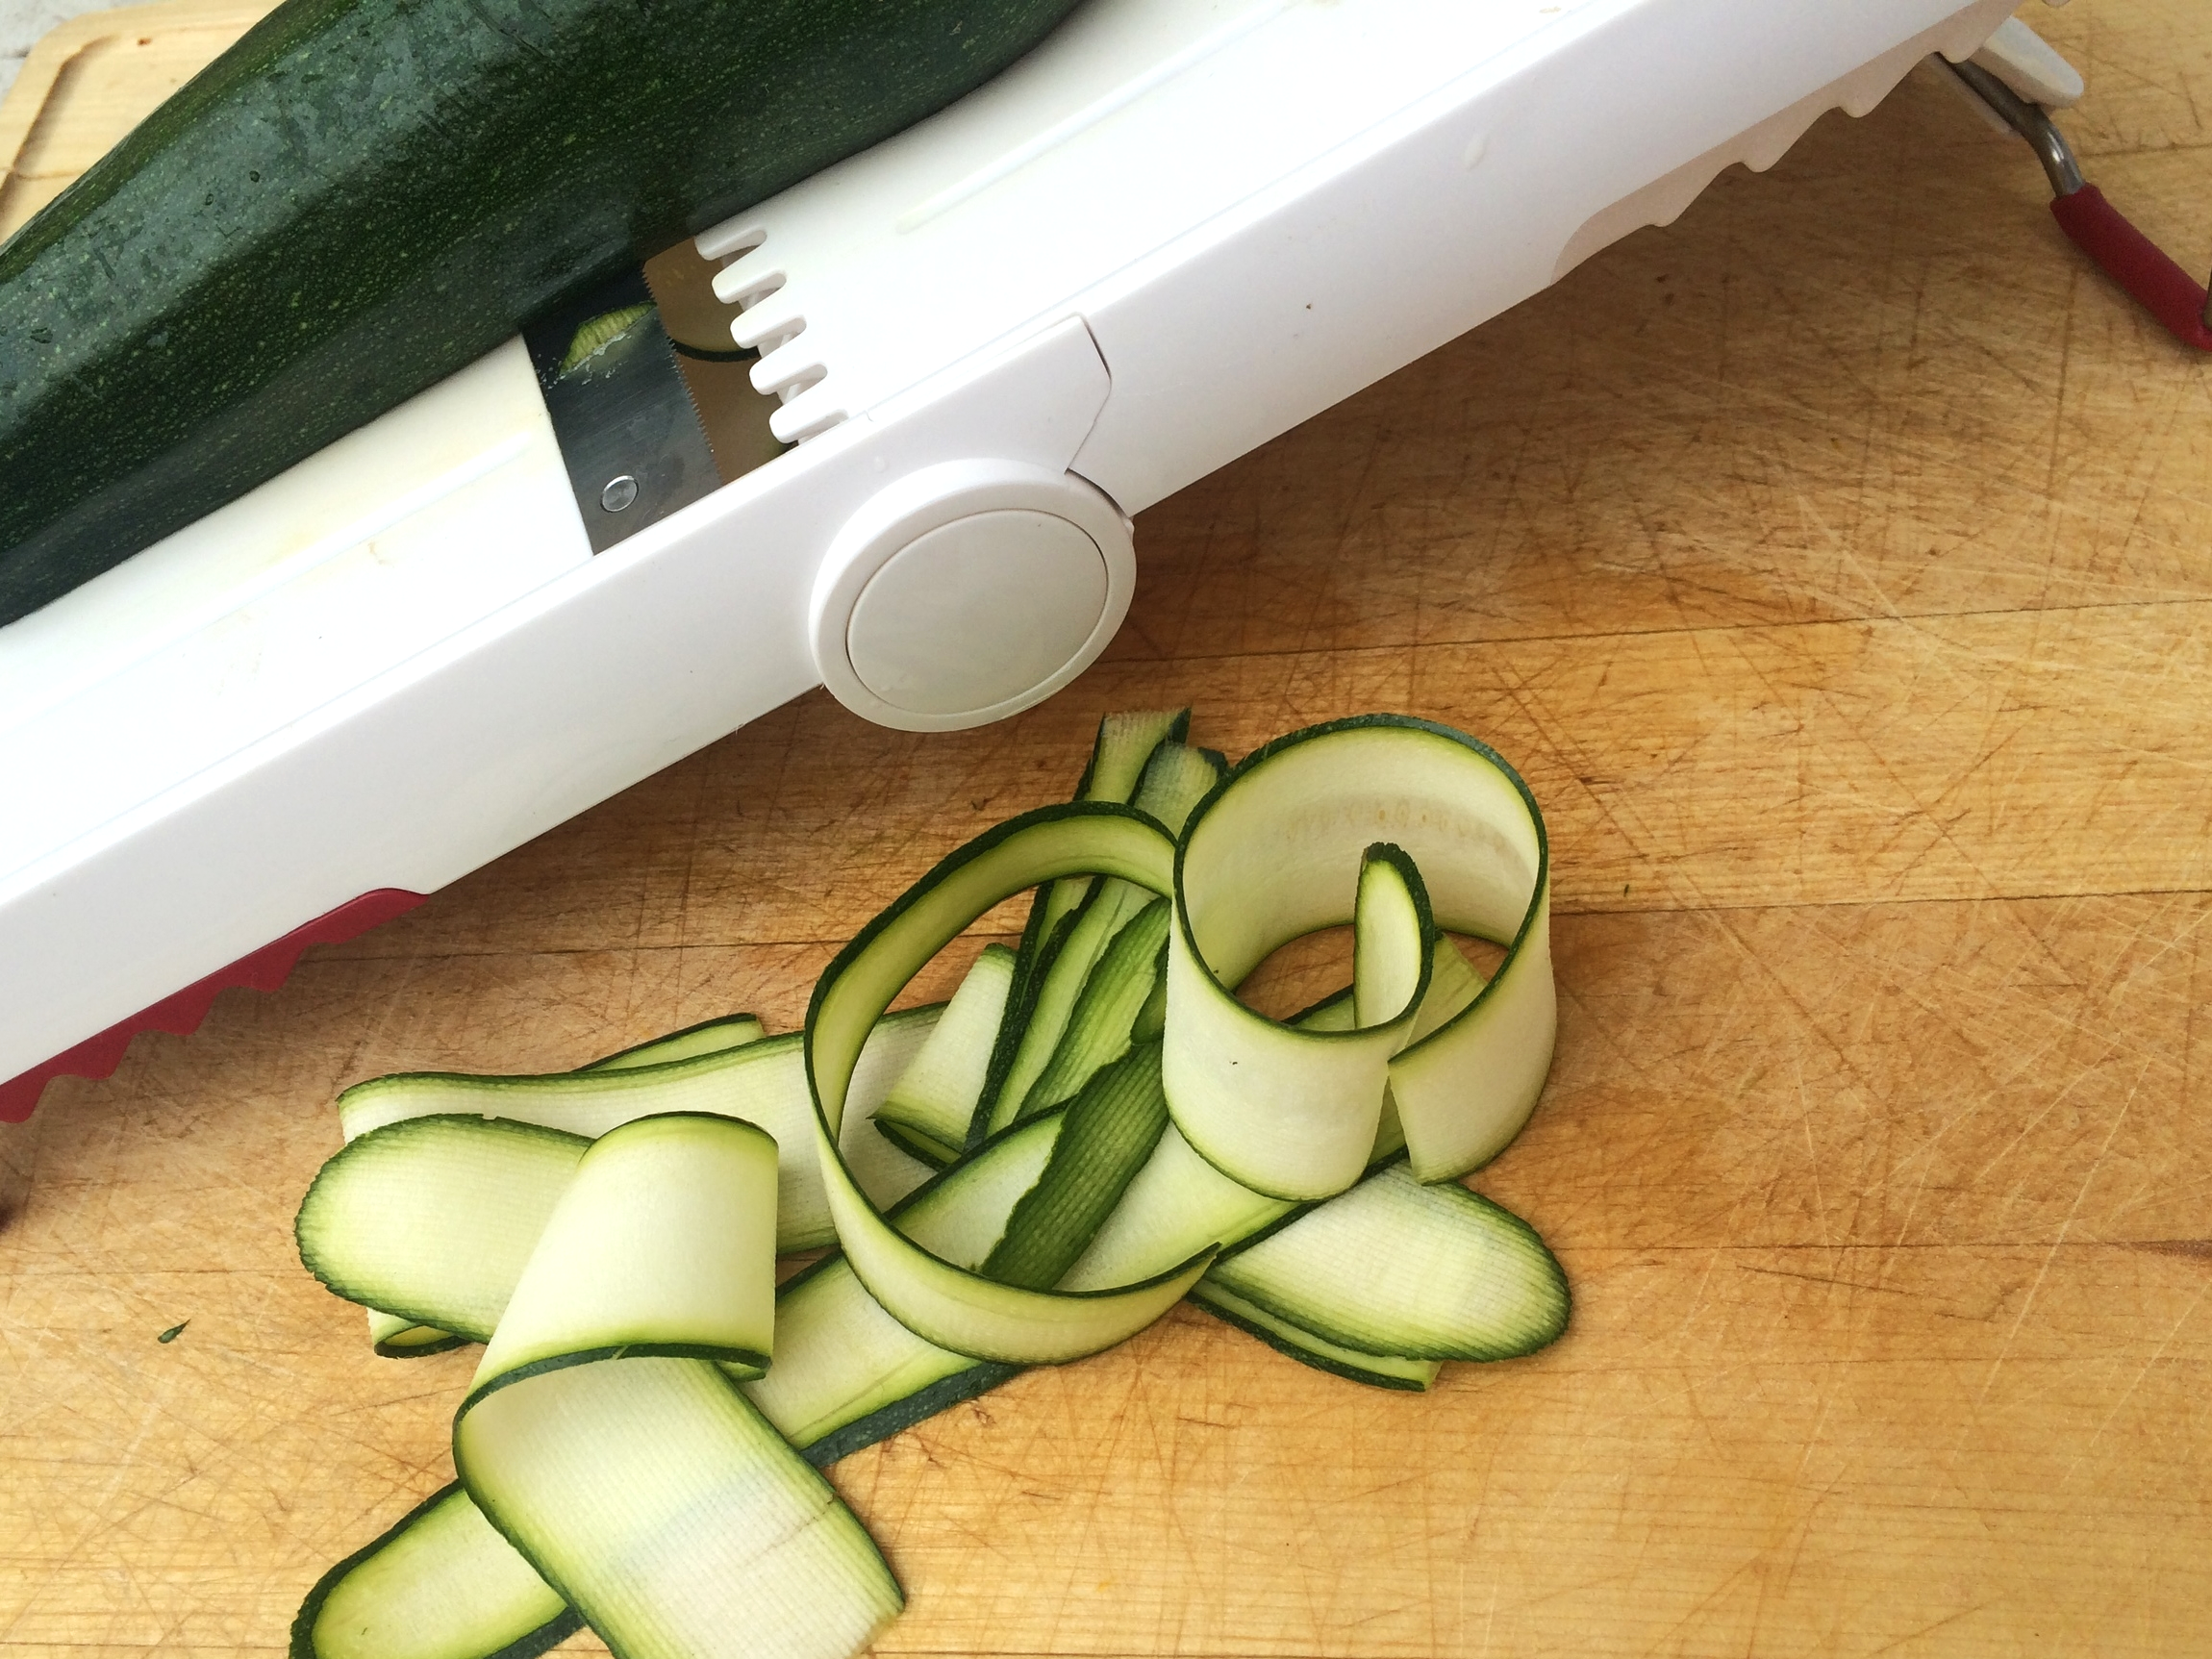
THIS kitchen tool has many uses, and I find myself using it more and more lately. I set my mandoline to the thinnest setting and sliced my zucchini length-wise. The result were these delicate and elegant zucchini ribbons. The thought of weighing these down with heavy marinara meat sauce seemed just wrong. These noodles needed something lighter and vibrant. Zucchini is a summer squash after all, they needed a summertime flavor profile! 

Zucchini Ribbons | My Engineered Nutrition

The pesto still allows their zucchini ribbons to keep their shape, unlike a heavy tomato based sauce which would weigh the ribbons down. The lemon zest really sets this dish apart, in my opinion! It adds an element of brightness and awakens all the flavors. 

This dish is simple, elegant and light - try it tonight!

Bison Pesto Meatballs with Zucchini Ribbons | My Engineered Nutrition


Bison Pesto Meatballs with Zucchini Ribbons

Prep Time: 10 minutes

Cook Time: 10 minutes 

Servings: 4

Ingredients

  • 1 lb ground bison (if you want to make this extra lean use 93/7 ground beef but I highly recommend bison)
  • 4 zucchini
  • 1 bunch of asparagus
  • 2 tsp garlic, minced
  • 1 tbsp olive oil
  • 3 oz pesto, pre-made or homemade
  • Zest of one lemon
  • Salt and pepper

Directions

  1. Prepare your zucchini ribbons. Slice all 4 zucchini length-wise on the thinnest setting of your mandoline. You could also use a spiralizer or in a pinch, you can thinly slice your zucchini.  Once you have your ribbons, thinly slice your asparagus into 1" pieces (not with the mandoline), cutting the thicker parts in half length-wise. 
  2. Heat your cast iron (or metal) skillet over medium heat.
  3. Mix together bison and 1/3 of pesto. Form into 12 meatballs.
  4. Evenly space meatballs in hot skillet. Brown for about 2 minutes each side, turning until all sides are cooked and a nice crust has formed. 
  5. While meatballs are cooking, sauté garlic in the olive oil in a separate pan over medium heat until garlic begins to brown, about 3 minutes. Add zucchini and asparagus and toss. Cook for another 2 minutes. Add remaining pesto and mix thoroughly. Turn off heat to skillet. 
  6. Zest lemon over the vegetables and lightly toss. Plate your zucchini mixture and top with meatballs and additional lemon zest, if desired. 

Nutritional info (1 serving = 1/4 of vegetables and 3 meatballs)

370 Calories - 28 g Protein, 12 g Carbs, 23 g Fat

*This may seem to be high in fat but these are healthy fats! Remember, we need to be sure to include enough in our diets. This is a great meal option for when you are eating low carb for a day. 

Posted on June 30, 2015 and filed under Recipes, Beef.

Bacon Wrapped BBQ Meatloaf

Bacon Wrapped BBQ Meatloaf | My Engineered Nutrition

Today I bring to you a comfort food classic: meatloaf. This isn't just any regular meatloaf, however. It is wrapped in bacon and coated in BBQ sauce. Traditionally, meatloaf is made with full fat ground beef, whole eggs and bread crumbs. I've lightened this dish up AND added bacon, all while keeping the total fat lower than the original recipe but not skimping on any of the flavor. You're welcome.

Bacon Wrapped BBQ Meatloaf | My Engineered Nutrition

My favorite way to develop recipes is to ask my family and friends what they feel like eating...and then I will create that with my own twist. That is exactly how this recipe came about. This is my idea of a fun game! I was staying with my sister, Greta, in LA last weekend and to show my thanks I offered to cook dinner for us. I asked her to think of something (anything!) that is normally unhealthy (but delicious) and I would make her a healthy version. Some may not agree with my idea of fun, but hey - we all have our thing. 

Bacon Wrapped BBQ Meatloaf | My Engineered Nutrition

She requested "comfort food" which for me means a rich, meat and potatoes type dish. I offered up meatloaf (which she gladly agreed to) and then decided to one up myself and make it (turkey) bacon wrapped meatloaf brushed with BBQ sauce instead of boring ol' ketchup. And to top it all off - make it lighter and gluten free. I came up with this recipe on the fly as I was chopping and mixing. The end result was better than I could have ever imagined. Lucky for you all I remembered to write the recipe down in my iPhone immediately following dinner. 

Bacon Wrapped BBQ Meatloaf | My Engineered Nutrition

So what makes this "lighter"? I used 93% lean ground beef instead of 80/20 ground beef, turkey bacon instead of regular bacon, egg whites instead of whole eggs and coconut flour as the binder instead of bread crumbs. The end result was juicy and moist but definitely tasted rich and full of comfort. 

Thanks to Greta for requesting this meal or I may never thought of this recipe :) Enjoy! 

Bacon Wrapped BBQ Meatloaf

Prep Time: 10 minutes

Cook Time: 50 minutes (30 minutes at 400F and 20 minutes at 350F)

Servings: 4

Ingredients

  • 1 lb ground beef or bison (if you want to make this extra lean use 93/7 ground beef!)
  • 5 strips turkey bacon
  • 2 egg whites
  • 4 tbsp coconut flour
  • 1/4 c yellow onion, diced
  • 1/4 c green bell peppers, diced
  • 2 cloves garlic, diced
  • 1 tbsp olive oil
  • 1 tbsp worcestershire sauce
  • 4 tbsp BBQ sauce, divided 
  • Salt and pepper

Directions

  1. Preheat oven to 4000F. 
  2. In a skillet over medium high heat, sauté onion, peppers and garlic in olive oil for 3-5 minutes or until onions become golden brown. Remove mixture from heat to a small bowl to cool. 
  3. In a mixing bowl combine  the onion and pepper mixture with the ground beef, egg whites, coconut flour, worcestershire sauce, 2 tbsp of BBQ sauce plus salt and pepper to season. Using your hands, mix until all ingredients are well incorporated. 
  4. Transfer the mixture to a baking dish and form into a loaf. Wrap with strips of turkey bacon so that meatloaf is fully covered. 
  5. Place meatloaf into oven and allow to cook at 400F for 10 minutes. After the first 10 minutes, brush the meatloaf with the remaining 2 tbsp of BBQ sauce and return to oven for an additional 20 minutes at 4000F. 
  6. After 30 minutes total at 400F, reduce oven temperature to 350F and continue to cook for another 20-30 minutes or until meatloaf is cooked through.
  7. Remove from oven and allow to rest for 10 minutes before cutting. Slice into 4 equal pieces and serve with additional BBQ sauce if desired. 

Nutritional info (1 serving = 1/4 of recipe)

310 Calories - 33.5 g Protein, 10 g Carbs, 15 g Fat

Posted on June 23, 2015 and filed under Recipes, Beef.

Rosemary Pork Roast with Butternut Squash and Apples

Rosemary Pork Roast with Squash and Apples | My Engineered Nutrition

In many cities, the month of May brings rising temperatures and signs of summer. In San Francisco, however, May signifies the start of our "winter" - cold, biting temperatures and thick, rolling fog. A small price to pay for living in such an amazing city, I suppose. On nights when the wind is blowing and the temperature has dropped, nothing beats coming home to a warm dinner. 

Rosemary Pork Roast with Squash and Apples | My Engineered Nutrition

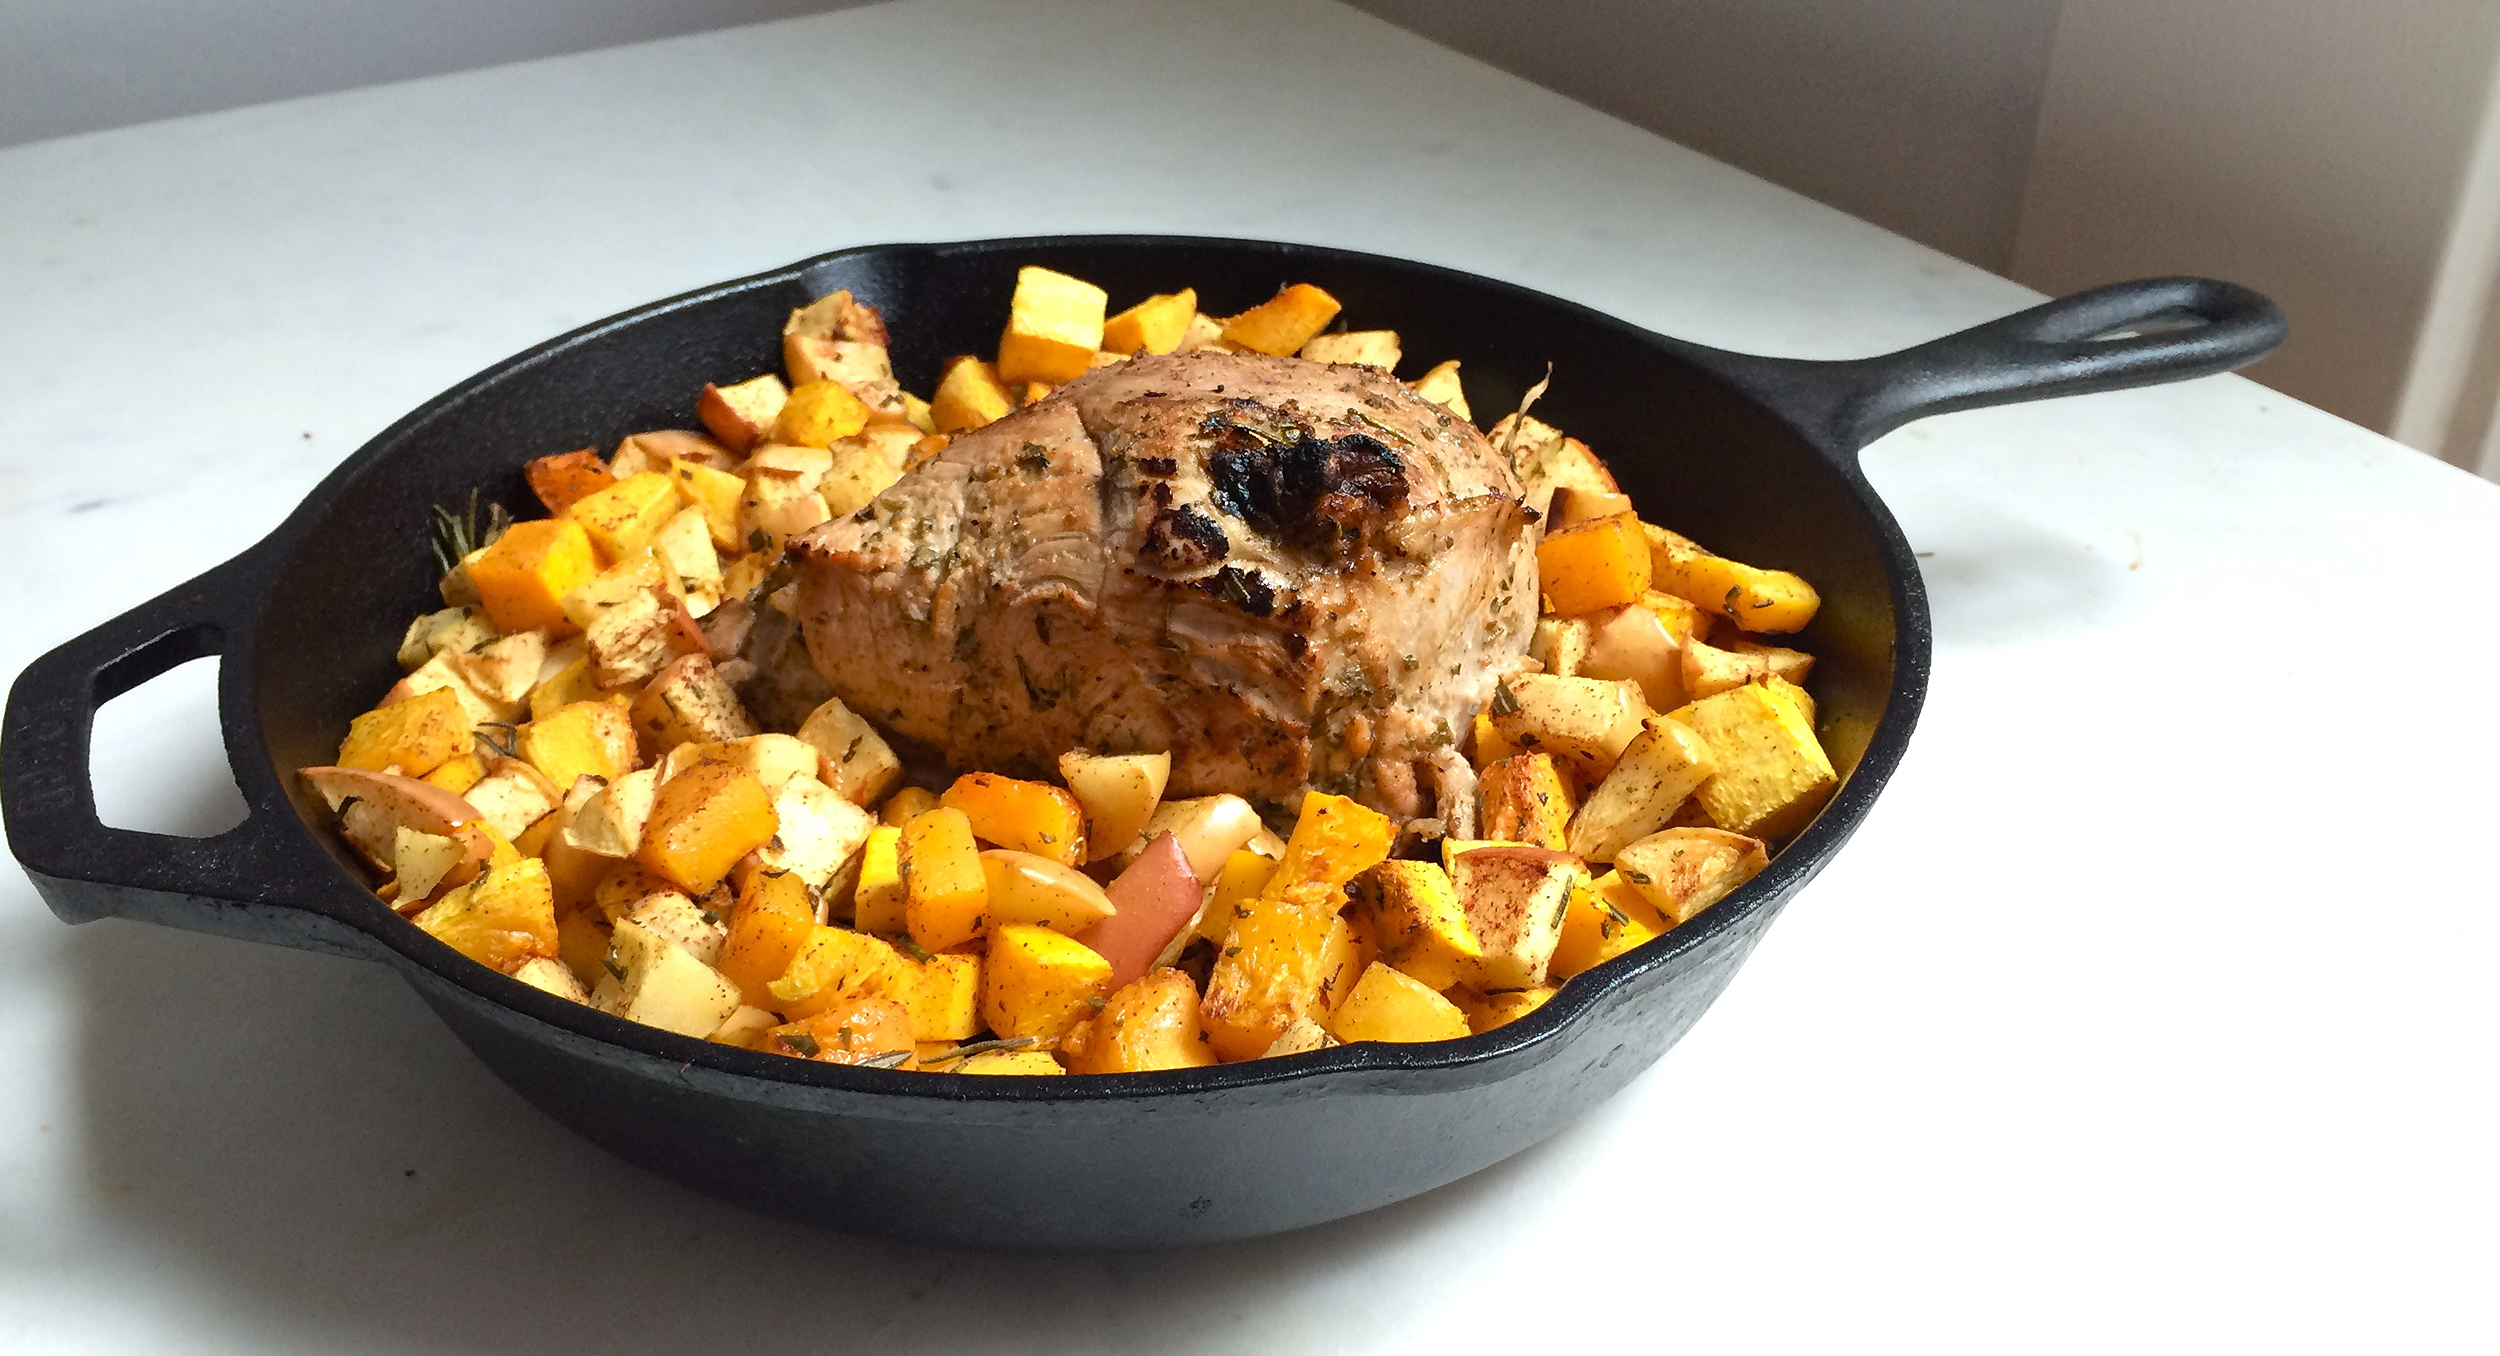
During the week, between work and workouts, I'm usually short on time. This meal is a perfect weeknight dinner option - seems like it took hours to make but can be completed within an hour! I love eating sirloin tip pork roasts. It's a very lean cut of pork but is still incredibly juicy. If you have an extra 30 minutes to spare, allowing it to marinate in my rosemary, lemony-Dijon marinade makes it even better.

Rosemary Pork Roast with Squash and Apples | My Engineered Nutrition

By searing the meat on all sides, you create a crust which locks in the juices while the roast finishes off in the oven. This also helps shorten the actual cooking time of the meat, once in the oven.

Rosemary Pork Roast with Squash and Apples | My Engineered Nutrition

I love this duo of butternut squash and apples with the pork. They are tossed in cinnamon, rosemary, olive oil and salt prior to roasting. Sweet and savory! I prefer to roast the squash and apples in the same pan as the pork so that the flavors of the roast infuse with them.

Rosemary Pork Roast with Squash and Apples | My Engineered Nutrition

Cooking time will vary based on the size of your roast and oven, but I was able to cook my roast in under 45 minutes - around 8-10 minutes for the searing and 35 minutes to finish off in the oven! This pork roast is one of my go-to meals during the week. No matter the season, you can't go wrong with these flavors!

Rosemary Pork Roast with Squash and Apples | My Engineered Nutrition

Rosemary Pork Roast with Butternut Squash and Apples

Prep Time: 15 minutes + time for marinade (30 minutes to 24 hours, optional)

Cook Time: 45 minutes

Servings: 4-6

Ingredients

For the pork roast

  • 1 1/2 - 2 lb. sirloin tip pork roast
  • 2 tsp fresh rosemary, chopped
  • Juice of 1/2 lemon (about 2 tsp)
  • 1 tbsp extra virgin olive oil
  • 2 tsp Dijon mustard
  • 2 cloves of garlic, minced
  • 1 tsp Kosher salt
  • 1/2 tsp cracked pepper

For the roasted squash and apples

  • 3 cups butternut squash, cubed
  • 2 apples, cubed
  • 2 tbsp fresh rosemary, chopped
  • 1 tbsp extra virgin olive oil
  • 1 tsp cinnamon
  • 1 tsp Kosher salt

Kitchen Tools

    Directions

    1. Start by making the marinade for the pork. In a small bowl combine rosemary, lemon juice, olive oil, Dijon mustard, garlic, salt and pepper. Whisk to combine and pour over pork. If you are short on time, you could skip letting this sit to marinate. If you have time, allow to marinate in the refrigerator for 30 minutes or up to 24 hours. (Even better, you could put the pork in the marinade the night before so that you are ready to go straight to cooking the next night!)
    2. Remove pork from the refrigerator and allow to come to room temperature. Preheat oven to 400°. 
    3. Chop squash and apples into cubes. Toss in rosemary, olive oil, cinnamon and salt.
    4. Heat cast iron skillet over high heat. Once heated, sear all sides of the roast for 2-3 minutes per side, creating a crust. 
    5. Arrange as much of the squash and apple mix in the skillet, around the roast, that will fit. Any remaining lay in a single layer on a baking sheet. Transfer cast iron skillet and baking sheet to oven. 
    6. Allow to cook until the roast registers an internal temperature of 140° (my roast of 1.6 lb. took 35 min - about 20 min per lb.). For the most accurate cooking time, I highly recommend the use of a meat thermometer! 
    7. Remove roast and squash/apple mix from oven and allow to sit for 5 min before cutting - we don't want to lose all the juices!
    8. Slice pork roast thinly and serve with roasted butternut squash and apples!

    Pork Nutritional info (1 serving, 5 oz cooked)

    189 Calories - 35 g Protein, 0 g Carbs, 5.6 g Fat

    Butternut Squash and Apples Nutritional info (1 serving = 1/4 of full recipe)

    135 Calories - 1.3 g Protein, 27.5 g Carbs, 3.8 g Fat


    Posted on May 18, 2015 and filed under Recipes, Pork.