Posts tagged #Cheese

Twice Baked Sweet Potato Casserole

Twice Baked Sweet Potato Casserole  | My Engineered Nutrition

I absolutely love sweet potatoes - the firm, light-skinned, pale flesh variety. Not to be confused with the soft, copper-skinned and orange flesh variety which stores often label as 'yams'.

Confusing, right? I've shared this article before, but if you want to nerd out on sweet potato varieties, read this article from The Kitchn.

Now that we are both on the same page about which glorious tuberous root I'm referring to, let's continue..

Twice Baked Sweet Potato Casserole | My Engineered Nutrition

I recently discovered that these pale fleshed sweet potatoes boil and mash BEAUTIFULLY...and quickly, I might add. One of my gripes I've always had with sweet potatoes is that they take for-ev-errr to bake or roast. And let's be real here, I'm usually starving when I actually start preparing my meals and the thought of waiting 45 minutes to an hour for them is unbearable and I'm not motivated enough to wait.  

All it takes is some boiling water and chopped sweet potatoes, and in just 10 MINUTES you've got yourself some wonderful mashed sweet potatoes. 

Twice Baked Sweet Potato Casserole | My Engineered Nutrition

Now, you could stop right after boiling and mashing the sweet potatoes and be well on your merry way eating as I've shown on through my Instagram HERE, HERE, HERE and HERE. However, these mashed potatoes can be oh-so-much better when transformed into this Twice Baked Casserole. 

This casserole is a breeze to make and it reheats wonderfully - perfect for those weeknight dinners when you are in need of something quick! This warm and creamy casserole is made of soft mashed sweet potatoes, low-fat or nonfat cheddar cheese, nonfat Greek yogurt garlic and green onions. It's like a loaded baked potato...but in casserole form.

Twice Baked Sweet Potato Casserole | My Engineered Nutrition

Twice Baked Sweet Potato Casserole

Prep Time: 20 minutes

Bake Time: 25 minutes

Servings: 6

Ingredients:

  • 2.5 lbs sweet potatoes (light-skinned, pale flesh), peeled and chopped **this is the weight after they've been peeled so account for a little more when purchasing
  • 2 tbsp grass-fed butter, melted
  • 1/2 cup nonfat Greek yogurt
  • 5 green onions, thinly sliced whites and greens
  • 4 oz nonfat or low-fat cheddar cheese, grated
  • 1 tsp garlic, minced (about 4 cloves)
  • 1/2 tsp salt

Directions:

  1. Preheat oven to 350°F and bring a pot of water to a boil. Once water as come to a rolling boil, add chopped potatoes. Boil for 10-15 minutes, until potatoes are soft when pierced with a fork.
  2. While potatoes are boiling, prepare other ingredients.  Once the potatoes have softened, drain and transfer to a large mixing bowl. With a large wooden spoon, simply mash the sweet potatoes. Add the butter, Greek yogurt, green onions, cheese, garlic and salt and mix until all ingredients are well incorporated.
  3. Transfer to a lightly greased casserole and bake for 25 minutes. Remove from oven and serve immediately. Casserole is also great reheated!

Nutritional Information (1 serving, 6 total each roughly 1 cup each):

245 calories - 11g Protein, 41g Carbohydrates, 4g Fat
 

Posted on February 18, 2016 and filed under Recipes, Vegetables/Sides, Sides.

Breakfast Quesadillas

Breakfast Quesadillas | My Engineered Nutrition

Can you think of a type of cuisine that pairs better with breakfast that Mexican? Maybe I'm partial having lived in Texas and now California, the Meccas of Tex-Mex and Mexican food in our great country, but nothing beats Mexican food for breakfast.

Breakfast Quesadillas | My Engineered Nutrition

In addition to your traditional Mexican-inspired breakfast fare (i.e. omelettes, scrambles, skillets, etc.) you also have devoted Mexican breakfast dishes such as huevos rancheros, chilaquiles, breakfast tacos, breakfast burritos, and these: breakfast quesadillas.

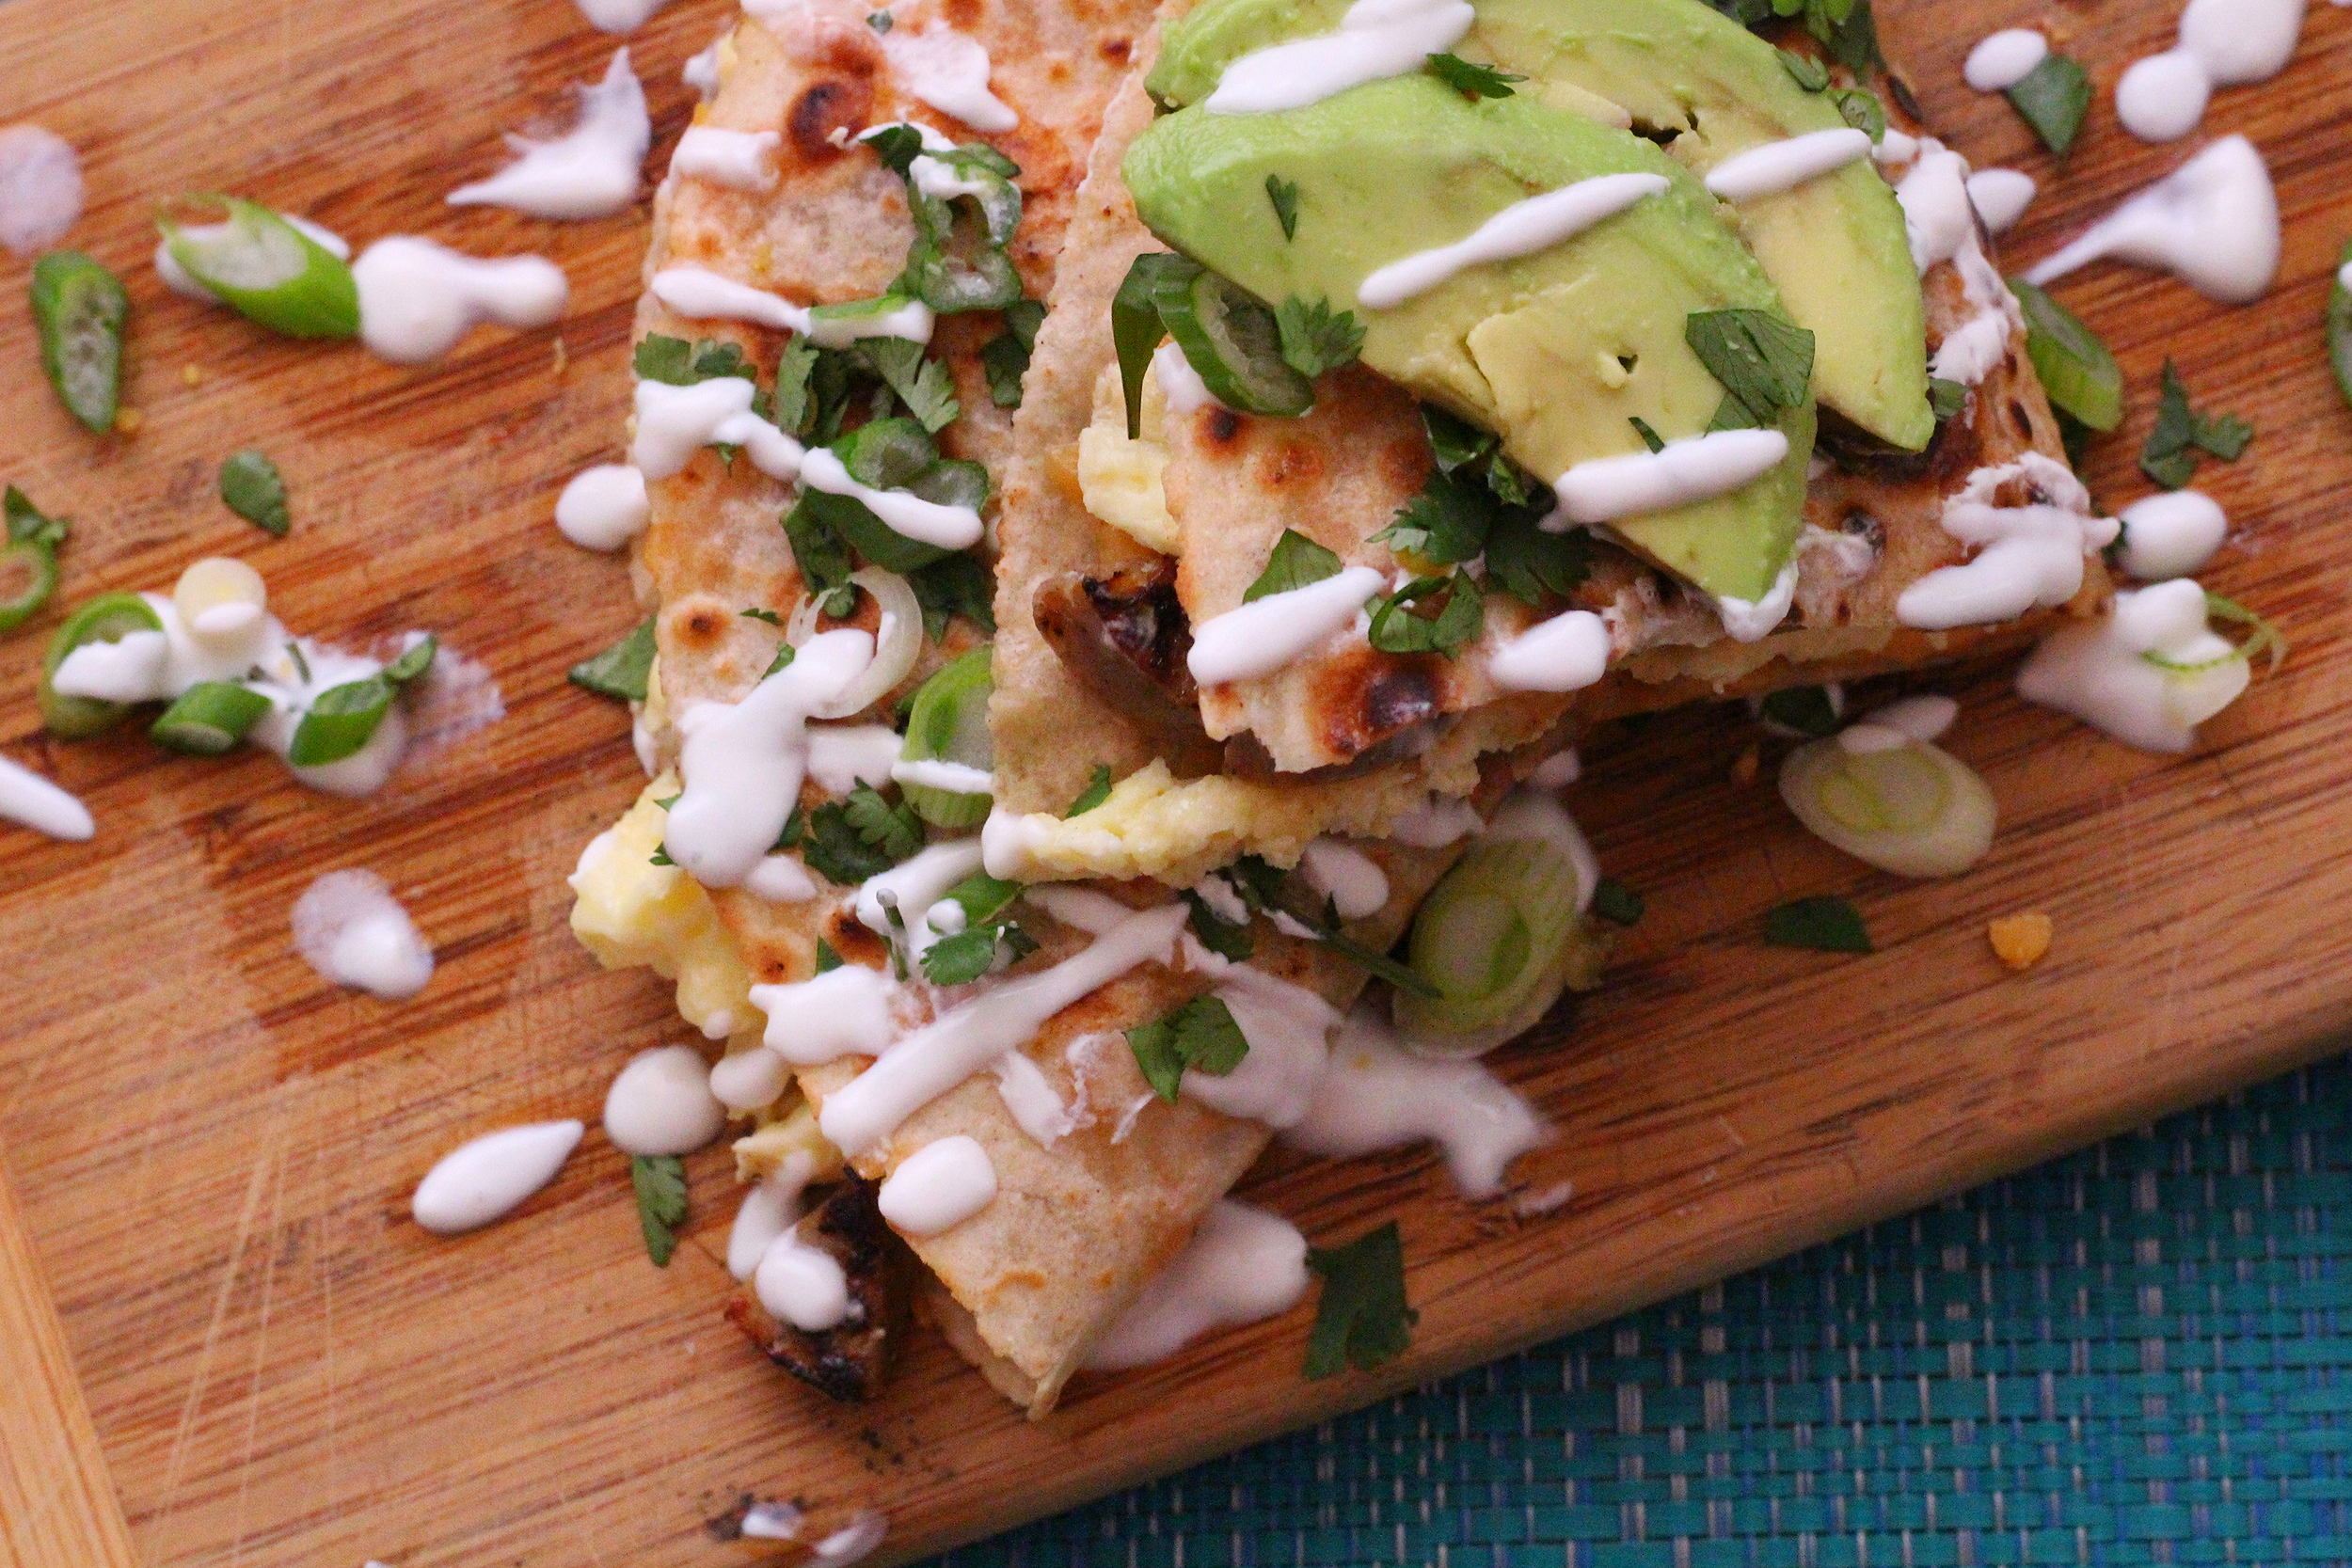
A perfectly toasted gluten free tortilla, filled with cheese, eggs and sausage and topped with avocado, lime and cilantro - it's the perfect breakfast combination!

Breakfast Quesadillas | My Engineered Nutrition

Like most of my recipes, I'm usually inspired to create them because I'm craving that dish.

(I know...a very sophisticated development process)

Recently, my friend at work that I sit across from brought in a breakfast quesadilla. Naturally, I had food envy and decided I had to just make one for myself. If you follow me on Instagram then you know how much girlfriend LOVE her quesadillas, but I've always been hesitant to post a recipe for them because they are so painfully simple to make. 

This unique spin on a classic, however, warranted a devoted post. Think of this recipe more as a 'road map' to creating your own delicious quesadilla. There are no rules! I hope I caused enough food envy in you to make this breakfast quesadilla ASAP! 

Breakfast Quesadillas | My Engineered Nutrition

Breakfast Quesadillas

Prep Time: 10 minutes

Servings: 2 Quesadillas

Ingredients:

Directions:

  1. Begin by preparing the ingredients to fill your quesadilla with. Grate the cheese, slice the green onions, chop the cilantro and slice the chicken sausage into half circle slices.
  2. Coat a nonstick pan with olive oil over medium heat and warm the chicken sausage. Set aside. Scramble egg and egg whites together in a small bowl. In the same pan used to cook sausage, melt butter over medium heat and pour eggs into pan. Scramble your eggs by cooking gently over medium heat and stirring with a rubber spatula. Once eggs are scrambled, set aside.
  3. In a large nonstick pan over medium high heat, warm one tortilla. Sprinkle half of the grated cheese in an even layer over the tortilla, allowing it to begin melting slightly. After 1 minute, spoon half of the eggs and half of the sausage onto on half of the tortilla and then fold the tortilla over in half. I prefer making 2 half quesadillas, as opposed to layering two tortillas directly on top of one another. Allow to cook for about a minute on that side before carefully flipping and continuing to cook on the opposite side. Use your best judgement on when the quesadilla is cooked through, ensuring not to burn your tortilla! Remove from heat and repeat process for second quesadilla with remaining tortilla, eggs, cheese and sausage. 
  4. In a small bowl mix together Greek yogurt and lime juice. Plate quesadillas and garnish with a drizzle of the Greek yogurt, a sprinkle of cilantro and green onion, and top with avocado slices. There is no right or wrong way to eat a quesadilla, so get creative!

Nutritional Information (1 quesadilla) - This will largely depend on what ingredients you choose to use! This is a rough estimate.

325 calories - 22 g Protein, 22 g Carbohydrates, 17 g Fat

Posted on February 11, 2016 and filed under Recipes, Breakfast, Chicken.

Spinach Artichoke Pizza with Cauliflower Crust

Spinach Artichoke Pizza | My Engineered Nutrition

Squeezing in one last recipe for 2015!

What a great year it has been. Even though I didn't start this website until May of 2015, I still managed to bring you 48 (yes, FORTY EIGHT) recipes this year. Oh man! Since I started off this blog with my BBQ Chicken Pizza with Cauliflower Crust, it seemed fitting to close out the year with another cauliflower crust pizza.  

Spinach Artichoke Pizza | My Engineered Nutrition

Recently, I figured out the sad truth that I'm allergic to nightshade vegetables. What is a nightshade? It is a plant family (Solanaceae) including tomatoes, peppers (bell pepper, chili peppers, tomatillos, cayenne, etc), white potatoes, eggplant and goji berries. The term “nightshade” may have been coined because some of these plants prefer to grow in shady areas, and some flower at night. 

I've narrowed it down that when I eat tomatoes and peppers (two of my most favorite things) my face begins to itch where my psoriasis is located and I begin to turn red. I'm not 100% sure this is what causes that, but there is a strong correlation and I don't want to chance it by continuing to eat them.

That being said, eating traditional pizza presents a dilemma. The base of most pizzas, after all, is tomato sauce.

Spinach Artichoke Pizza | My Engineered Nutrition

My mom recently saw a jar of Spinach Artichoke Pizza Sauce in Williams-Sonoma. I loved the idea of using that as the  base of my pizza! So yes - this isn't an original idea to use spinach and artichoke as the pizza sauce - gasp!

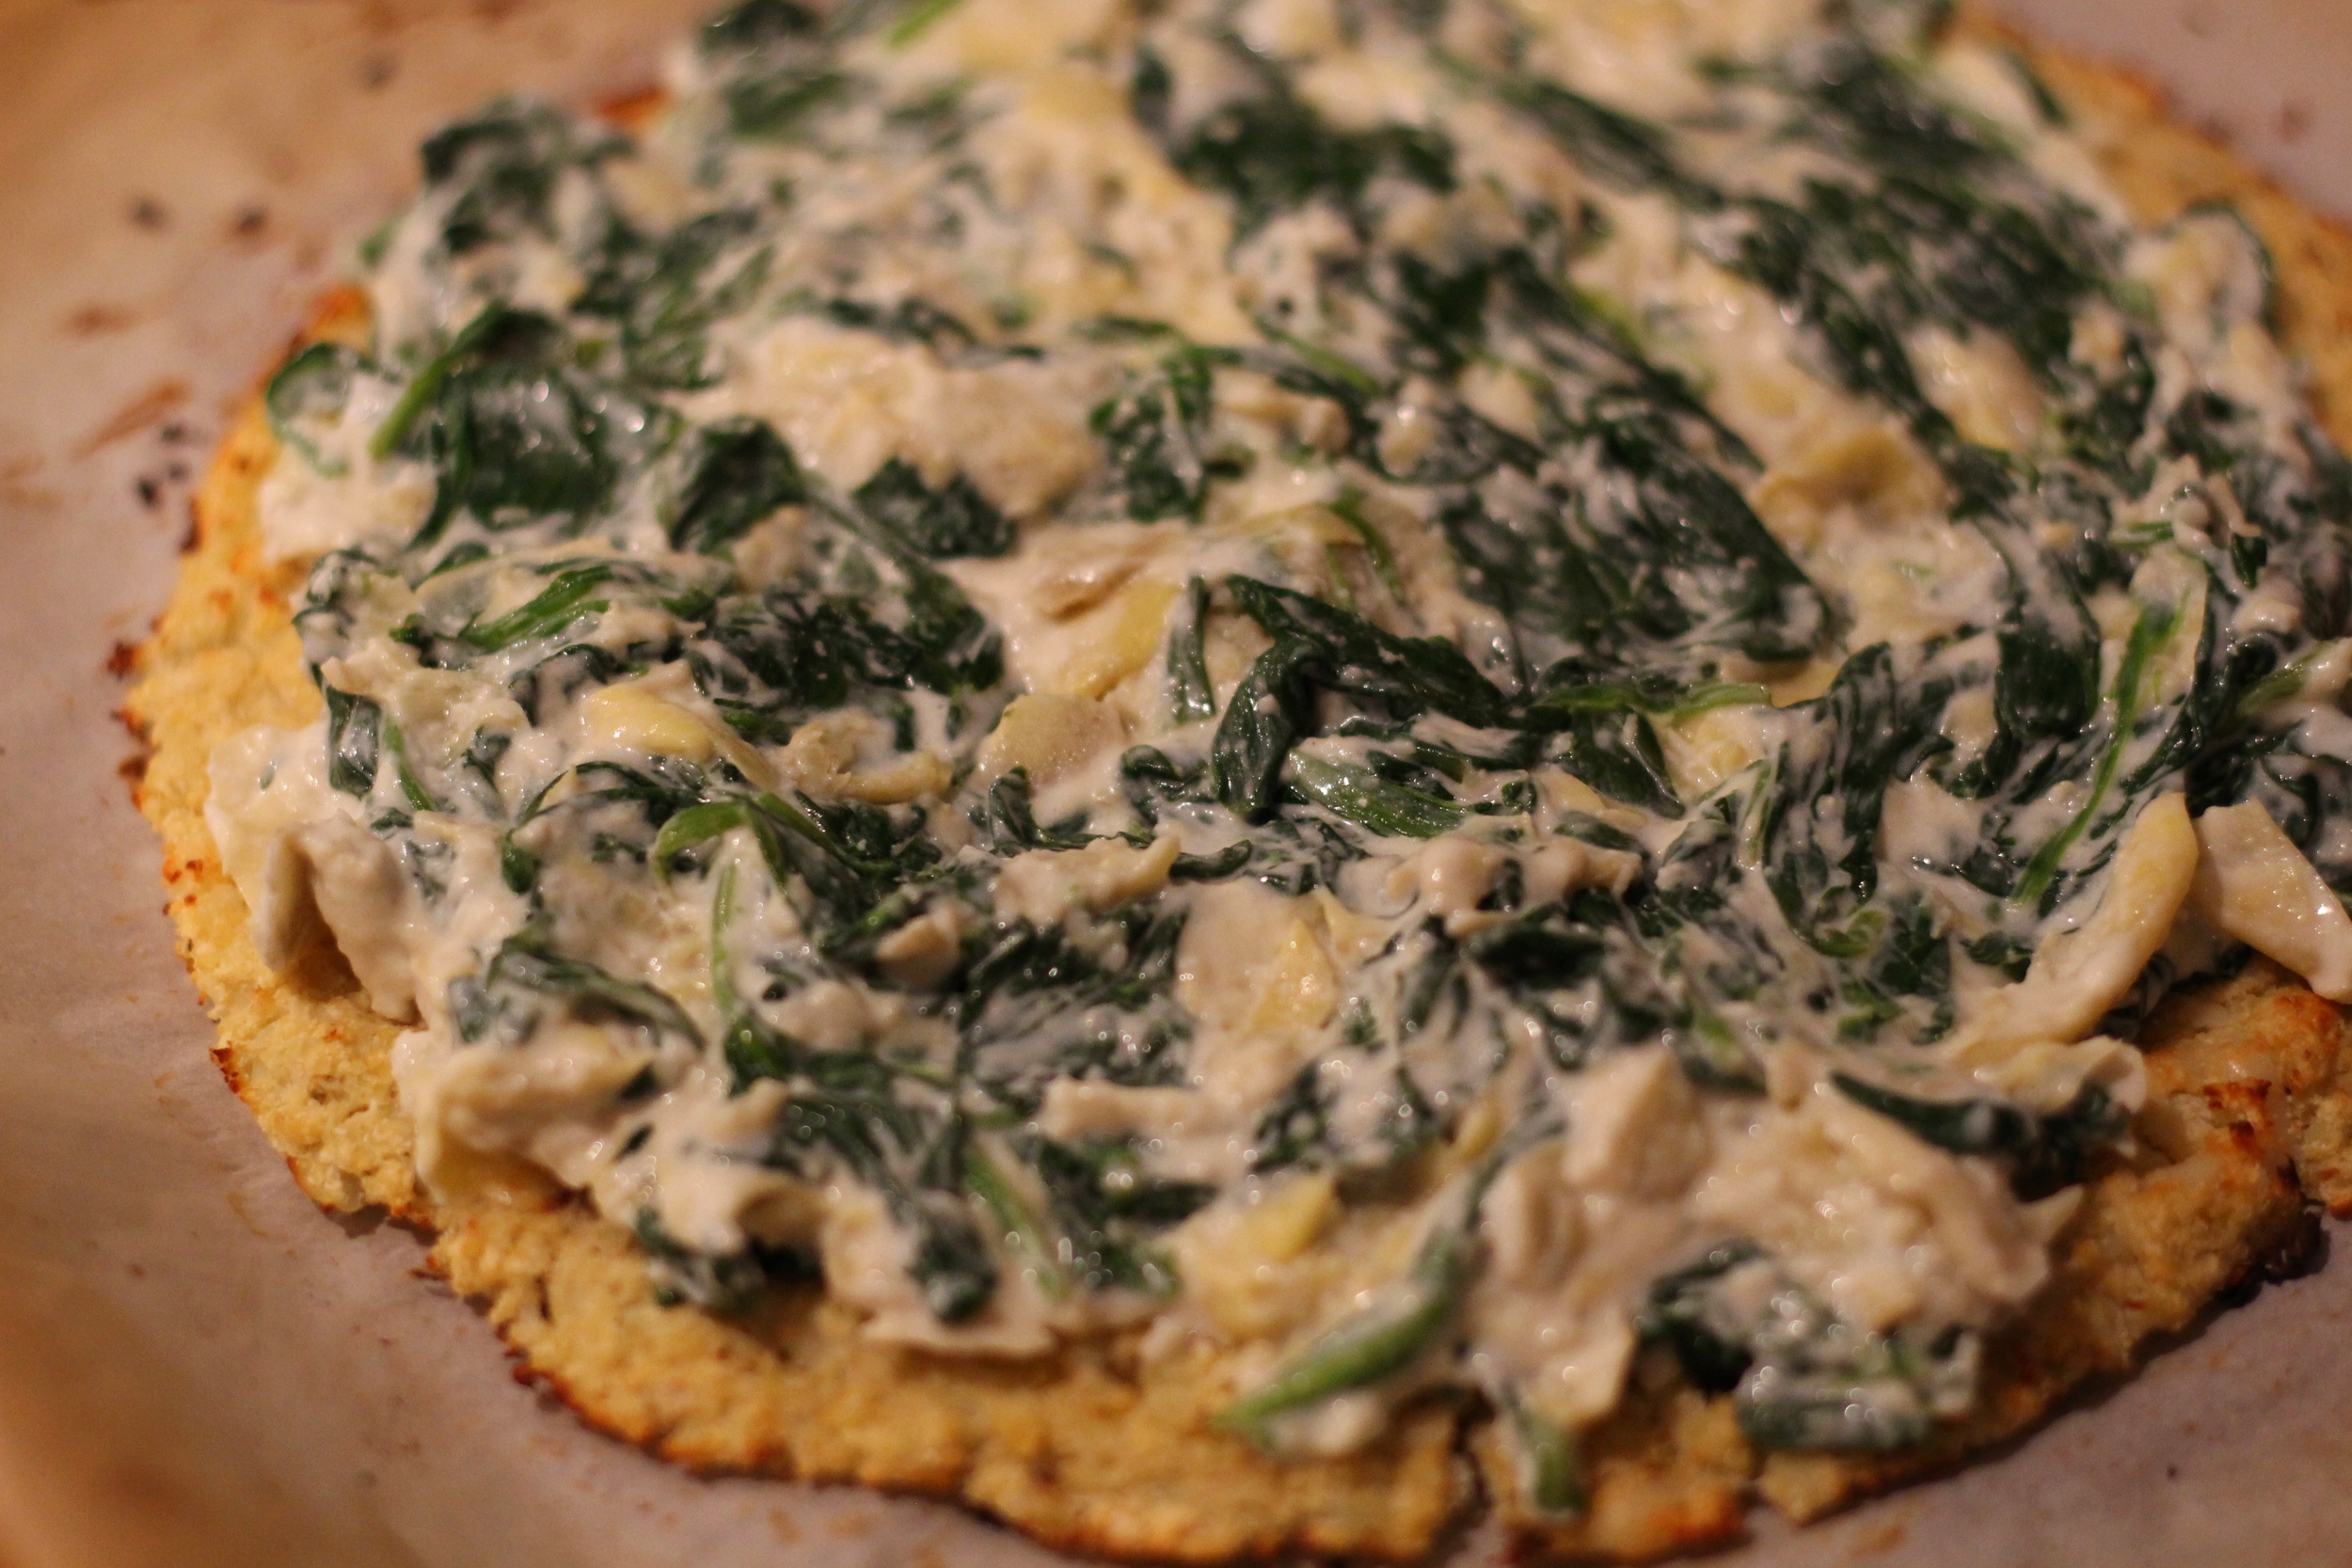
My mom always used to make (and still does) her spinach artichoke dip using canned artichokes, spinach, Miracle Whip and Kraft Parmesan Cheese. I tweaked this formula just a bit and made my spinach artichoke base using garlic, spinach, artichokes, nonfat Greek yogurt and freshly grated Parmesan cheese. Seriously, you could eat this stuff by the spoonful.

I spread that all over the top of my perfected Cauliflower Crust and finished things off with some turkey bacon and fresh mozzarella. The result is a super creamy pizza that tastes so decadent but is much better for you than eating traditional spinach artichoke dip, which can be loaded with fat. If you loved my BBQ Chicken Pizza then you must try this Spinach Artichoke Pizza today!

Spinach Artichoke Pizza | My Engineered Nutrition

Spinach Artichoke Pizza

Prep Time: 20 minutes

Cook Time: 15-25 minutes

Servings: 4 slices

Ingredients: 

  • 1 Cauliflower Crust  (see this post on how to make!)
  • 1/2 tbsp grass-fed butter
  • 3 cloves garlic, minced 
  • 5 oz baby spinach, roughly 4.5 cups or one small package of spinach
  • 1/2 cup artichokes hearts, chopped (75 g)
  • 1/2 tsp salt
  • 1/4 cup nonfat Greek yogurt (2 oz)
  • 1/4 cup shaved Parmesan cheese (1 oz)
  • 1.5 oz fresh mozzarella
  • 2 slices turkey bacon, cooked and chopped into small pieces

Directions:

  1. Preheat oven to 450°F. Prepare Cauliflower Crust per instructions, baking at 450°F for 10-15 minutes, until golden brown.
  2. While Cauliflower Crust is baking, melt butter in a nonstick skillet over medium high heat. Add garlic and brown for 1 minute. Next, add baby spinach and salt and allow to wilt, about 2-3 minutes. Once wilted add the artichoke hearts, stir to combine and cook for 1 minute to warm through. 
  3. Transfer spinach and artichokes to a mixing bowl, along with the Greek yogurt and Parmesan cheese. Mix until well incorporated.
  4. Once the Cauliflower Crust has finished baking, spread spinach artichoke mixture evenly over top the crust. Finish with a sprinkle of the turkey bacon and slices of fresh mozzarella. Bake at 450°F for 5-10 minutes, until cheese has melted. Remove from oven and allow to cool for 5 minutes before slicing. 

Nutritional Information (1 slice, 4 total slices in pizza):

163 calories - 16 g Protein, 9 g Carbohydrates (3.8 g Fiber), 7 g Fat

Posted on December 30, 2015 and filed under Recipes, Vegetables/Sides.

How to Build an Epic Cheese and Charcuterie Board

How to build an EPIC cheese and charcuterie board | My Engineered Nutrition

Anyone who knows me knows I LOVE to entertain. 

LOVE IT. In fact, I find more joy in feeding and entertaining other people than I do cooking just for myself.

With Labor Day this coming weekend, I figured this was the perfect time for me to share how I build an EPIC cheese and charcuterie board. The holidays are always a time which calls for gathering, celebrating and entertaining.

 I recently went to Malibu Wines in Malibu (duh) and decided that occasion called for a cheese and charcuterie board. Follow along as I break down how you too can assemble this epic board. 

How to build an EPIC cheese and charcuterie board | My Engineered Nutrition

Wine tasting or not, cheese and charcuterie are ideal for any occasion. It is the perfect start to a dinner, fantastic addition to a party, a great option for a picnic, or simply "just because". My components for assembling the perfect board include:

  1. Cheeses
  2. Charcuterie
  3. Something Salty
  4. Something Sweet
  5. Bread and Crackers

And of course, let's not forget the serving platter,small dishes, name makers and cheese knives!

1. Cheeses

How to build an EPIC cheese and charcuterie board | My Engineered Nutrition

My general rule is 3 oz of cheese per person if the board is the main food for the event. If you are serving multiple appetizers or want this to be a lighter snack, then scale back the amount of cheese you buy. 

I like to select 3 - 4 different types of cheeses. If you are having a large party (8+ people) you can opt for even more choices. When I am thinking about what cheese to serve, I try and select a soft, semi-soft, semi-hard and hard cheese. You should plan on allowing your cheeses to sit at room temperature for at least an hour before serving. Their flavors are best when they are at room temperature and not as hard blocks straight from the refrigerator (which mutes the flavor)! 

Soft: These are soft and creamy cheese which are spreadable. Goat, Brie, Chevre, Camembert

Semi-soft: More firm than soft cheeses but still has a high moisture content and tend to be mild in taste. Munster, Gruyere, Blue-veined cheeses (although these aren't mild but much  more distinct and "stinky")

Semi-hard: These cheese are much lower in moisture than soft cheese and aged for a longer time. Cheddar (which there are so many varieties of based on aging length), Gouda

Hard: These are the cheeses that are packed very firmly, aged for months or years, and when cut are very crumbly  due to their low moisture content. Manchego, Asiago, Parmigiano-Reggiano 

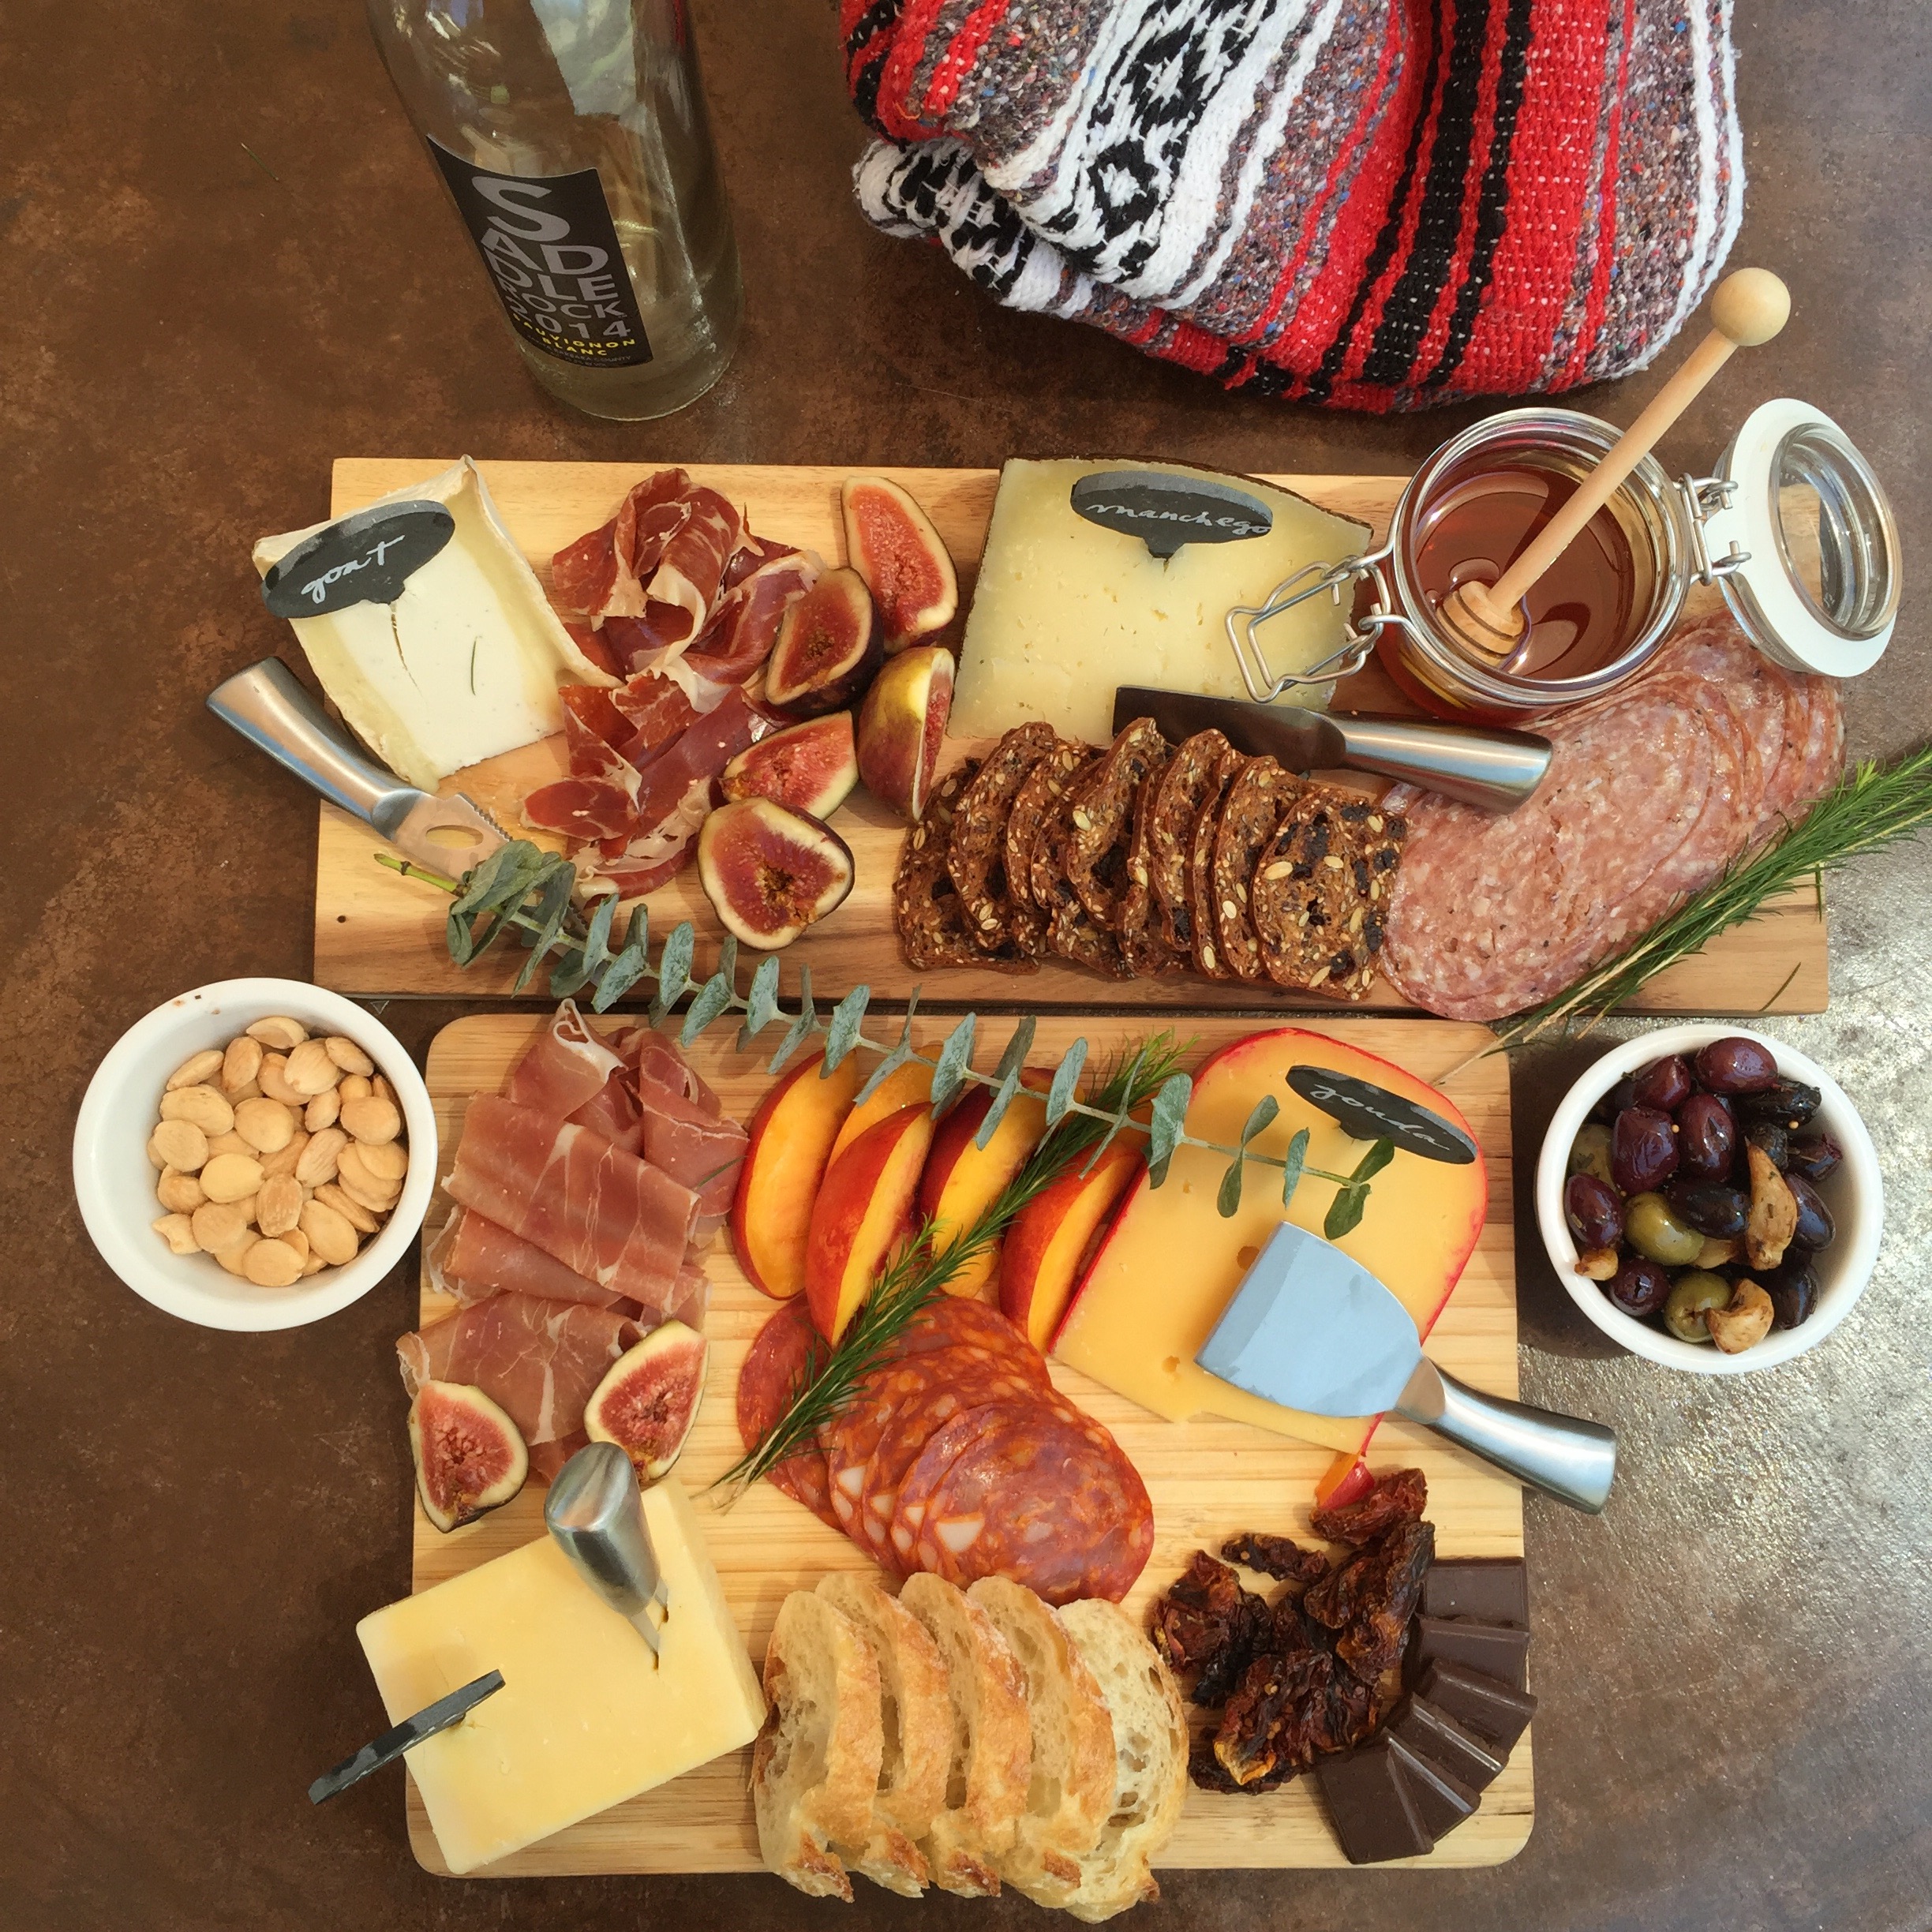
For my board I selected Truffle Tremor as my soft cheese (from Cypress Grove Chevre) as it is a wonder balance of goat cheese and Italian black summer truffles. If you haven't ever tried this cheese I highly recommend it! I wasn't necessarily in the mood for a semi-soft cheese for this occasion, so instead I selected 2 semi-hard cheeses - Gouda and Irish Cheddar. Lastly, for my hard cheese I chose Manchego. 

You'll notice that all of my cheeses have name tags. It is important to let your guests know what they are eating! I bought these adorable chalkboard markers off Amazon but even just paper name tags will do.

2. Charcuterie

How to build an EPIC cheese and charcuterie board | My Engineered Nutrition

Similar rules apply here for the amount of meats to serve. I aim for 2-3 oz of meat per person but again, if you are looking for something lighter you can decrease the amount of meats you buy. 

I am by no means an expert on different types of dry-cured meats and sausages. I found this article on The Savory very helpful and informative - Charcuterie Study Guide: A Meat-by-Meat Breakdown.  Charcuterie varies from region to region, but below are a few popular choices. 

Dry-Cured Meat:  

Italy: Prosciutto, Speck, Bresaola

Spain: Jamon Iberico, Jamon Serrano

Dry-Cured Sausage:  

Italy: Mortadella, Salami, Soppressata, Coppa

Spain: Chorizo

Other:

France: Pate comes in many different textures and compositions. They can be made from pork, rabbit, duck or chicken liver. 

Italy: Ciccioli is a pressed cake of fatty pork made from lard renderings. This is by no means good for you in large quantities...but it is hands down the most delicious thing I've ever had on a charcuterie board. I've never made it myself (only had it at a restaurant) but there are plenty of recipes out there should you want to try making!

For my board, I selected (from left to right) Prosciutto, Jamon Iberico, Chorizo and Sopressata. 

How to build an EPIC cheese and charcuterie board | My Engineered Nutrition

The main components of our board are now in place, but the accompaniments are equally as important to bring good balance. 

3. Something Salty

How to build an EPIC cheese and charcuterie board | My Engineered Nutrition

The salty components I chose for my board included Marcona almonds, an assortment of olives and sun-dried tomatoes. A good mix of crunchy and salty goodness. 

4. Something Sweet

How to build an EPIC cheese and charcuterie board | My Engineered Nutrition

For the sweet, I added raw organic honey, fresh figs, nectarines and a few squares of dark chocolate. This can really change based on the types of cheese and wine you pair for the occasion. If you were drinking full-bodied red wines, I may opt for cherries, plums and chocolate. We were eating this during a hot day so I knew we would be drinking a crisp, cold white wine so figs, nectarines and honey were a great pairing!

How to build an EPIC cheese and charcuterie board | My Engineered Nutrition

5. Bread and Crackers

Last, but certainly not least, you need to choose what type of bread or cracker you will eat all of these delicious meats and cheeses on! You can go simply with just bread or just crackers, but I personally prefer a mix of both.

Cracker, goat cheese, prosciutto and fig

Cracker, goat cheese, prosciutto and fig

Crackers are a great base for your soft, spreadable cheeses

 Baguette, cheddar, chorizo and sun-dried tomato

 Baguette, cheddar, chorizo and sun-dried tomato

Once you have all of your components, it is time to assemble. This is the part I love! You can use a mix and match of cutting boards/serving platters or just choose one large board. Cutting boards are recommended so that your guests can easily slice the cheese directly on them. 

You should separate the stronger smelling cheeses from the milder ones - you don't want to interfere with the flavors of your cheeses. I also make sure that the charcuterie is divided about board. Once the charcuterie and cheese are in place, fill in the gaps with your accompaniments. If everything doesn't fit on the board - that's OK! You can see I used small bowls for the nuts and olives. If you want to get really creative (and why wouldn't you) garnish the board with some greenery to finish off.

How to build an EPIC cheese and charcuterie board | My Engineered Nutrition

You literally cannot go wrong. Whatever you choose, it is guaranteed to be tasty. Have fun and enjoy the company of those you share this with! Cheers!

My Engineered Nutrition

Pin Me!

How to build an EPIC cheese and charcuterie board | My Engineered Nutrition


Posted on September 3, 2015 and filed under Recipes, Entertaining.