Coconut Cherry Oat Bars

Coconut Cherry Oat Bars | My Engineered Nutrition

If you look through my kitchen, you would be hard pressed to find many 'snacks' or processed foods. I'd always much rather prefer making things for myself, that way I know all of the ingredients and there aren't any hidden additives. Plus, making food for yourself is usually far more affordable. 

After a hard workout I'm usually starving and in need of an easy and FAST snack to hold me over until dinner. Carbs are a must to refuel but I don't want something full of sugar or junk like a traditional store-bought energy bar. 

Coconut Cherry Oat Bars | My Engineered Nutrition

Solution? THESE bars!

Whoa baby, are these delicious and so incredibly simple to make! You want to know another secret? Aside from the slight bit of sweetened coconut on top of the bars there is no added sugar. These are naturally sweetened with ripe mashed banana and dried cherries. I'm also using coconut butter, or manna, in these bars. If you haven't ever tried this...you are in for a treat. Not to be confused with coconut oil, coconut butter is made from the flesh of the coconut. 

The bars are a great post-workout treat, but also would be awesome for a quick breakfast or easy dessert. Really, you can make an argument to have these bars morning, noon or night!

Coconut Cherry Oat Bars | My Engineered Nutrition

While it isn't absolutely necessary, I used a True Nutrition Custom Oatmeal Blend to make these bars. It is pretty awesome to be able to make your own oatmeal blend! The combinations are almost endless as far as mix-ins and flavoring options. For these bars, I used a blend of Old Fashioned Oats, Dried Tart Cherries and Chopped Walnuts. 

Want to give a Custom Oatmeal blend a try? If you use the code 'MYENG' at checkout, you will receive 5% off your order! 

Coconut Cherry Oat Bars | My Engineered Nutrition

What is your favorite post-workout snack? Regardless of your oats, I hope you give these bars a try! 

Coconut Cherry Oat Bars | My Engineered Nutrition

Coconut Cherry Oat Bars

Prep Time: 15 minutes

Bake Time: 25 minutes

Servings: 8 bars

Ingredients: 

  • 2 cups oats blend (True Nutrition Custom Oat Blend of Old Fashioned Oats, Dried Tart Cherries, Chopped Walnuts)*
  • 1 cup mashed ripened banana
  • 2 tbsp Coconut Butter (also called Coconut Manna)
  • 1/2 cup dried tart cherries, coarsely chopped
  • 1 tsp vanilla extract
  • 1/2 cup shredded sweetened coconut (unsweetened also works!)

Baking Accessories:

  • Baking Dish, 8 inch square
  • Baking Sheet
  • Parchment Paper 

*If you choose not to use a blend, simply combine 1/4 cup chopped walnuts with 1-1/2 cup oats and increase dried cherries to 1/4 cup

Directions:

  1. Preheat oven to 350°F. Prepare baking dish by lining with parchment paper. Fold the paper so that the bottom and edges are covered in the parchment - this will make for easier removable of the bars from the dish.
  2. Spread the 2 cups of oats out on a baking sheet, making an even layer. Toast in the oven for 5-8 minutes, ensuring the oats don't get too brown.
  3. While the oats are toasting, combine mashed banana, melted coconut butter, dried cherries and vanilla extract in a mixing bowl. Once oats have toasted, add oats to the mixing bowl and stir until all ingredients are well combined. 
  4. Transfer oat mix to prepared baking dish and spread into corners. Sprinkle an even layer of the shredded coconut on top and bake for 25 minutes at 350°F.
  5. Remove from oven and allow to cool completely before slicing. Slice into 8 equal bars. 

Nutritional Information (1 bar):

193 calories - 4.5 g Protein, 29 g Carbohydrates, 6.5 g Fat
Cajun Baked Salmon

Cajun Baked Salmon | My Engineered Nutrition

Growing up, I was very lucky to have been exposed to a wide variety of cuisines. I can thank my mom for introducing me to a world of flavors, all before I could reach the kitchen counter top without the help of a stool. Surprisingly enough, however, there are some foods I just didn't really get introduced to until later in life. This was mainly due to either my mom or dad's taste preferences. The list, while very short, included salmon, mushrooms and tomatoes. 

My mom doesn't care for mushrooms or raw tomatoes (stewed or cooked tomatoes pass her test!) so very rarely did we see those making an appearance on the dinner table. My dad's list is also very short, but for as long as I can remember consists of: mint, melon, and SALMON. 

Cajun Baked Salmon | My Engineered Nutrition

Salmon has long been a neglected protein in my rotation of meals. This changed, however, when I began dating my boyfriend who happens to love salmon. He grew up eating it regularly - quite the opposite of my young culinary career. Recently he requested we have salmon for dinner, and when asked how he wanted it prepared he replied with "do you have Cajun rub?".

My spice cabinet is overflowing with jars of spices. I guarantee I'll have almost ANYTHING you are looking for. His cabinet consists of 2 jars of pre-made spice blends: Cowboy Rub and Cajun Seasoning. To his disappointment, I informed him that I did not have the pre-made Cajun spice blend. As a consolation, I offered to make an even BETTER blend. This salmon is healthy, easy to prepare and takes almost no time to bake! 

Lucky for me, this recipe passed the test of The Salmon Man.

Cajun Baked Salmon | My Engineered Nutrition

Cajun Baked Salmon

Prep Time: 5 Minutes

Bake Time: 20-25 minutes

Servings: 2-4

Ingredients:

  • 1 lb skin-on-salmon fillet
  • 1 tsp garlic, minced
  • 1 tsp olive oil
  • 1/2 lemon
  • Cajun spice blend

Cajun Spice Blend

  • 1/4 tsp paprika
  • 1/4 tsp chili powder
  • 1/4 tsp onion powder
  • 1/4 tsp oregano
  • 1/4 tsp salt
  • 1/4 tsp pepper

Kitchen Equipment

  • Baking sheet
  • Parchment paper or aluminum foil

Directions:

  1. Preheat oven to 425°F. Line baking sheet with parchment paper or aluminum foil. Mix spices together for the Cajun spice blend and set aside.
  2. Place the salmon, skin side down, on the prepared baking sheet. Drizzle olive oil over salmon and squeeze lemon juice over top. Spread garlic over the fillet. Cover the salmon fillet evenly with the spice blend and massage into the salmon a bit, ensuring to cover the entire piece of fish.
  3. Bake for 20-25 minutes. Depending on the thickness of your fillet, it could take more or less time. Keep an eye on the salmon and check after 15 minutes. When the thickest part of the salmon is easily flaked with a fork, the salmon is done cooking. Remove from oven and serve immediately. 

Nutritional Information (one-4 oz serving, recipe makes four-4 oz servings)

150 calories - 23 g Protein, 0 g Carbohydrates, 6 g Fat


Posted on April 1, 2016 and filed under Recipes, Fish/Seafood.

Chia Seed Protein Pudding (Vegan)

Chia Seed Protein Pudding | My Engineered Nutrition

You know the saying "if it ain't broke don't fix it"?

Well, I eat this pudding every day and have been for probably the last 5 or 6 months. No, this is not an exaggeration. I love it and I have yet to get tired of eating this every day - so, why stop now? 

Chia Seed Protein Pudding | My Engineered Nutrition

I normally eat this in the afternoon, before I workout. Sometimes I eat it for breakfast, sometimes as dessert. That's the beauty of this simple protein packed pudding - you can eat it day or night! This is also totally customizable, which is probably why I haven't gotten bored of this.

You can use ANY flavor protein powder and top the pudding with whatever your heart desires: berries, bananas, nut butter, shredded coconut, whipped cream, chocolate chips...really, anything you want!

Chia Seed Protein Pudding | My Engineered Nutrition

This pudding requires just THREE ingredients: chia seeds, plant-based protein powder and non-dairy milk (you could actually use water in a pinch)! I must stress using a plant-based protein, as this won't have that "pudding" texture using whey protein. Instead, you'll end up with a liquefied protein syrup which is far less than appetizing (trust me, I know from experience). If you haven't tried a non-whey protein powder I highly recommend testing the waters of plant-based protein with this recipe! I personally like eating this protein as a pudding over having it as a shake, hence why I've eaten this every day for the past 6 months. Chia seeds become gelatinous when they absorb liquid, which is what gives this pudding its 'pudding-like' texture, in combination with the protein powder.

Another benefit of this pudding is that it is great source of fiber! Chia seeds are packed with fiber and there is a bit with the protein, rounding out this recipe with 5 total grams of fiber. This truly is the ultimate guilt-free treat.

Chia Seed Protein Pudding

Prep Time: 5 minutes

Set time: 12 hours (Overnight is ideal, at least 3 hours for chia seeds to become gel-like)

Servings: 1

Ingredients: 

  • 1/4 cup protein powder, plant-based (such as pea and rice protein, I recommend True Nutrition) NOTE: this will not work with whey protein as it won't set up and hold like a pudding! 
  • 1 tbsp chia seeds
  • 1/2 cup non-dairy milk, such as almond, coconut or cashew milk

Optional Toppings:

  • Fruit
  • Nut butters
  • Whipped cream
  • Toasted coconut

Directions:

1. This couldn't be any simpler: in a bowl mix together protein powder, chia seeds and milk. You want this to be liquid-y, not totally thick like a pudding at this point. Cover and allow to sit overnight (or at least 3 hours) to allow for chia seeds to gel. Mix after the pudding has set and serve with desired toppings. 

Nutrition (1 serving, does not account for additional toppings):

185 calories - 27 g Protein,  5.5 g Carbohydrates, 6 g Fat

Gluten Free Irish Soda Bread

Gluten Free Irish Soda Bread | My Engineered Nutrition

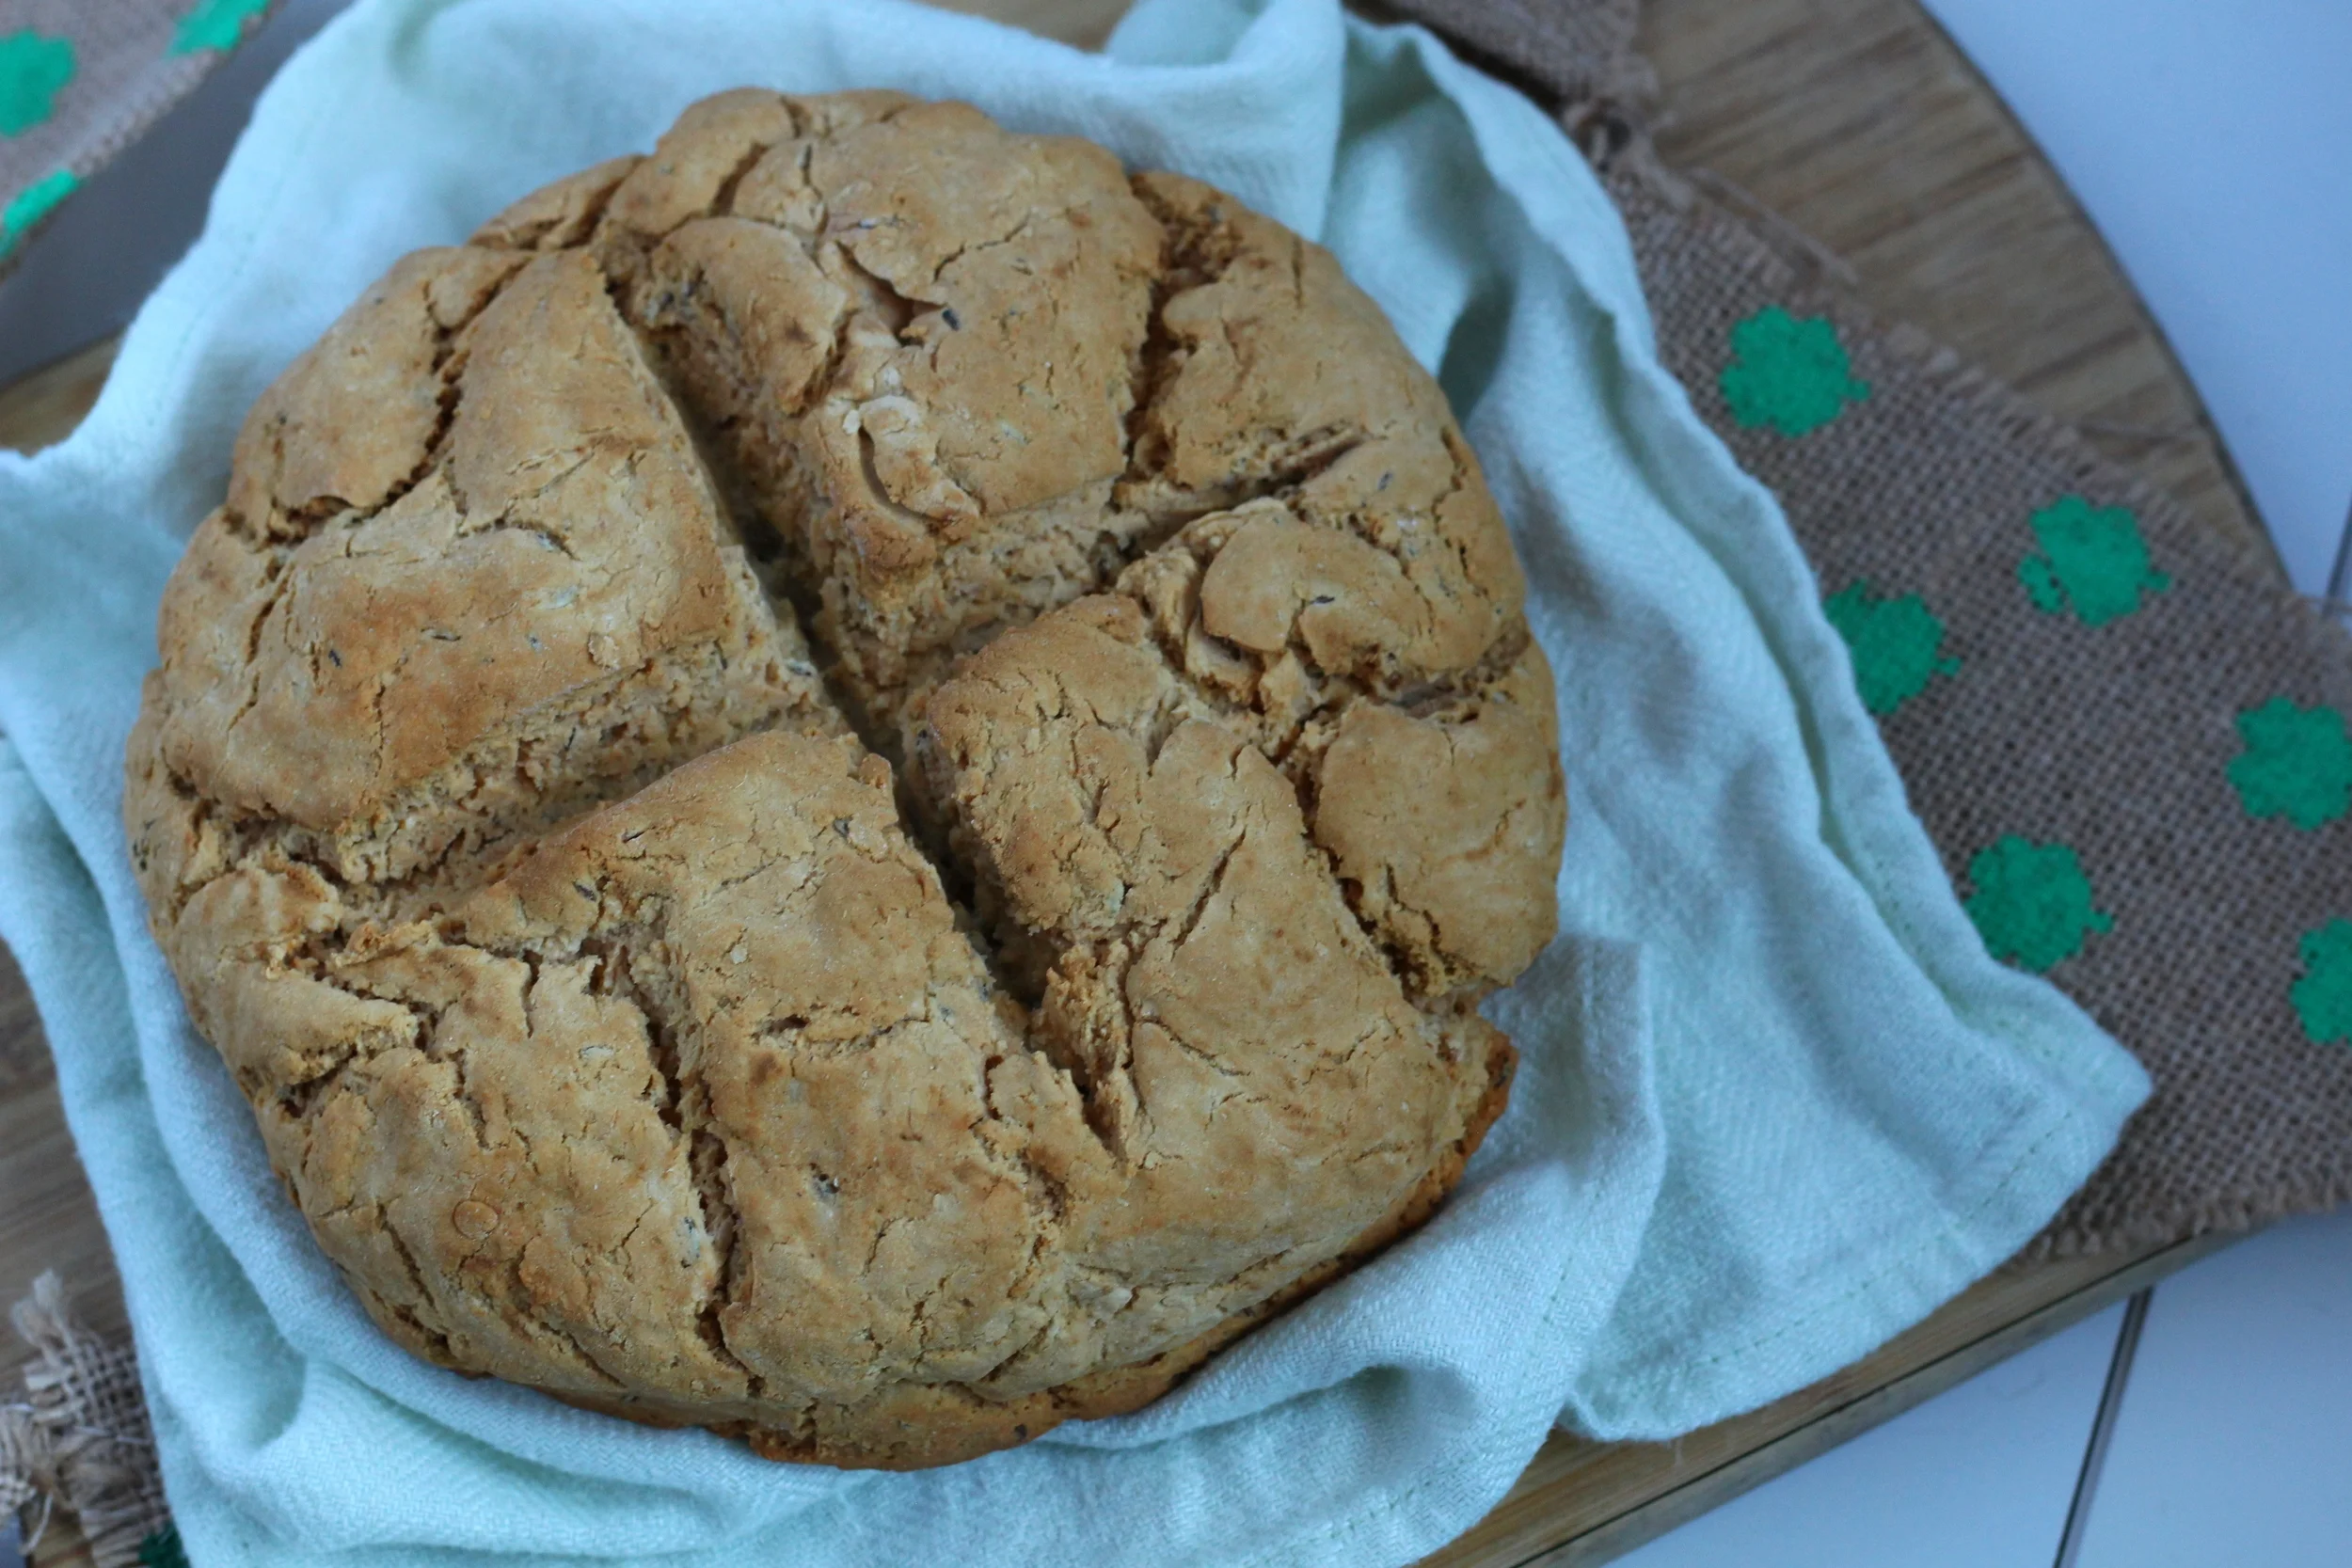
One more recipe, just in time, for St. Patrick's Day!  Yesterday I posted that warm and hearty Cabbage, Ham and Potato Soup and you know what goes perfectly with it? THIS Irish Soda Bread! I'll have to admit, I am by no means a connoisseur of Irish soda bread. I've had it a time or two, but since I stay away from gluten it isn't a frequent food I consume.

I wanted that to change, so I set out determined to make a gluten free version of this simple bread in honor of the holiday.

Gluten Free Irish Soda Bread | My Engineered Nutrition

It took me a time or two (or five) to get a bread that I was satisfied with. The star of this bread is Bob's Red Mill Gluten Free 1-to-1 Baking Flour. This flour, which is a blend of various gluten-free flours, is amazing to bake with.  The basic recipe for the bread is quick and simple. Flour, buttermilk and baking soda, which is the levaning agent instead of yeast. I've adapted the original formula some and have swapped Greek yogurt in place of buttermilk and have added caraway seeds (I love that Rye bread flavor!).

Gluten Free Irish Soda Bread | My Engineered Nutrition

This bread is dense and savory. If you are expecting a light and airy slice of bread, this is not the loaf for you. If, however, you are looking for a thick and dense slice, able to withstand dipping into a hearty soup - look no further! 

Gluten Free Irish Soda Bread | My Engineered Nutrition

Gluten Free Irish Soda Bread

Prep Time: 15 minutes

Bake Time: 50-60 minutes

Servings: 16 slices

Ingredients: 

Baking Accessories:

  • Baking Sheet
  • Parchment Paper 

Directions:

  1. Preheat oven to 375°F. Prepare baking sheet by lining with parchment paper. 
  2. In a large mixing bowl combine flour, salt, baking soda and baking powder.
  3. In a medium bowl combine Greek yogurt with water and whisk until well incorporated. In a small bowl crack egg and whisk. Add both wet ingredients to the dry in the large mixing bowl. Initially, stir with a spatula and then use hands until dough forms into a ball. 
  4. Once a ball has formed, turn out onto a floured surface and add caraway seeds. Kneed until caraway seeds are even incorporated throughout the dough. You may need to add a bit of water if the dough is not holding together - carefully add 1 tbsp of water at a time! If dough becomes to sticky and wet, dust with a small bit of flour. Form into a disc about 8" in diameter.
  5. Transfer to prepared baking sheet. Bake for 50-60 mins or until a toothpick inserted into bread comes out clean and you hear a hollow sound when you knock on the bottom of the loaf. Allow to cool for at least 10 minutes before slicing or bread may be too warm and gummy. Serve warm or store in air-tight container for later. I find it is easiest to slice this loaf by cutting in half and then cutting into slices, rather than trying to slice the original diameter of loaf.

Nutritional Information (1 slices):

125 calories - 3.5 g Protein, 27 g Carbohydrates, 0.3 g Fat

Posted on March 16, 2016 and filed under Recipes, Baking.

Cabbage, Ham and Potato Soup

Cabbage, Ham and Potato Soup

The scene couldn't have been more fitting when I first made this soup. It was a lazy Sunday and the rain had be coming down for hours on end. There was a chill in the air, making it the perfect day to stay indoors wearing my favorite comfy clothes - and to create the ultimate St. Patrick's Day soup!

I imagine it is like this in Ireland quite often, which would be incredibly detrimental to my productivity. But seeing as how we've been in a drought for so long in California, it was a very welcomed rainy day.

Cabbage, Ham and Potato Soup | My Engineered Nutrition

Now, let's talk about this soup. 

I, for one, am a huge lover of cabbage. Raw, slaw, stewed or pickled - you name it, I'll eat it. Not everyone goes ga-ga for the vegetable like I do, but I'm hoping to change your tune after trying this soup.  Loaded with cabbage, cubes of ham, sweet potatoes and seasoned with caraway seeds and fresh thyme, this soup will warm you from the inside even on the coldest and rainiest of days. (OK, so I know sweet potatoes aren't really keeping with the Irish theme BUT they are the white sweet potatoes and I think they are more fitting that the traditional tuber)

Cabbage, Ham and Sweet Potato Soup | My Engineered Nutrition

This recipe makes a VERY large batch of soup, which is great as this rewarms wonderfully. I'm beginning to realize all of my Soup Recipes make large batches...

This will feed a family for a meal or two, or you can easily freeze a portion of this soup if you are only cooking for one or two. It doesn't need to be St. Patrick's Day to enjoy this soup, but a lazy, rainy Sunday to enjoy a warm bowl doesn't hurt.

Cabbage, Ham and Sweet Potato Soup | My Engineered Nutrition

Cabbage, Ham and Potato Soup

Prep Time: 15 minutes

Cook Time: 45 minutes

Servings: about 10 cups of soup

Ingredients:

  • 1 head of cabbage, chopped
  • 1 medium onion, chopped
  • 1 lb ham steak, cubed
  • 1 tbsp extra virgin olive oil
  • 3 cloves garlic, minced
  • 2 tsp caraway seeds
  • 2 tsp fresh thyme, chopped
  • 2 bay leaves 
  • 1 tsp salt
  • 1/2 tsp black pepper
  • 4 cups chicken broth
  • 2 cups white sweet potatoes, cubed

For garnish:

  • Irish Soda Bread

Directions:

  1. In a large pot over medium heat, add onions and olive oil. Cook while stirring often until onions are softened and fragrant, about 5 minutes.
  2. Add cubed ham, garlic, thyme, caraway seeds, bay leaves,salt and pepper. Stir and continue to cook for another 5 minutes.
  3. Add cabbage and chicken broth, increase heat to high and bring to a boil, about 10 minutes.
  4. Add sweet potatoes and return to a boil, 5 minutes. 
  5. Cover and reduce heat to low and simmer for 20 minutes. Serve immediately. Allow any remaining soup to cool and store in the refrigerator or freeze.

Nutritional Information (1 cup soup):

138 calories - 13 g Protein, 15 g Carbohydrates, 2.8 g Fat

Posted on March 15, 2016 and filed under Recipes, Soup, Pork.