Spinach Artichoke Frittata

Spinach Artichoke Frittata | My Engineered Nutrition

I love breakfast, especially savory ones. Eggs, sausage, ham, and cheese - these are a few of my favorite things! Since I started following Intermittent Fasting (not eating between 9PM and 12PM), however, I don't eat during traditional "breakfast" meal time. Don't get me wrong, I love my current approach to nutrition and it works really well for me...but that doesn't mean I still don't miss my beloved breakfast!

Spinach Artichoke Frittata | My Engineered Nutrition

The amount of "breakfast for dinner" I prepare has been on the rise. I noticed I have very few breakfast recipes on the site, and the ones that are posted are sweet baked goods like my Apple Cider Protein Donuts, Pumpkin Protein Waffles or Pumpkin Pronuts.

That's because breakfast is very often a quick scramble of whatever meats, vegetables, cheese and egg I have on hand.

Spinach Artichoke Frittata | My Engineered Nutrition

This frittata may look involved but it couldn't be easier! While some may turn their noses up at just eating the egg whites (love the yolks!), I still believe it is just fine to eat them every once in a while when you are being mindful about your diet. In this case I balanced out the total fat in the frittata by adding butter and ham - who doesn't love that? 

With some frittatas, they can become overloaded with vegetables, making it heavy and dense. The spinach and artichokes keep this frittata light while also packing it full of veggies! This frittata is pleasing on the eyes, so it could be served at a brunch or breakfast party. No party? I made this for myself for multiple dinners and the leftovers re-warm perfectly!

Spinach Artichoke Frittata | My Engineered Nutrition

Spinach Artichoke Frittata

Prep Time: 5

Cook Time: 20

Servings: 4

Ingredients:

  • 1 pint egg whites (approximately 10 egg whites)
  • 1 tbsp butter
  • 1 tsp garlic, minced
  • 4 oz ham steak
  • 2-1/2 c spinach  
  • 1 oz Parmesan cheese, grated
  • 8 artichoke heart quarters, canned, water drained
  • Salt and pepper

Directions:

  1. Preheat oven to 375.  
  2. Melt butter over medium high heat in a medium sized saucepan. Add garlic and ham, stir. Next add spinach and allow to wilt down. This only takes a couple of minutes.
  3. Combine egg white, Parmesan cheese, salt and pepper in a mixing bowl. Whisk to combine. Once spinach has cooked down, pour egg white mixture into pan. Stir to incorporate spinach and ham with egg whites. Cover with lid and cook for about 2-3 minutes until the eggs begin to set. Remove lid and arrange artichoke hearts in a ring around top of frittata. 
  4. Transfer to oven and cook for 10 minutes or until frittata has set and cooked through. Remove from oven and allow to cool for 5 minutes before slicing. 

Nutritional Information (1/4 of Frittata):

138 calories - 20 g Protein, 2.5 g Carbohydrates, 5 g Fat
Posted on December 17, 2015 and filed under Recipes, Breakfast.

Double Chocolate Peppermint Protein Muffins

Double Chocolate Peppermint Protein Muffins | My Engineered Nutrition

While I dream of having a full time job has a food blogger someday, whipping up recipes day in and day out, the current reality is that I'm an engineer (gotta pay the bills to buy all this food somehow). At my office, we have a quarky birthday tradition: when it is your birthday, you bring in treats for the office. A backwards tradition that I've actually grown fond of. 

Things are starting to get more serious with my figure prep as I near being just 9 weeks out. What fun is bringing in birthday treats if the birthday girl herself can't eat them?? This pushed me to get creative with my baking!

Double Chocolate Peppermint Protein Muffins | My Engineered Nutrition

First to come to mind was cupcakes. I love baking cupcakes and have created some pretty fantastic cakes in years past. The best part of a cupcake, in my opinion, is the frosting/topping. You know what makes it so good? BUTTER. 

I would have LOVED to make a full fat birthday treat, however, I have my eyes set to my goal. So what if I ditched the frosting? What is a cupcake without frosting? Ah yes - a muffin.

Double Chocolate Peppermint Protein Muffins | My Engineered Nutrition

I knew I wanted a healthy dose of chocolate and I'd also been craving some Holiday inspired. What pairs better during the holiday season than chocolate and peppermint? Now, this is a stretch to call this delicious creation a muffin. Most often muffins are thought of as a breakfast food. These can easily pass for dessert. I did put my signature spin on these and added in protein powder, so that counts for "breakfast"...right?

I brought 3 dozen of these into my office and they were eaten up in record speed. If you are looking for a crowd-pleasing dessert to serve up this holiday season that tastes like it is a decadent treat but is actually low fat, gluten free and packed with protein, do yourself a favor and bake up a batch of these Double Chocolate Peppermint Protein Muffins!

Double Chocolate Peppermint Protein Muffins | My Engineered Nutrition

Double Chocolate Peppermint Protein Muffins

Prep Time: 25 minutes

Bake Time: 15 minutes

Servings: 12 muffins

Ingredients:

Kitchen Tools:

  • Muffin tin
  • Stand mixer or electric hand mixer

Directions: 

  1. Preheat oven to 425°F. Prepare muffin tin by spraying with oil or brushing with a small bit of butter. Prepare candy canes by placing them within a plastic Ziploc bag and crushing with a rolling pin (this part can get fun). 
  2. In a medium bowl, combine flour, cocoa powder, sugar, protein, baking powder and salt. Whisk to combine. 
  3. In a stand mixer (or large bowl with hand mixer), combine coconut milk, Greek yogurt, eggs, and vanilla. Whisk until light and fluffy, about 1 minute at medium-high speed. Remove bowl from stand mixer (or remove hand mixer) and add in dry ingredients. By hand, mix in the dry ingredients with a hand whisk and spatula. It is important NOT to over mix! The batter will be fairly thick; scoop-able, not pour-able. Once well incorporated, mix in chocolate chips and crushed candy cane. 
  4. Scoop batter into muffin tin. Place tin in oven to bake. Immediately after closing oven door, reduce temperature to 375°F. Bake muffins for 15 minutes or until a toothpick inserted into the muffins comes out clean. Allow to cool for 5 minutes within the pan and then remove to finish cooling on a cooling rack. 

Nutritional Information (1 muffin)

186 Calories - 8g Protein, 31g Carbohydrates, 3.2g Fat

Sweet Potato Stacks

Sweet Potato Stacks | My Engineered Nutrition

So a few weeks back I saw this video that Tasty posted for Sweet Potato Marshmallow Stacks. I thought the technique of making these was genius, but I was in the mood for a savory sweet potato dish for Thanksgiving, rather than sweet.

Sweet Potato Stacks | My Engineered Nutrition

On Thanksgiving last week, the sweet potatoes were my last dish to prepare. I had no recipe and just went with what felt right. I grabbed my mandoline and sliced up a few yams. NOTE: technically these super orange taters are yams, the whiter ones are actually sweet potatoes, but I digress...

I threw the sweet potatoes into a mixing bowl then added some fresh rosemary, thyme, grated Parmesan, melted butter, salt and pepper.

Sweet Potato Stacks | My Engineered Nutrition

I gave that all a good mix, making sure no sweet potato was left behind when it comes to melted butter and cheese! I stacked those little guys into a muffin tin and baked them in the oven. 

Sweet Potato Stacks | My Engineered Nutrition

The result? These awesome little stacks of crispy cheesy goodness. 

Sweet Potato Stacks | My Engineered Nutrition

These sweet potato stacks are so simple and take no time to prepare. Looking for an appetizer to take to your next holiday party? These are the perfect finger food!  Not in the mood for sharing? These are awesome re-warmed so they could easily be made ahead of time and eaten throughout the week. 

Whatever the occasion, don't miss out on these stacks.

Sweet Potato Stacks | My Engineered Nutrition

Sweet Potato Stacks

Prep Time: 10 minutes

Bake Time: 40 minutes

Servings: 12 stacks

Ingredients:

  • 2-3 large sweet potatoes (21 oz total weight)
  • 1 tbsp melted butter
  • 1 oz grated Parmesan cheese (1/4 cup)
  • 1/2 tbsp fresh rosemary, chopped
  • 1/2 tbsp fresh thyme, chopped
  • 1/2 tsp salt
  • 1/4 tsp pepper

Kitchen Tools:

  • Mandoline slicer
  • Muffin tin

Directions: 

  1. Preheat oven to 375°F.
  2. Slice sweet potatoes into disks with a mandoline slicer.If you do not have a mandoline, you can thinly slice with a knife but try to be as uniform as possible. 
  3. In a large mixing bowl combine sliced sweet potatoes, melted butter, rosemary, thyme, salt, pepper and only half of the parmesan cheese. Toss potatoes until they are even covered with the butter and cheese. Layer potato slices in a muffin tin. As a tip, the smaller slices from the ends of the sweet potatoes fit best in the bottom of the tins and as you layer up the larger slices fit better! 
  4. Top each stack with a sprinkle of the remaining cheese. Bake in oven for 40 minutes. Remove from tin and serve. 

Nutritional Information (1 stack): 

60 calories - 1.8 g Protein, 10.5 g Carbohydrates, 1.7 g Fat

Posted on December 3, 2015 and filed under Recipes, Vegetables/Sides.

Whipped Cauliflower with Caramelized Onions

Whipped Cauliflower with Caramelized Onion | My Engineered Nutrition

Mashed potatoes are great, don't get me wrong.

But with all the other deliciously-heavy side dishes to choose from at Thanksgiving, wouldn't it be nice to have at least one lighter alternative? Or, what if you are like me, and cannot tolerate night-shade (white potatoes)?

Cauliflower to the rescue!

Caramelized Onions | My Engineered Nutrition

To start things off, any dish you add these caramelized onions to will be a hit. The Kitchn does a great tutorial on how to caramelize onions. It make take a bit of extra time and planning up front, but the results is well worth it.

Whipped Cauliflower with Caramelized Onions | My Engineered Nutrition

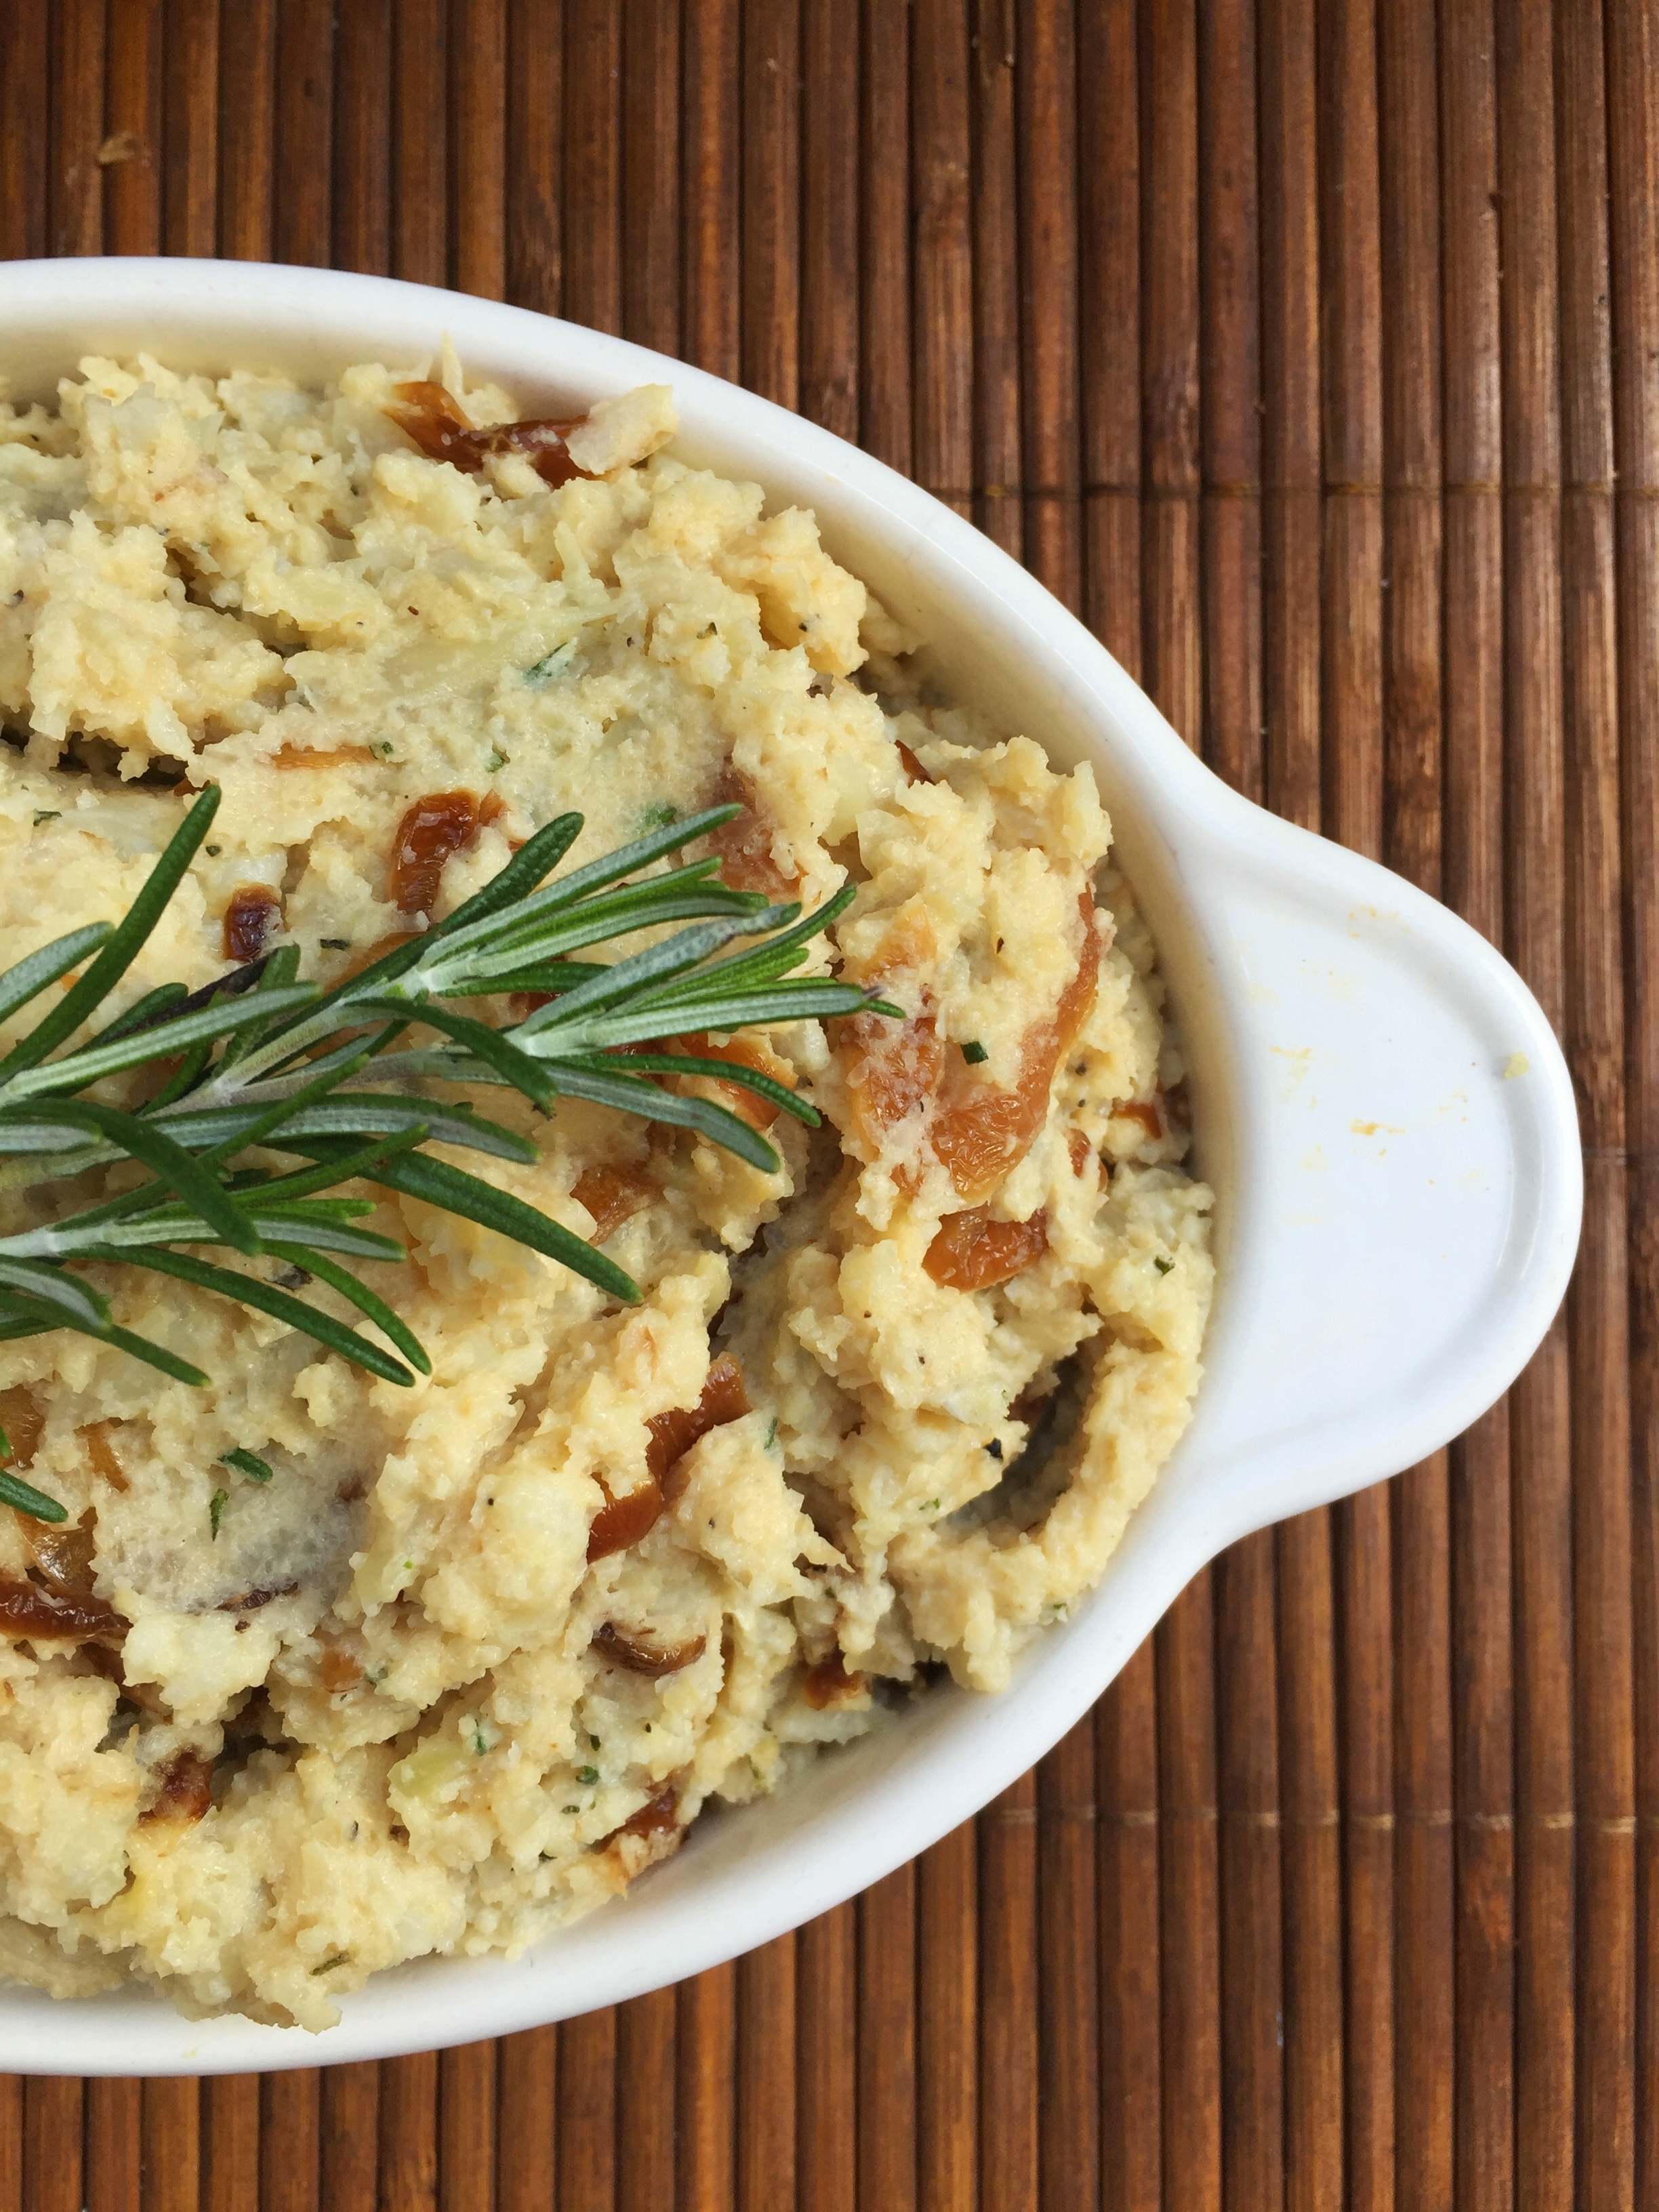
Cauliflower is great a great low carb substitute, and if cooked correctly can have almost an indistinguishable texture compared to white potatoes. I haven't loaded these down with butter and heavy cream, instead I snuck in non-fat Greek yogurt to provide that bit of creaminess to this side dish. Your dinner guests won't know the difference!  

Whipped Cauliflower with Caramelized Onions | My Engineered Nutrition

Whipped Cauliflower with Caramelized Onions

Prep Time: 1 hour (caramelized onions) + 10 minutes

Cook Time: 30 minutes

Servings: 6

Ingredients:

  • 2 small/medium heads of cauliflower, about 8 cups chopped
  • 1-1/2 tbsp butter
  • 4 cloves garlic, minced
  • 1/2 tsp salt
  • 1/4 tsp pepper
  • 1-1/2 tbsp fresh rosemary, chopped
  • 1/4 cup chicken stock
  • 6 oz non-fat Greek yogurt
  • Caramelized onions (1 whole onion)  - follow The Kitchn instructions

You will also need: 

  • Blender or immersion blender
  • Electric hand mixer

Directions: 

  1. Bring a large pot of water to boil. While the water is warming, chop cauliflower into florets. Once  water is to a boil, add cauliflower. Continue to boil for 10 minutes, until the cauliflower becomes very tender. Drain cauliflower.
  2. Return large pot to stove top. Over medium heat, melt butter. Add garlic and rosemary and allow to become fragrant but be sure not to let the garlic become too brown, about 1-2 minutes. Add cauliflower and mix to combine. Allow to cook for an additional 8 minutes.
  3. If your blender is large enough (or you have an immersion blender) you can do this next step in one batch. If not, this can be done in batches. Transfer cauliflower mixture to blender and add chicken stock. Blend but do not completely liquify - we want a 'mashed potato-like' texture.
  4. Return cauliflower to large pot (no heat). Add Greek yogurt and caramelized onions. Whip the cauliflower with the hand mixer until all ingredients are well incorporated. 
  5. I like to finish things off in the oven so that the cauliflower is warmed through and this also creates a bit of a crisp layer, which is a nice touch :) This would be a great dish to prepare ahead of time on Thanksgiving and just re-warm in the oven before sitting down to eat. 375F for about 15 minutes should do the trick!

Nutritional Information (1 serving)

120 calories - 6 g Protein, 13 g Carbohydrates, 5 g Fat

Posted on November 24, 2015 and filed under Recipes, Vegetables/Sides.

Apple Cranberry Pie

Apple Cranberry Pie | My Engineered Nutrition

The best meals are visually appetizing and have a taste that is even greater.

THIS pie - oh man. 

I always eat with my eyes first, and the moment this pie came out of the oven I knew I'd created a keeper.  

Apple Cranberry Pie | My Engineered Nutrition

I absolutely love when I get requests for recipes and this pie was inspired by my dear friend Samantha. She was looking for a lightened up apple pie for the holidays. We all know a traditional apple pie has both a base crust and a top pie crust. While that is very very delicious (READ: double the buttery crust), it maybe isn't ideal if we are trying to be smart about our dessert choices this holiday season.

Apple Cranberry Pie | My Engineered Nutrition

Instead of a top pie crust I covered this pie with a delicious almond meal streusel - you won't event miss that top crust! This allows the real stars of this pie to shine - the soft and sweet apples mixed with the occasional POP of tart from the cranberries. I've greatly reduced the amount of sugar added to this pie, leaving it to be mostly sweetened naturally from the apples.  

This is such a great holiday dessert. It will be fantastic for Thanksgiving but even more perfect for Christmas time, which is right around the corner!

Apple Cranberry Pie | My Engineered Nutrition

Apple Cranberry Pie

Prep Time:

Bake Time:

Servings: 8-10 slices

Ingredients:

For the Pie:

  • 1 Mamaw's Pie Crust
  • 3 lbs of apples (5-6 medium) - I use a mix of honey crisp and golden delicious
  • 1 cup fresh cranberries
  • 2 tbsp lemon juice
  • 2 tbsp arrowroot powder
  • 1 tsp cinnamon
  • 1/4 tsp salt
  • 1/4 tsp cloves
  • 1/4 tsp allspice
  • 1/4 tsp nutmeg
  • 1/4 cup coconut palm sugar

Streusel Topping:

  • 1/4 cup almond meal/flour
  • 2 tbsp coconut palm sugar
  • 1 tbsp butter, softened

Directions:

  1. Preheat oven to 375°F.
  2. Prepare pie crust per directions. Once completed place in refrigerator to keep chilled while you continue on with the rest of the recipe. 
  3. Peel, core and slice apples. My method is to first peel the apples, remove the core, slice in half and then cut 1/4" slices. Place apples in a large mixing bowl with cranberries and toss with lemon juice. 
  4. In a small bowl, mix together cinnamon, salt, cloves, allspice, nutmeg, coconut palm sugar and arrowroot. The arrowroot acts as a thickener in the pie to hold it together. Add to the apples and cranberries and mix until all of the fruit is evenly covered with the spice mixture. 
  5. Remove the pie crust from the refrigerator and fill with apple/cranberry mixture. Prepare the streusel by combining all ingredients in a small bowl and mixing until a meal-like consistency forms. Spread evenly over the top of the pie. 
  6. Loosely cover the pie with foil and bake at 375°F for 30 minutes. Remove foil after 30 minutes and continue baking uncovered for an additional 30 minutes. 
  7. Remove from oven and allow to cool for 3-4 hours (or ideally, make this pie the night before you plan on serving!). If you cut the pie too soon from the oven you run the risk of it not setting and becoming difficult to serve. 

Nutritional Information (1 slice out of 10 slices)

200 calories - 1.5 g Protein, 31 g Carbohydrates, 8 g Fat


Posted on November 20, 2015 and filed under Sweet Treats, Recipes, Baking.