Brussels Sprout Chips

Brussels Sprout Chips | My Engineered Nutrition

Why are chips so addicting? Why is it that you can never just have one?

It's the salty, crunchiness of the chip that makes them just so damn tasty and addictive. 

Brussels Sprout Chips | My Engineered Nutrition

With a little extra effort, these brussels sprout chips provide a guilt-free alternative to the not-so-good-for-you bagged chips you find  in the grocery store and at nearly every party. For the longest time I never attempted making brussels sprout chips because...well, they seemed like more effort than what they were worth. 

Boy, was I wrong. 

I PROMISE that these are so worth it. So much so that you won't want to share. But, I urge you to share (maybe the second batch) at your next party! These would be a perfect snack to nibble on while watching football this fall or as a great snack for a cocktail hour with friends. 

Brussels Sprout Chips | My Engineered Nutrition

Brussels Sprout Chips

Prep Time: 15 minutes

Cook Time: 15 minutes

Servings: 2

Note: This recipe is EASILY scaled, just keep the ratio of 3 cups brussel sprout leaves to 1/2 tbsp extra virgin olive oil

Ingredients:

  • 3 cups brussels sprout leaves, yielded after separating
  • 1/2 tbsp extra virgin olive oil
  • 1/2 tsp salt
  • 1/2 tsp garlic powder

Directions:

  1. Preheat oven to 350°F. Line a baking sheet with parchment paper and set aside. 
  2. To separate leaves, but bottoms of brussel sprout off and discard. Carefully separate the outer leaves from the sprout until you are just left with the sprout core. Transfer the leaves into a mixing bowl. You can keep the sprout core for a different use - I usually slice in half and roast separately like normally done with brussels sprouts. Continue to separate the sprout leaves until you have 3 cups of leaves. Toss brussels sprout leaves with olive oil, salt and garlic power.
  3. Spread brussels sprout leaves in a single layer on the parchment lined baking sheet and bake for about 15 minutes, or until leaves become golden brown. Remove from oven and serve immediately. 

Nutritional Information (1 serving)

52 calories - 1.4 g Protein, 3.6 g Carbohydrates, 3.6 g Fat
Posted on October 6, 2015 and filed under Recipes, Vegetables/Sides.

Guacamole

Guacamole | My Engineered Nutrition

We all have that one recipe we cling  to; the one we know like the back of our hand and can make with our eyes closed. For me, it is guacamole. For as long as I can remember, guacamole has been "my thing". Growing up, I was always in charge of making the guacamole. I took pride in teaching my younger sister how to make guacamole. I love making guacamole so much that at the age of 10, I asked for a molcajete (volcanic rock mortar and pestle). 

One of my staple snacks to enjoy while watching football is guacamole. Its so delicious, easy to make and a huge crowd pleaser. 

IMG_2257.JPG

Everyone has their own preference on how they enjoy their guacamole. Chunky or creamy? Spicy or mild? Simple or complex? 

I believe my guac is the perfect balance of all these qualities, making it the best you'll ever taste! Also, my secret touch: cumin.

Consistency is number one on my list for making the best guacamole. I have my method of scoring and then scooping the avocado in chunks to preserve a nice consistency. I love texture in my guac!

Guacamole | My Engineered Nutrition

Usually guacamole is served with tortilla chips - not the healthiest option! Instead, try serving yours up with carrots, broccoli and peppers. You still get a nice crunch but without the added fat.


Guacamole

Servings: 8

Prep Time: 10 minutes

Ingredients:

  • 2 avocados (roughly 10 oz of avocado)
  • 1/4 cup onion, chopped
  • 1 roma tomato
  • 1/4 cup cilantro, chopped
  • 1 lime, juiced
  • 1/4 tsp garlic powder
  • 1/4 tsp salt
  • 1/4 tsp cumin
  • 1-2 tbsp jalapeno, chopped (optional - depends on how spicy you want this!)

Directions:

  1. Start by preparing your avocados. I do this by cutting them in half and removed my pit. Next, I score the halves length-wise and width-wise which creates small cubes. Scoop avocado from skin, which will leave you with many small pre-cut cubes of avocado, into a medium mix big bowl. 
  2. Add remaining ingredients to mixing bowl and mash all ingredients together. Continue mixing until all ingredients are well incorporated, but chunky consistency is still kept. Serve with fresh vegetables or tortilla chips.

Nutritional Information (1 serving)

70 calories - 1 g Protein, 4 g Carbohydrates, 5.5 g Fat

Posted on October 5, 2015 and filed under Recipes, Condiments.

Roasted Chicken Breast

Roasted Chicken Breast | My Engineered Nutrition

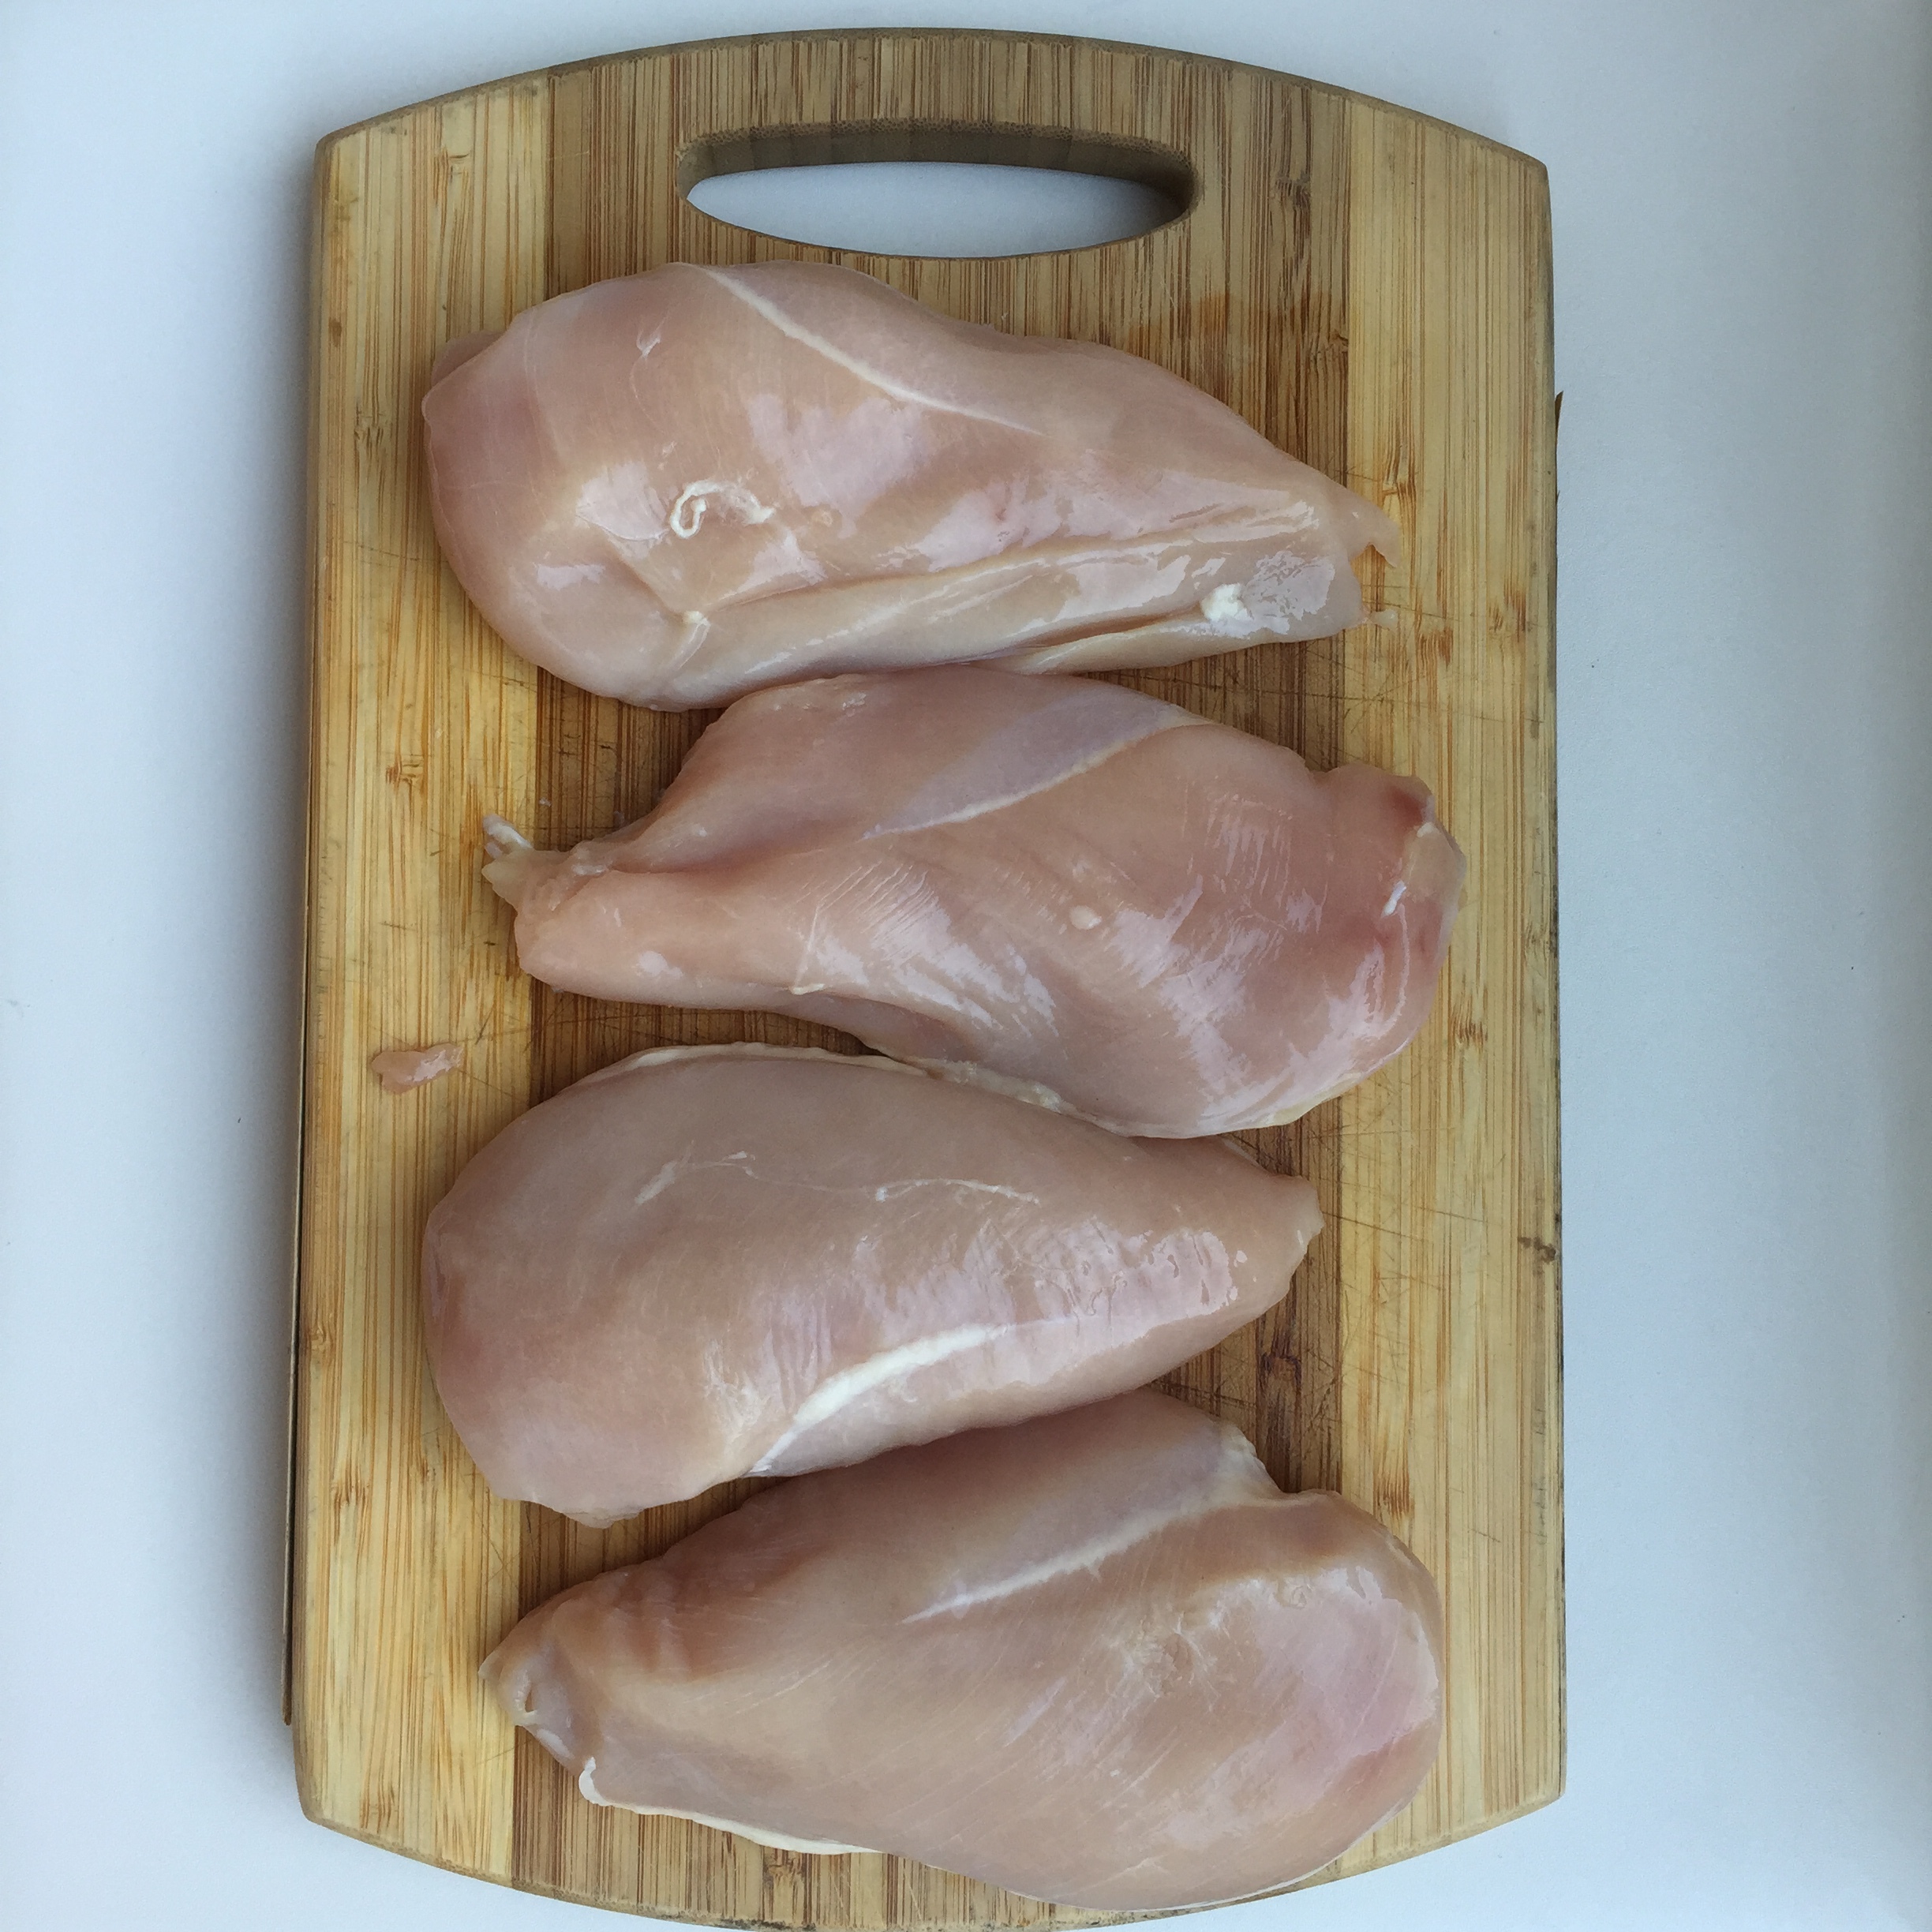
Roasting chicken can be a very simple but also very tricky. Cook just right and it can be juicy and tender. Cook too long and you have a dry and hard piece of protein that is almost unbearable. Once I mastered how to perfectly roast chicken breast my life got SO much easier (and more tasty) when it came to prepping meals in advance. 

Roasted Chicken Breast | My Engineered Nutrition

If you've known me in the past 2 years, then you've known me during a time when I took meal prepping very seriously. This was during my time when I was actively competing in figure competitions. Bring on the veggies and chicken breast for 80% of my meals (also before I learned of the beauty of flexible dieting, but I digress). Coincidentally enough, I could never cook chicken perfectly during this time. 

Roasted Chicken Breast | My Engineered Nutrition

I actually got to a point where I couldn't stand to look at baked chicken because I anticipated a dry and hard piece of meat. Please ANYTHING other than that!! Fast forward a year and a half since my last show and I have one very small but very impactful addition to my kitchen tool arsenal: an instant read food thermometer.  

Instant Read Food Thermometer | My Engineered Nutrition

I can't stress how big of a difference this simple tool can make! No more guessing if and when your meats are cooked to the appropriate temperature and NO MORE OVERCOOKING! Rejoice! 

Roasted Chicken Breast | My Engineered Nutrition

Ok...so a bit dramatic.

But seriously, if you haven't made the investment in this tool it will make your time in the kitchen so much easier. This simple 'How To' on roasted chicken is a staple for everyone's meal rotation. I make chicken on a weekly basis and either eat it as is with salads, sandwiches, etc. or transform it and use this as a base for other recipes. This is such a simple technique and everyone should know how they too, can cook perfectly juicy chicken! 

The key to perfectly cooked chicken is to pull it from cooking BEFORE it reaches the proper internal temperature. A safe minimum internal temperature for chicken is 165°F. I pull my chicken from the oven once it reaches 155°F, as it will continue to cook about another 10°F after it is taken out of the oven. 

Roasted Chicken Breast | My Engineered Nutrition

Perfectly Roasted Chicken Breast

Ingredients:

  • 4 Chicken Breasts
  • 1 lemon, juiced
  • 1 tsp dried rosemary
  • 1 tsp dried oregano
  • 1/4 tsp salt
  • 1/4 tsp pepper

Directions:

  1. In a mixing bowl, combine chicken breasts, lemon juice and spices. Allow to marinate for 15 minutes. Meanwhile, preheat oven to 400°F.
  2. Line a baking sheet with parchment paper. Once the chicken has marinated, arrange chicken breasts on baking sheet, evenly spaced. Insert thermometer probe into the thickest part of one of the larger pieces of chicken.
  3. Roast at 400°F until the thermometer reads 155°F - this normally takes about 25 minutes for me. 
  4. Remove from the oven and let rest for at least 5 minutes before cutting - you don't want to lose all the juices! Now you can eat this as is or use in your favorite dish! 
Posted on September 29, 2015 and filed under Recipes, Chicken.

Bacon Roasted Brussels Sprouts

Bacon Roasted Brussels Sprouts | My Engineered Nutrition

Fall is in full swing! My favorite seasons for cooking? Fall and winter. I love roasting and warm, slow cooked meals. I love the rich flavors and fragrant spices that fill your house as you are cooking. Halloween, Thanksgiving and Christmas. Cliche as it may be, I LOVE fall.

One of my ultimate Fall favorite side dishes? Bacon Roasted Brussels Sprouts. 

Bacon Roasted Brussels Sprouts | My Engineered Nutrition

Now, this certainly isn't a dish you can only eat in the fall and winter months, but it sure does hit the spot on evenings when the air is cool and crisp. This is a quick and simple side dish and honestly, what can be better than Brussels sprouts and bacon?  

Bacon Roasted Brussels Sprouts | My Engineered Nutrition

Bacon Roasted Brussels Sprouts  

Prep Time: 10 minutes

Cook Time: 20-25 minutes

Servings: 4

Ingredients

  • 4 cups Brussels sprouts
  • 3 slices of bacon
  • 1 tbsp shallots, minced  
  • 1 tsp fresh thyme, minced   
  • 1/4 tsp salt
  • 1/4 tsp pepper

Directions

  1. Preheat oven to 400°F. Prepare Brussels sprouts by cutting off their bottoms (discard) and slicing in half. For the extra large sprouts I usually cut these into quarters to assure they cook evenly. Transfer cut sprouts to large mixing bowl. Toss with shallots, thyme, salt and pepper.
  2. In a large skillet, fry bacon until crispy. I've found the best way to do this (without burning your bacon) is to begin by arranging your bacon in the skillet prior to turning on heat. Place skillet over medium-high heat and cook bacon until crispy, ensuring to flip bacon halfway through. This should take about 5 minutes.
  3. Once your bacon has cooked, removed slices and place on a paper towel lined plate. Set aside. Next, CAREFULLY pour rendered bacon grease over sprouts and toss to evenly coat.  
  4. Transfer sprouts to a baking sheet, spreading them out into a single even layer. Roast in 400°F oven for 20 minutes or until nicely browned. Halfway through roasting, give the sprouts a toss on the baking sheet so that you have even browning on all sides.  
  5. While roasting, chop the bacon into small pieces - real deal bacon bits! Once sprouts have roasted, sprinkle bacon on top and serve. 

Nutritional Information (1 serving)

130 calories - 5 g Protein, 8 g Carbs, 8.7 g Fat, 3.3 g Fiber

Posted on September 24, 2015 and filed under Recipes, Vegetables/Sides.

Fig, Ham and Arugula Flatbread

Fig, Ham and Arugula Flatbread

Fall is OFFICIALLY here! Today, September 23rd, is the fall equinox. Equal parts day and night. What better way to celebrate than with this very Fall-worthy flatbread!? Last week I posted an easy step-by-step guide to my Cauliflower Crust. I'm using this as the base for this Fig, Ham and Arugula Flatbread!

Fig, Ham and Arugula Flatbread | My Engineered Nutrition

I've already show you a fantastic recipe for PIZZA using my crust, but what about showing some love for flatbread? I absolutely love the pairing of figs and prosciutto (did you see my Cheese and Charcuterie board). It is a salty, sweet and rich tasting combination! 

You know what makes prosciutto so dang tasty? Fat, baby!! While it's perfectly acceptable to indulge every now and again, I wanted to create a lighter option that can be enjoyed for any occasion and is just as delectable. Enter: ham. Ham provides that deliciously salty pork flavor with a fraction of the fat. 

Fig, Ham and Arugula Flatbread | My Engineered Nutrition

Loaded up with ham and figs, sprinkled a top with shaved Parmesan cheese and finished off with arugula and a balsamic reduction drizzle - this flatbread packs a punch of flavor!

Fig, Ham and Arugula Flatbread

Prep Time: 15 minutes

Cook Time: 15-20 minutes

Servings: 9 pieces

Ingredients

  • 1 Cauliflower Crust  (see my post on how to make!)
  • 3 figs
  • 3 slices of ham, thinly cut (2.5 oz)
  • 1 oz shaved Parmesan cheese, about 1/4 cup
  • 1/2 cup arugula 
  • 1-2 tbsp Balsamic Reduction, optional (It is very simple to make for yourself! Here is an EXAMPLE
    • Alternatively: If you don't have the time (or patience) to make the reduction, you can very simply toss the arugula in balsamic vinegar before topping the flatbread!

Directions

  1. Begin by preparing the Cauliflower Crust. I have a detailed step-by-step guide on how to make this. When it comes to Step 6, shape crust into a rectangle/oval before baking.
  2. As crust is baking, prepare the toppings by thinly slicing the figs and cutting the ham into strips.
  3. Once the crust has baked, remove from oven. First, top with an even layer of Parmesan cheese. Follow with the ham and lastly the figs. Return to oven (450° F) for another 5 minutes or until the cheese has melted and the ham has warmed. 
  4. After the flatbread has been baked, top with fresh arugula and drizzle with a balsamic reduction. No balsamic reduction? No problem! Simply toss the arugula with 1 tbsp balsamic vinegar before topping the flatbread. 
  5. Slice the flatbread into 9 equal pieces and serve!

Nutritional Information (2 slices)

110 calories - 11 g Protein, 11 g Carbs (5.5 g Fiber), 2.4 g Fat 


Posted on September 23, 2015 and filed under Recipes, Pork.